


What to Sew with a Yard of Fabric

I happened to be shopping with my princess last week and came upon the half price red tag fabric sale. I decided to let Isabella pick some fabric out, at $2 a yard I couldn't go too wrong...or so I thought. My lovely daughter and I spent the next thirty minutes fighting over ribbon to accent the dress with! I was about to ditch the whole idea when I finally exasperated her enough to agree to my suggestions. I don't make many clothes because I don't think it's as economical as garage sale shopping but this dress cost around $3 to make, so it didn't break the bank. I will highlight a few of the things I did to make the dress, but I didn't make a pattern or measure so I can't really give you any specific tutorial, if nothing else you will find some inspiration.
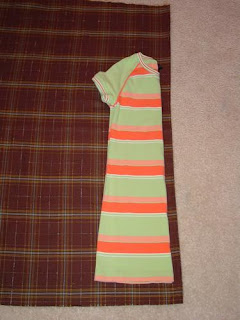 I used two different dresses from my daughters closet to make the pattern. I folded the dress in half and used that to cut on the fold. Notice in the above picture I didn't go right to the edge of the fold, but instead gave myself about a half an inch of room. My fabric wasn't quite as stretch as the Jersey in the dress and I didn't want to mess with zippers or buttons.
 I used the blue dress as a guide to make the arm and neck holes. I made this piece to be the back.

 I had a little fabric left and racked my brain on how to make a front for the dress. I probably should have made the first cut on the fold as the front, but I made subtle pleats so it hid the seam that I was forced to make by putting the two front pieces together.
 Then I cut the top. Again, I cut on the fold and used the blue dress as a guide. I only needed a front piece, since the back piece was cut from top to bottom.
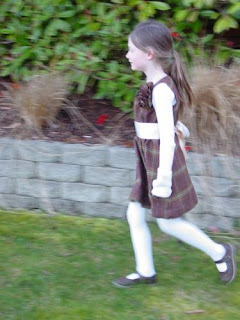
 I then used my old "change the tension and thread length" to make the bottom of the bodice gathered. This is when I stopped taking pictures of the process. But I finished the raw edges, pleated the bottom of the front, sewed the bodice and the front piece together, then sewed the two sides together and hemmed the skirt. It really only took me about an hour to make from start to finish...well, an hour if I hadn't been interrupted every few minutes to break up a fight or get a snack or ride bikes. And this is the finished product on my beauty queen. The ribbon is just tied around the middle with a bow in the back.


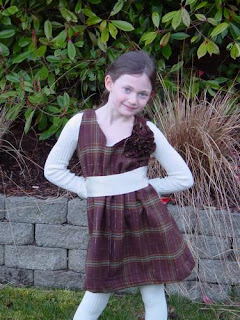
I added three matching flowers on the bodice. I will explain how I did that tomorrow.
 I used two different dresses from my daughters closet to make the pattern. I folded the dress in half and used that to cut on the fold. Notice in the above picture I didn't go right to the edge of the fold, but instead gave myself about a half an inch of room. My fabric wasn't quite as stretch as the Jersey in the dress and I didn't want to mess with zippers or buttons.
 I used the blue dress as a guide to make the arm and neck holes. I made this piece to be the back.
 I had a little fabric left and racked my brain on how to make a front for the dress. I probably should have made the first cut on the fold as the front, but I made subtle pleats so it hid the seam that I was forced to make by putting the two front pieces together.
 Then I cut the top. Again, I cut on the fold and used the blue dress as a guide. I only needed a front piece, since the back piece was cut from top to bottom.
 I then used my old "change the tension and thread length" to make the bottom of the bodice gathered. This is when I stopped taking pictures of the process. But I finished the raw edges, pleated the bottom of the front, sewed the bodice and the front piece together, then sewed the two sides together and hemmed the skirt. It really only took me about an hour to make from start to finish...well, an hour if I hadn't been interrupted every few minutes to break up a fight or get a snack or ride bikes. And this is the finished product on my beauty queen. The ribbon is just tied around the middle with a bow in the back.


I added three matching flowers on the bodice. I will explain how I did that tomorrow.

6 comments
That is an awesome little dress! and your model is too cute for words. Thanks for sharing :)
~ Emily N. from "too Blessed to Stress"
Super cute! She is adorable and so photogenic!
It looks adorable!
This is too darn cute! I love it... I LOVE making dresses using an already-in-use dress as the pattern.
Thanks for linking up!
Super cute-love how it turned out!
-Tiff
So clever and cute! Your model looks fantastic!
Thanks for linking up to Make it Yours day!
Post a Comment