Showing posts with label re-fashion. Show all posts

Thursday, February 2, 2012

Tutorial: Ruffle Dress from Cardigan Sweater


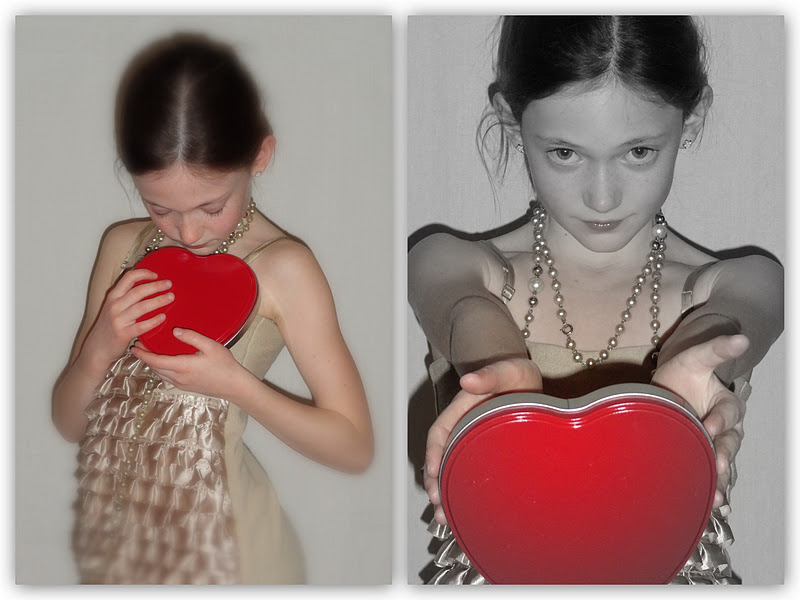
Yesterday, I showed you a preview of the Valentine's day ruffle dress I made for my daughter.

I took this cardigan sweater and made it over from drab 
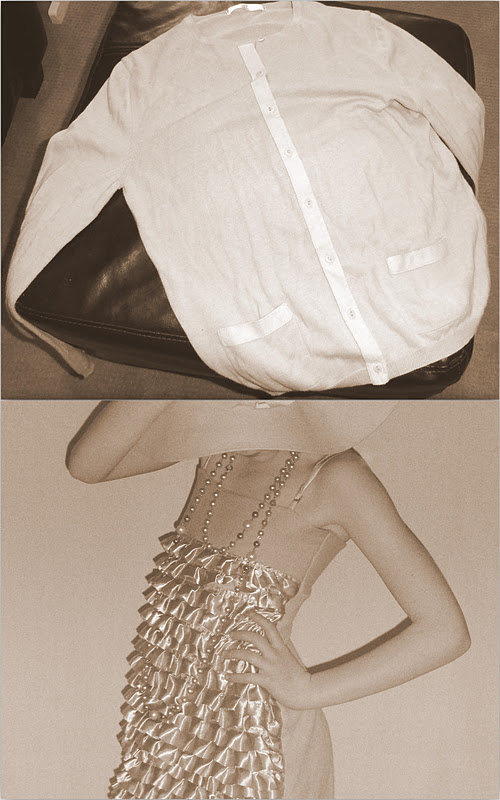

to fab!

Like Dorthy, lets switch to color and I will show you how.
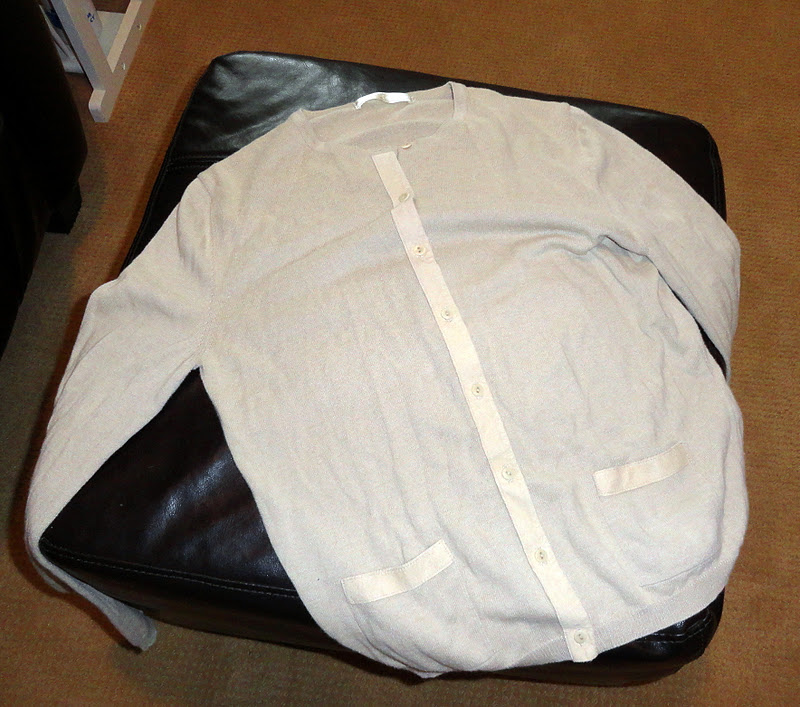
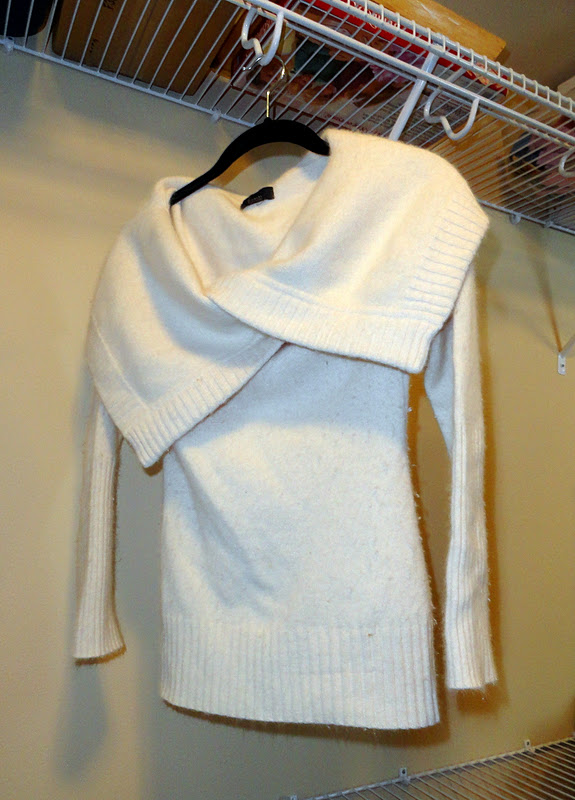
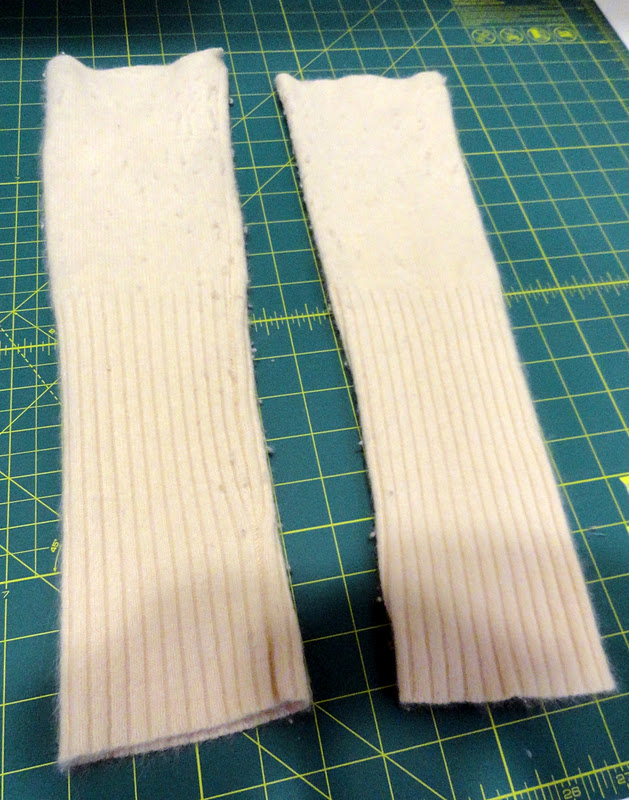
I started out with this sweater that I had in my closet.
I buy things like this at garage sales for less than a dollar with the hope of them finding a new life one day.


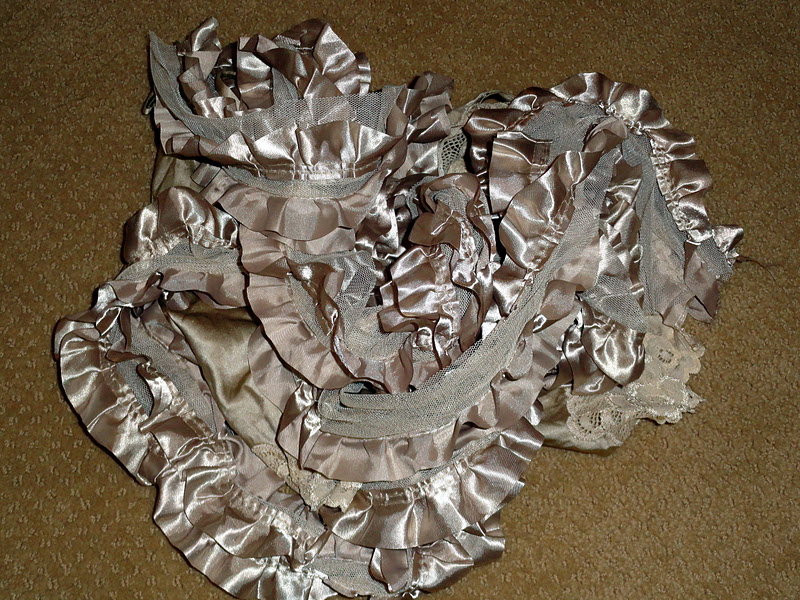
At a fabric store closing sale last year, I fell in love with these ruffles.  I picked three yards of it up not knowing what I was going to do with it until I saw how well the ruffles matched this sweater and the idea came to life.


I started off by taking apart the sweater piece by piece.  


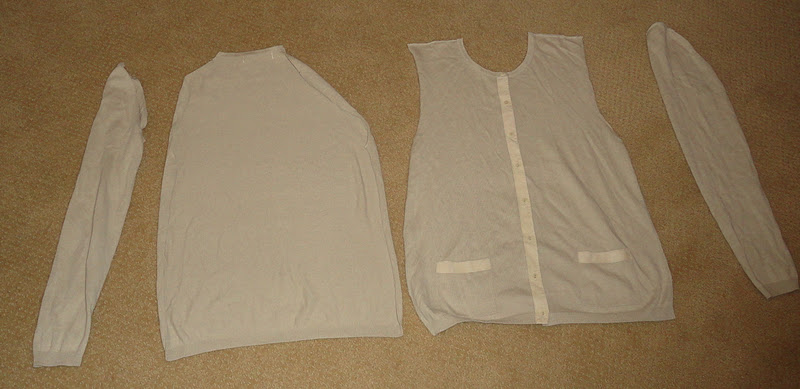
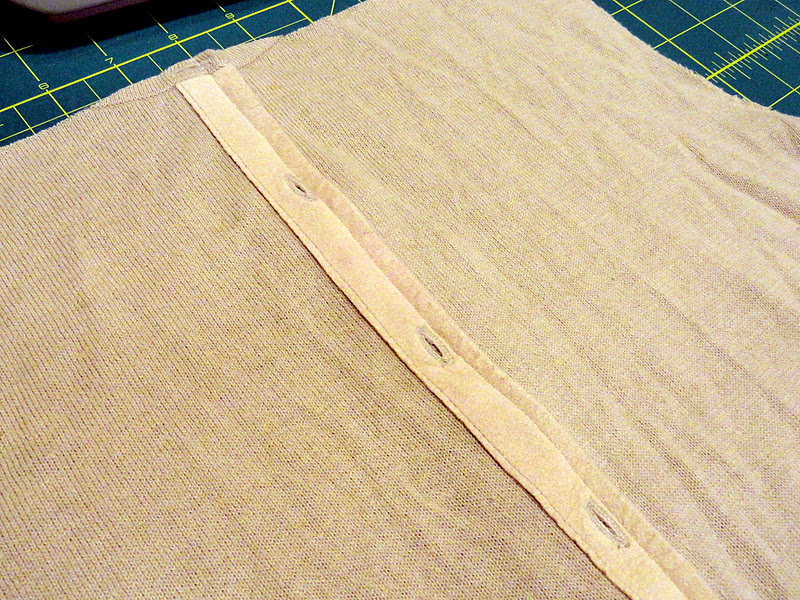
I cut the buttons off of the front and pinned the sweater closed.  
Then I sewed down the front of the sweater to keep it closed.


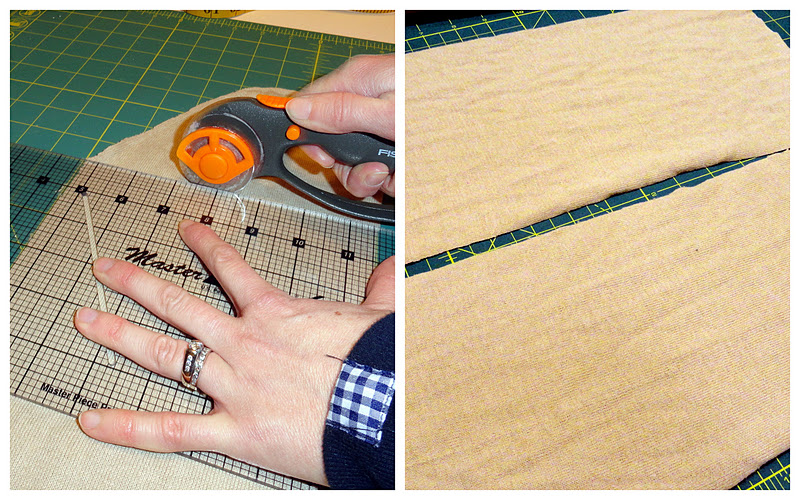
Next, I cut the sleeves open, 
layed them flat
 and cut long rectangles that were 6 inches wide for the top of the dress.

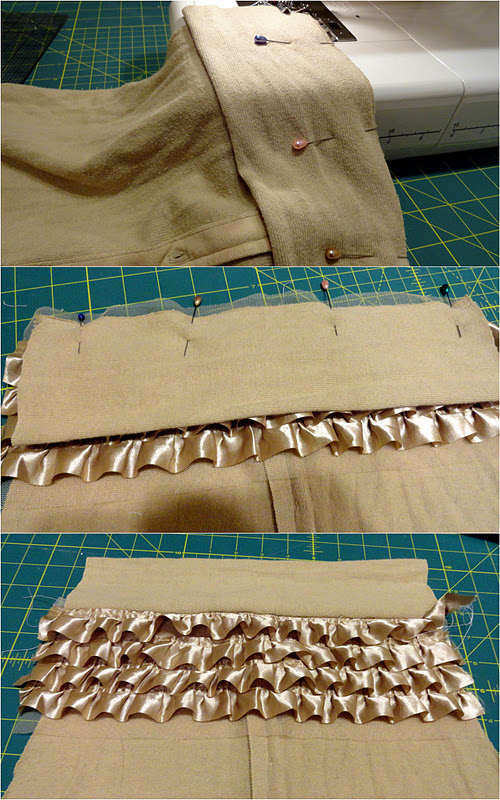
Both rectangles were folded over in half and pinned in place
one on the front, and one on the back
Between the front fold and the top of the dress, I pinned the first layer of ruffles.
Each ruffle set was 4 ruffles wide.
Once it was sewn into place I had the top part of my dress


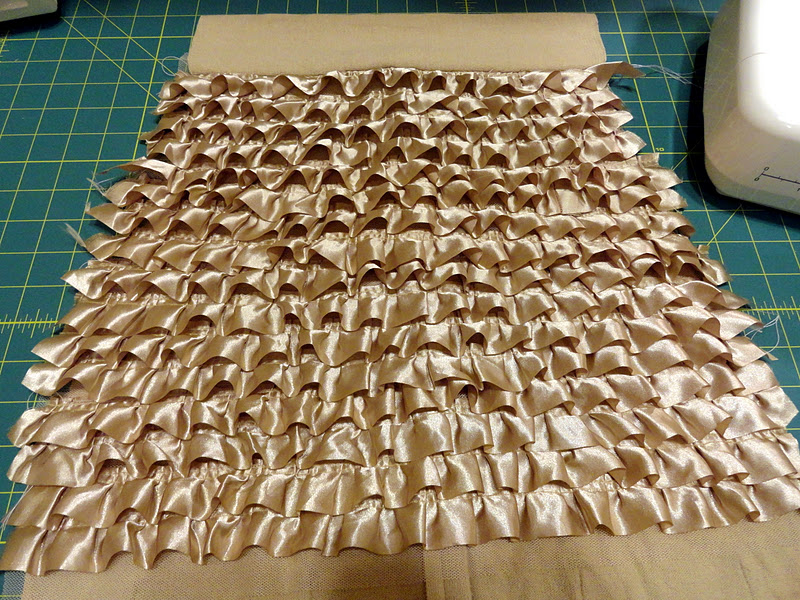
I continued to layer the ruffles down the dress 
making sure I left enough ruffles overhanging so that the ruffles 
were longer than the dress on the sides.
I continued on until the bottom of the dress.


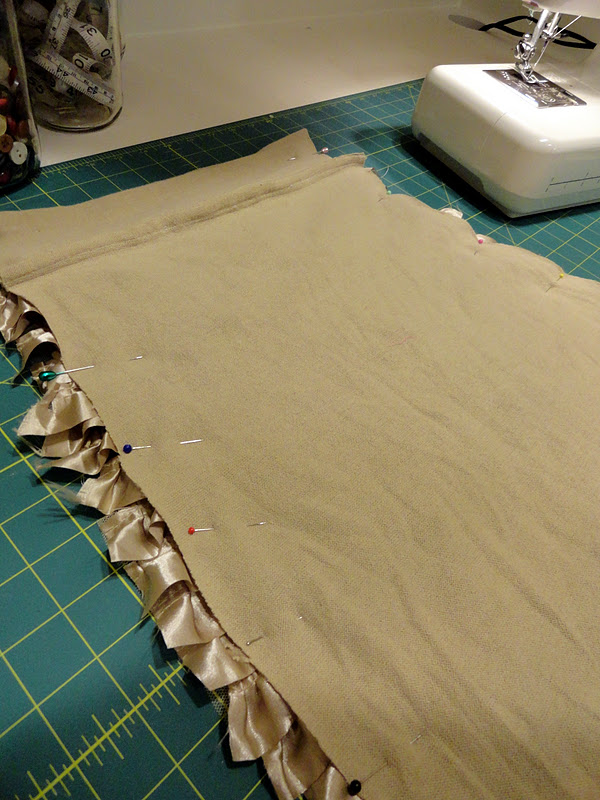
Then I put the right sides of the front and back together and pinned them in place.
Be careful to make sure all of the ruffles are getting sewn into the sides and are facing the same direction.


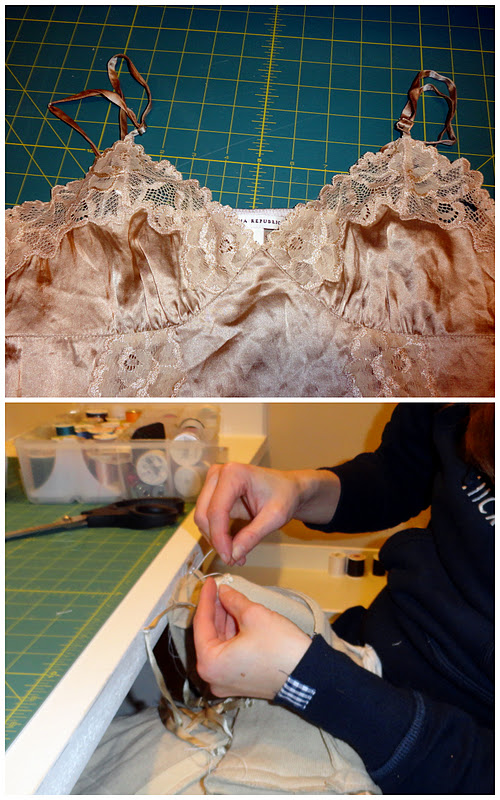
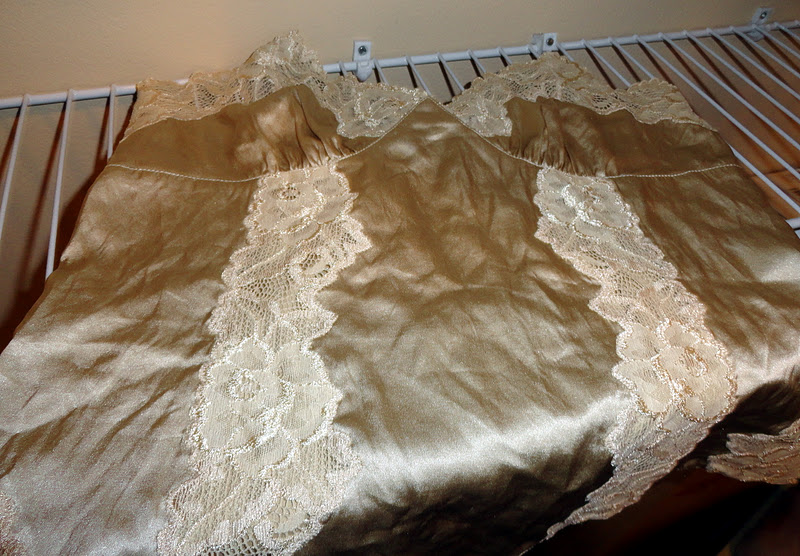
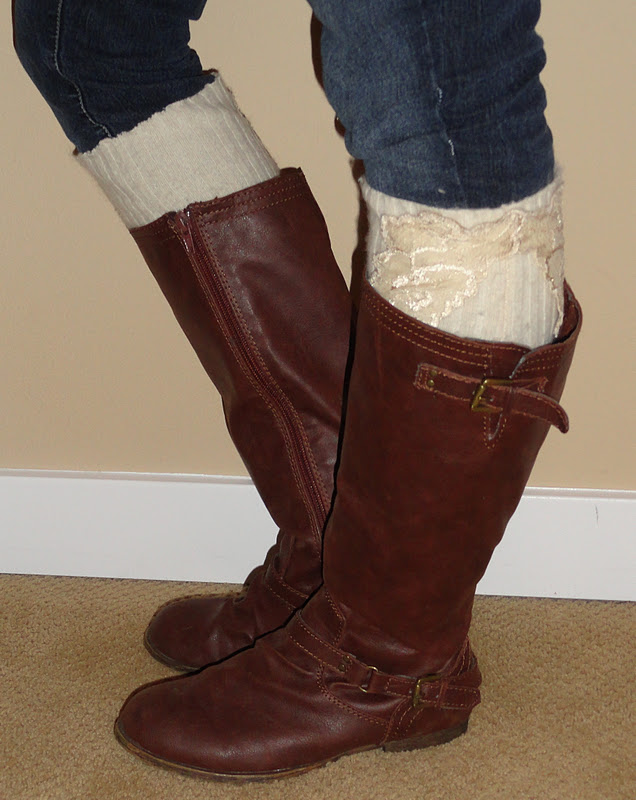
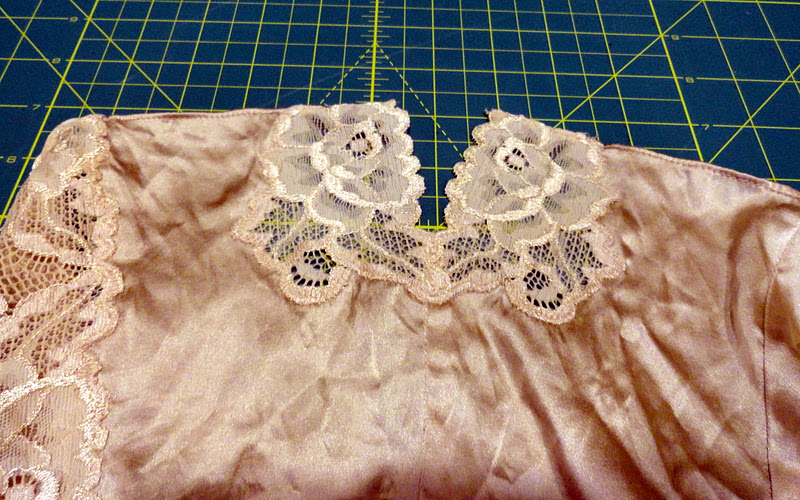
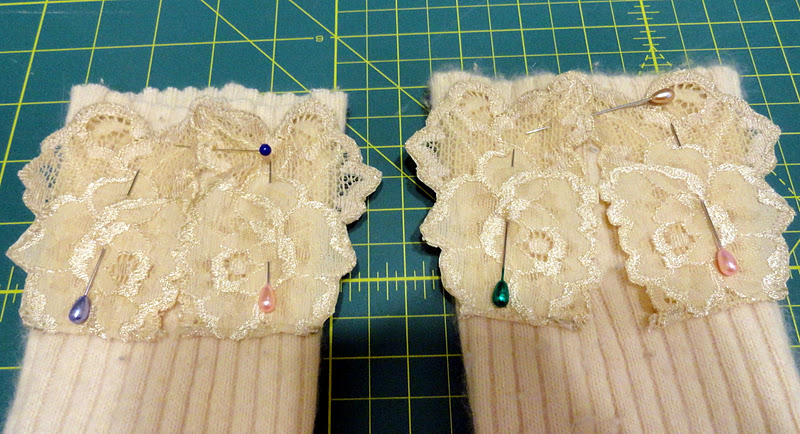
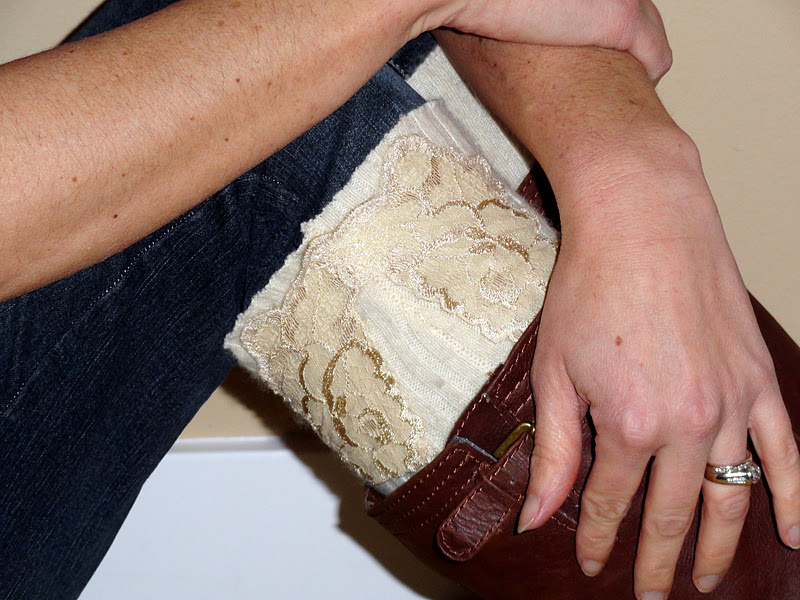
After I sewed down both sides, I took this old camisole (remember how I used it last week to fancy up some boot socks from another old sweater?) and cut the straps off.  I hand sewed them onto the dress


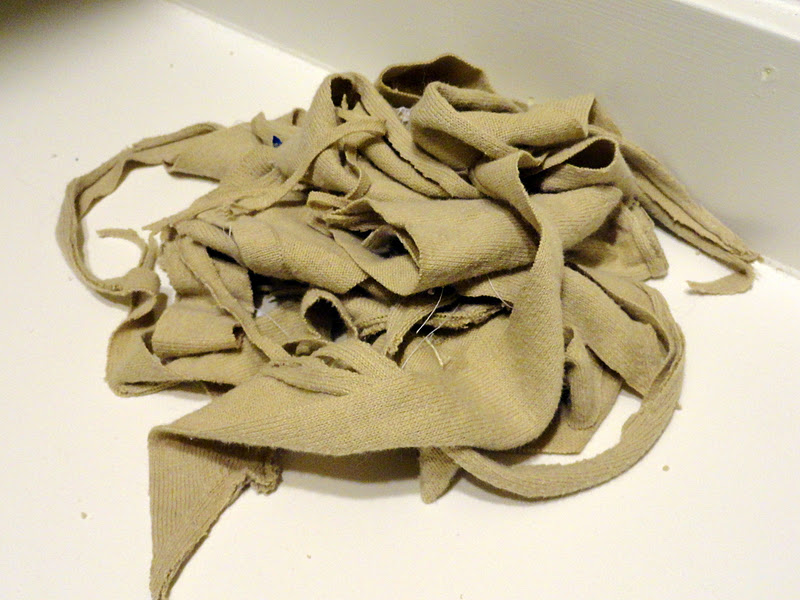
After I was finished, this is all that I had left of the sweater.


And that was it!
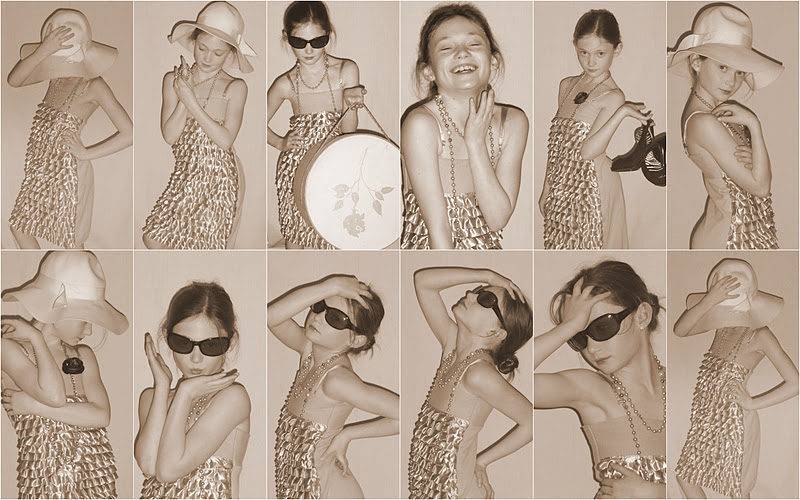
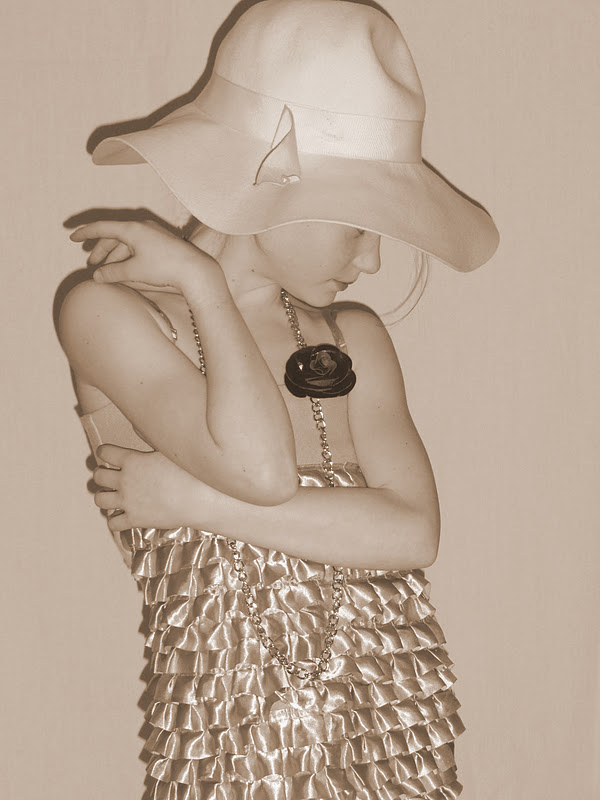
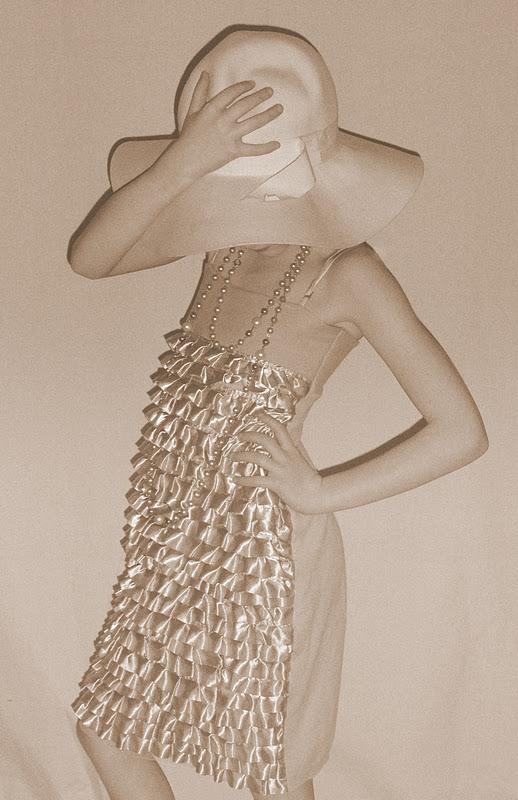
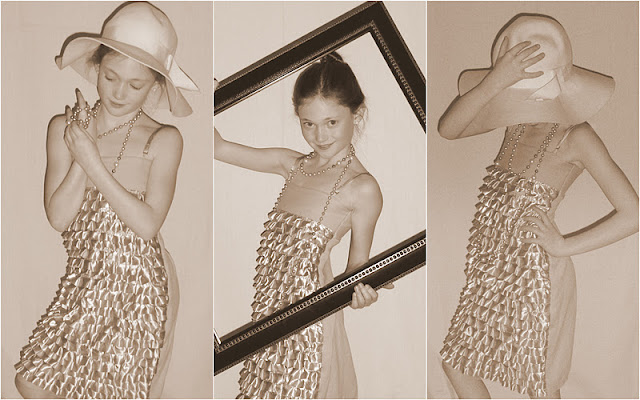
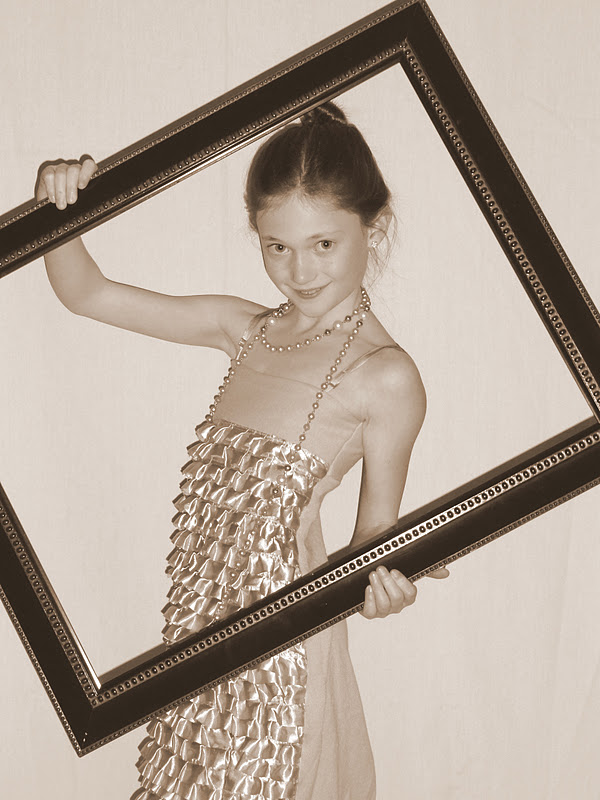
Now you have a fancy ruffle dress from an old sweater!
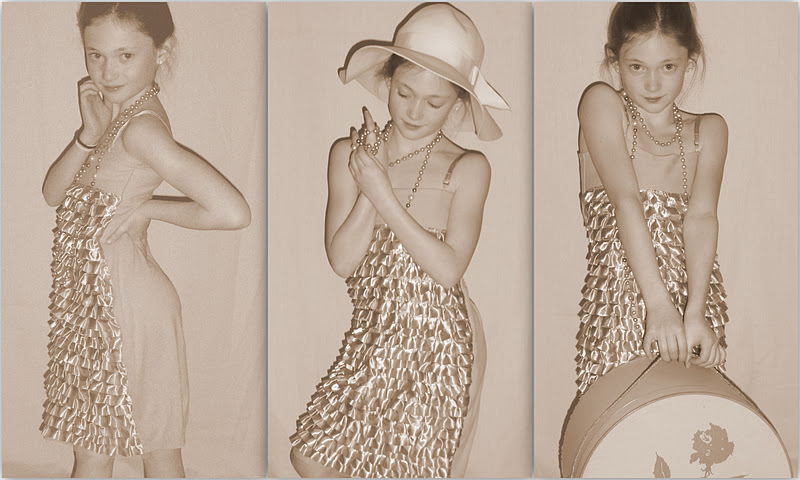

Kick your heels off


put on a fancy hat


And get ready for some fun!


Wednesday, February 1, 2012

Sweater to Dress ruffled girls refashion


Just in time for Valentine's day, a ruffled refashion.


Could you even guess that this dress used to have a former life as a boring cardigan sweater?


Come back tomorrow and check out the total transformation from an ugly sweater, to an adorable ruffled dress.


Wednesday, January 25, 2012

Another FREE project! Flower belt tutorial and the difference between an estate sale and a garage sale


Yesterday I showed you my boot socks that I made for free, 
today, I am keeping with the theme (FREE-my favorite word!) 
and I am going to show you a belt that I made.


Even though garage sale season is over 
(you didn't know there was a season?  It's like hunting season, or crabbing season, you know, garage sale season.  Usually from May-September, no license needed!)
my heart started racing when I saw an estate sale sign a few weeks ago.

What's the difference between an estate sale and a garage sale you ask?

An estate sale is usually being held after a person dies.  
Not always but usually. 
 If it's run by a company (and there are several companies out there)I don't typically enjoy them because the prices are set so high so the company can receive their commission. 
It's so much more fun when it's run by the family because the grieving family is usually on site to answer any and all questions and you find out about the history of the items you are interested in.  
Also (the best part), they want to get rid of the stuff so it's super cheap.
An estate sale is usually a whole house full of items for sale, and it isn't just limited to a garage.  

A garage sale is just that, a sale in the garage (or front yard/driveway) and is mostly held so the family can purge off their belongings and not end up on an episode of hoarders.

O.k., back to my story.  So my hearts racing as I saw the signs directing me to the estate sale.  I was even more excited when I saw that it was an old house (you know, those houses that are completely built around by new cookie cutter houses but where the owner won't sell their property).
Old house=cool old stuff

After perusing through the garage I headed inside and found out that this lady had some cool old clothes.  The family told me to fill a bag for $2 so I stuffed that bad boy full!  One of the items I picked up was this belt.

My husband thinks it's a garter belt for a fat person, but I'm pretty sure it's not. 
 And while the bag of clothing was $2, I consider this belt free because you should see how much stuff I stuffed in the bag, so to make me feel good about myself, we are calling this belt free.


When I saw it I immediately thought of those belts that the Pleated Poppy makes,

 or that I am Momma-Hear Me Roar put a tutorial out there for.


autumn bloom belt

the awesome free bloom belt 
(pretty sure I should trademark this one!)

So with that inspiration, I got started.

I cut out lots of circles (freehand) out of fabric that I got in a free box last summer at a garage sale.
See how much fun free is?!


then I folded the circle in half and put hot glue in the middle (by the fold)


Then I folded it in half again and added another drop of glue


I used one of my circles as a base and started gluing the folded circles around the base


I filled in the center with more folded circles


I made three flowers.  Two larger ones, and a smaller flower.


I took some felt scraps that I had in my stash and cut it into a crazy rectangelish shape.


Then I glued the flowers on and cut around the felt so you just saw flower, not felt.


I added a pin


And covered the pin with another piece of scrap felt...you know, to make it pretty and hold it in place


Then I pinned the flowers into place on the belt


Now stand awkwardly in front of your fireplace modeling your awesome free bloom flower belt


That's it!  


Don't you just love FREE!


Tuesday, January 24, 2012

Making your own boot socks from an old sweater


There isn't much I love more than a good re purpose project.  

Fabric and supplies for crafts can get so expensive, so I love to use things that I get cheap at garage sales, or things that I have on hand fo free yo!

Remember this ruffle skirt I made eons ago from some of my hubby's old t-shirts?


Or this scarf.  Again, out of old t-shirts from my hubby's goodwill pile.


I made this dress from a pillowcase that my mom sent me that she picked up at a garage sale.


We had LOTS of free time last week during our snowstorm, so I cleaned out my closet. 
I found this sweater that I haven't worn in a few years


and this camisole, that I got in my cousins Goodwill pile (she let me scavenge through it before she sent it off..thanks Betsy!).


I put the two together and decided to make some boot socks.


All you need is a sweater.  It's a bonus if the sleeve is a little tighter on one end.


I cut the sleeve off just before it attached to the body of the sweater


I was left with these two leg warmers but I knew they could be better


I really liked the lace on this cami so I cut it off.


I pinned it where I wanted it on my socks and hand stitched the lace down


And there you have it!


Boot socks for free!
My belt?  Oh, stay tuned for that tutorial later on this week.
You can find the tutorial on making your own skinny jeans here.