
Showing posts with label thrifty decor. Show all posts
Showing posts with label thrifty decor. Show all posts
Monday, December 21, 2015
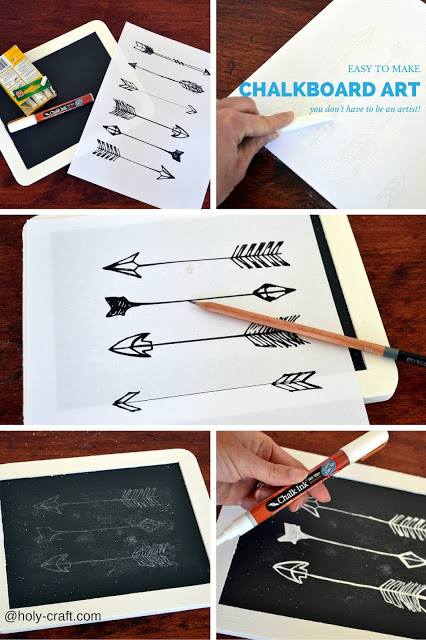
Easy chalkboard art secret for those of us that aren't hand lettering artists

Friday, September 11, 2015
Garage Sale finds Friday
Welcome back to another week of garage sale finds Friday. Where I share with you my latest garage sale finds. This series is starting to wind down for the summer as garage sale season is starting to come to a close. As long as I have finds to share, I will be sharing them with you! In fact, this weekend is one of my favorite neighborhood sales all year long! So there is sure to be at least one more good GSFF left in me!
For now, I can't wait to show you what I found!

Friday, August 21, 2015
Garage Sale Finds Friday
Welcome back to another week of garage sale finds Friday, where I share with you my favorite garage sale finds from the week.
This week, I got some pretty great authentic vintage items. I even got some pretty great deals on those vintage items too.

Friday, August 7, 2015
Garage Sale Finds Friday-the one where I steal furniture...sort of.
Welcome back to another week of garage sale finds Friday, where I share with you my favorite garage sale finds from the week.

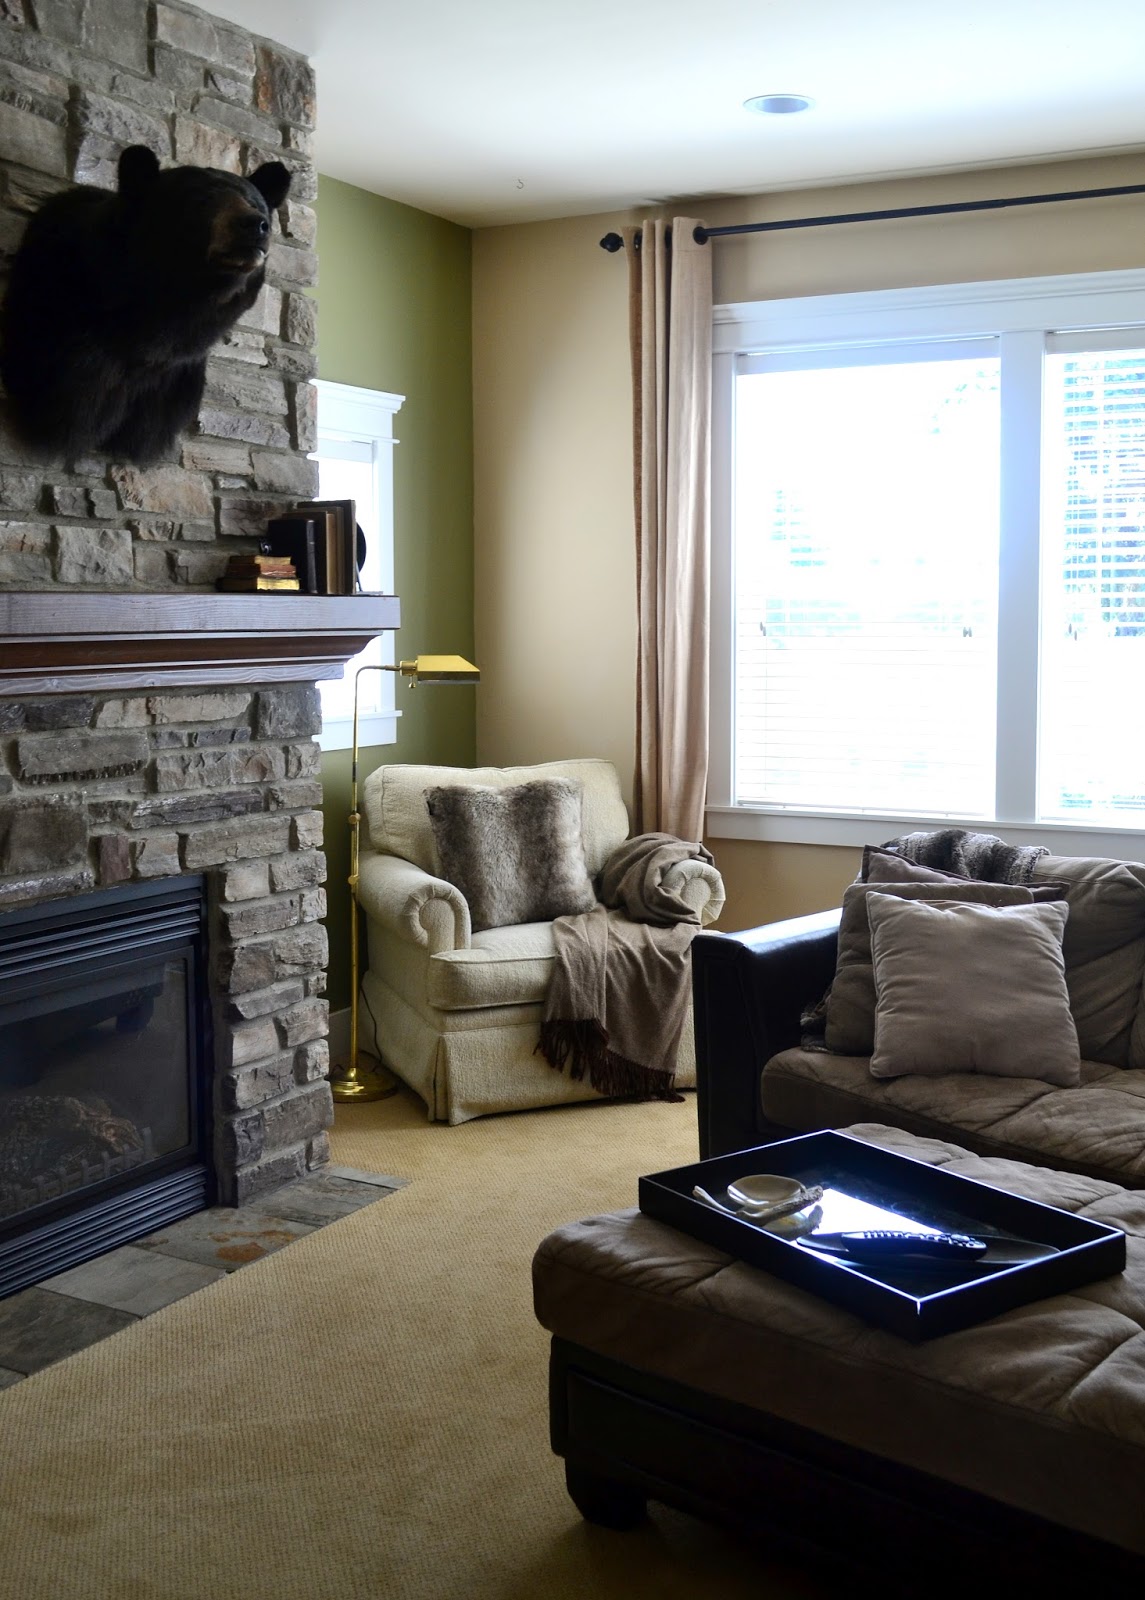
This week, I did some thrifty redecorating. I have the hardest time decorating because I put these imaginary budget constraints on myself and unless I can find something at a garage sale, usually nothing fits in that budget.
I've spent the past nine months thinking about a neutral chair for our living room, but I haven't been able to find one. I really felt like something needed to flank the fireplace. Well, I finally found something. And you won't believe how much I paid for the corner room redo!
Tuesday, August 4, 2015
Transformation Tuesday painting a desk with metallic paint
Welcome back to another transformation Tuesday! I'm so excited to share with you my latest garage sale find from Friday that has been transformed!
I had a chance to sample the metallic paint line from Modern Masters and was drawn to Pewter. There are some amazing metallics to choose from, but silver has my heart.
Bet you can't guess which item from my garage sale finds Friday I chose to paint metallic.
Friday, July 31, 2015
Garage Sale Finds Friday
Welcome back to another week of garage sale finds Friday, where I share with you my favorite garage sale finds.
This week I've got some fun woody goodies and a pretty little something. One of my finds even got a little transformation that will be revealed on Tuesday. Wonder if you can guess which one.

Wednesday, July 1, 2015
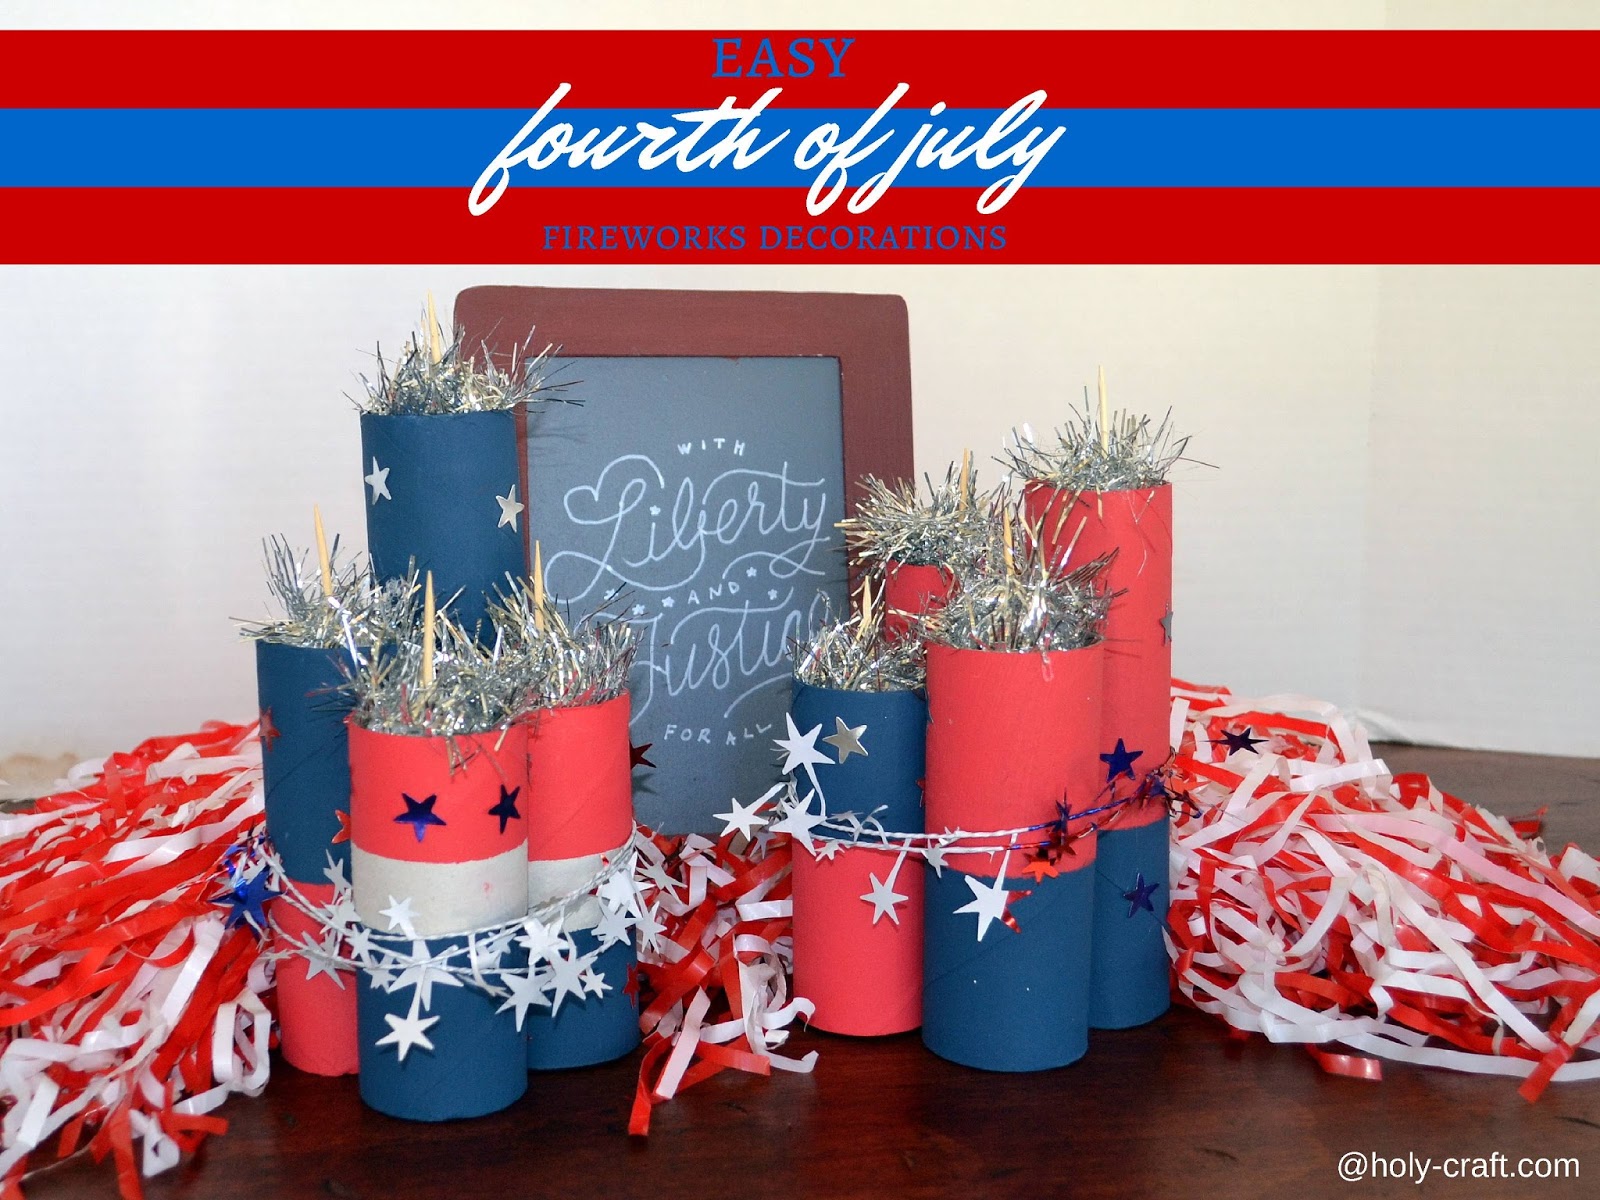
Easy to make Fourth of July firework decorations
There aren't a lot of holidays that I spend a lot of time decorating for. Fourth of July falls into that category. I love red, white and blue and am quite patriotic, I just forget. It kind of sneaks up on me every year. I feel like here we are in June and I'm just getting used to the idea and BAM!
This year was no different. Hello, It's July 1st and I'm just now getting a tutorial out to you about my easy fireworks decorations. Good news is, they are so easy that you can whip them up today and have them ready for your festivities on Saturday.
Friday, June 26, 2015
Garage sale finds Friday + summer camp counselor information you don't want to miss
Welcome to another week of garage sale finds Friday. Where I share with you some of my favorite garage sale finds from the week. I had some pretty great finds and scored a collectors item for next to nothing!
Want to see what I got?

Tuesday, June 16, 2015
Transformation Tuesday: Succulents in painted terra cotta pots and cigar boxes
Welcome to the first ever transformation Tuesday here at Holy Craft! I am so excited that you are here today! If you randomly stumbled upon today's post, here is a little background.
I'm a huge garage saler {yep, it's a word}! I have been going to sales for as long as I remember and nearly every Friday and Saturday you will know where to find me. I just love finding a deal and I have the most fun on the hunt.
However, not everything I find is in tip top shape. Sometimes my finds need a little transformation to get to their fullest potential. Which is where my new series, transformation Tuesday comes into play. In case you missed the return post of garage sale finds Friday, you can go here and check out my finds because today, I will be taking those finds up a notch and transforming them. Ready?!
Monday, June 15, 2015
Easy DIY planked table top cover for your existing table
I am a big believer in using what you have. Why replace something if you can fix it? This idea to "fix" our current kitchen table has been rattling around in my head for at least a year.
When we moved into this house nearly five years ago, we purchased a table at a local big box store. We had a lot of furniture to buy to fill our home that was twice the size of our previous home and I was working on a tight budget. Actually, let's be honest, I'm always working on a tight budget!
Long story short, the table, that to it's credit gets used multiple times a day, wasn't holding up as well as we would have liked. I would often craft on the table and that poor surface took the brunt of the abuse. That abuse and normal wear and tear on a cheap table was making it quite the eye sore in our kitchen.
I am so excited to share with you this planked table top cover that my husband and I made to cover up our existing unbelievably embarrassing table top. The top goes on to create a beautiful surface for our daily meals and can come off to create a work surface that I don't mind messing up and crafting on.

Monday, May 11, 2015
Gold painted seashell candles
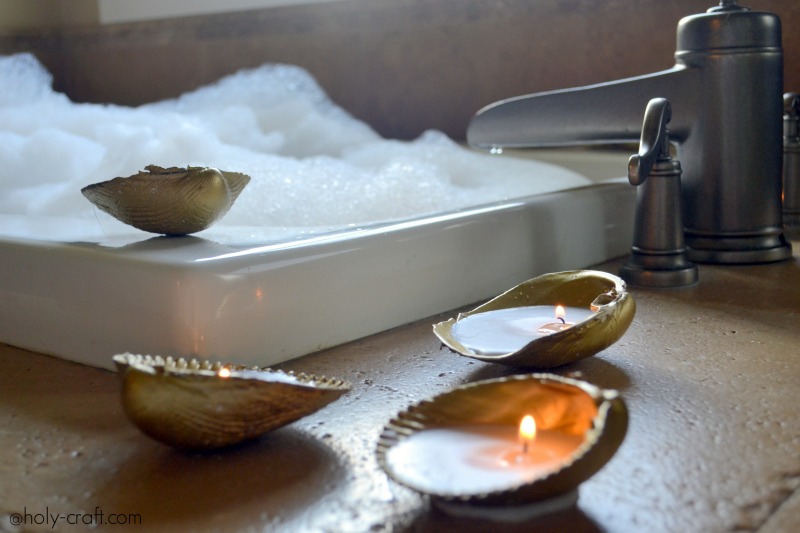
Friday, May 1, 2015
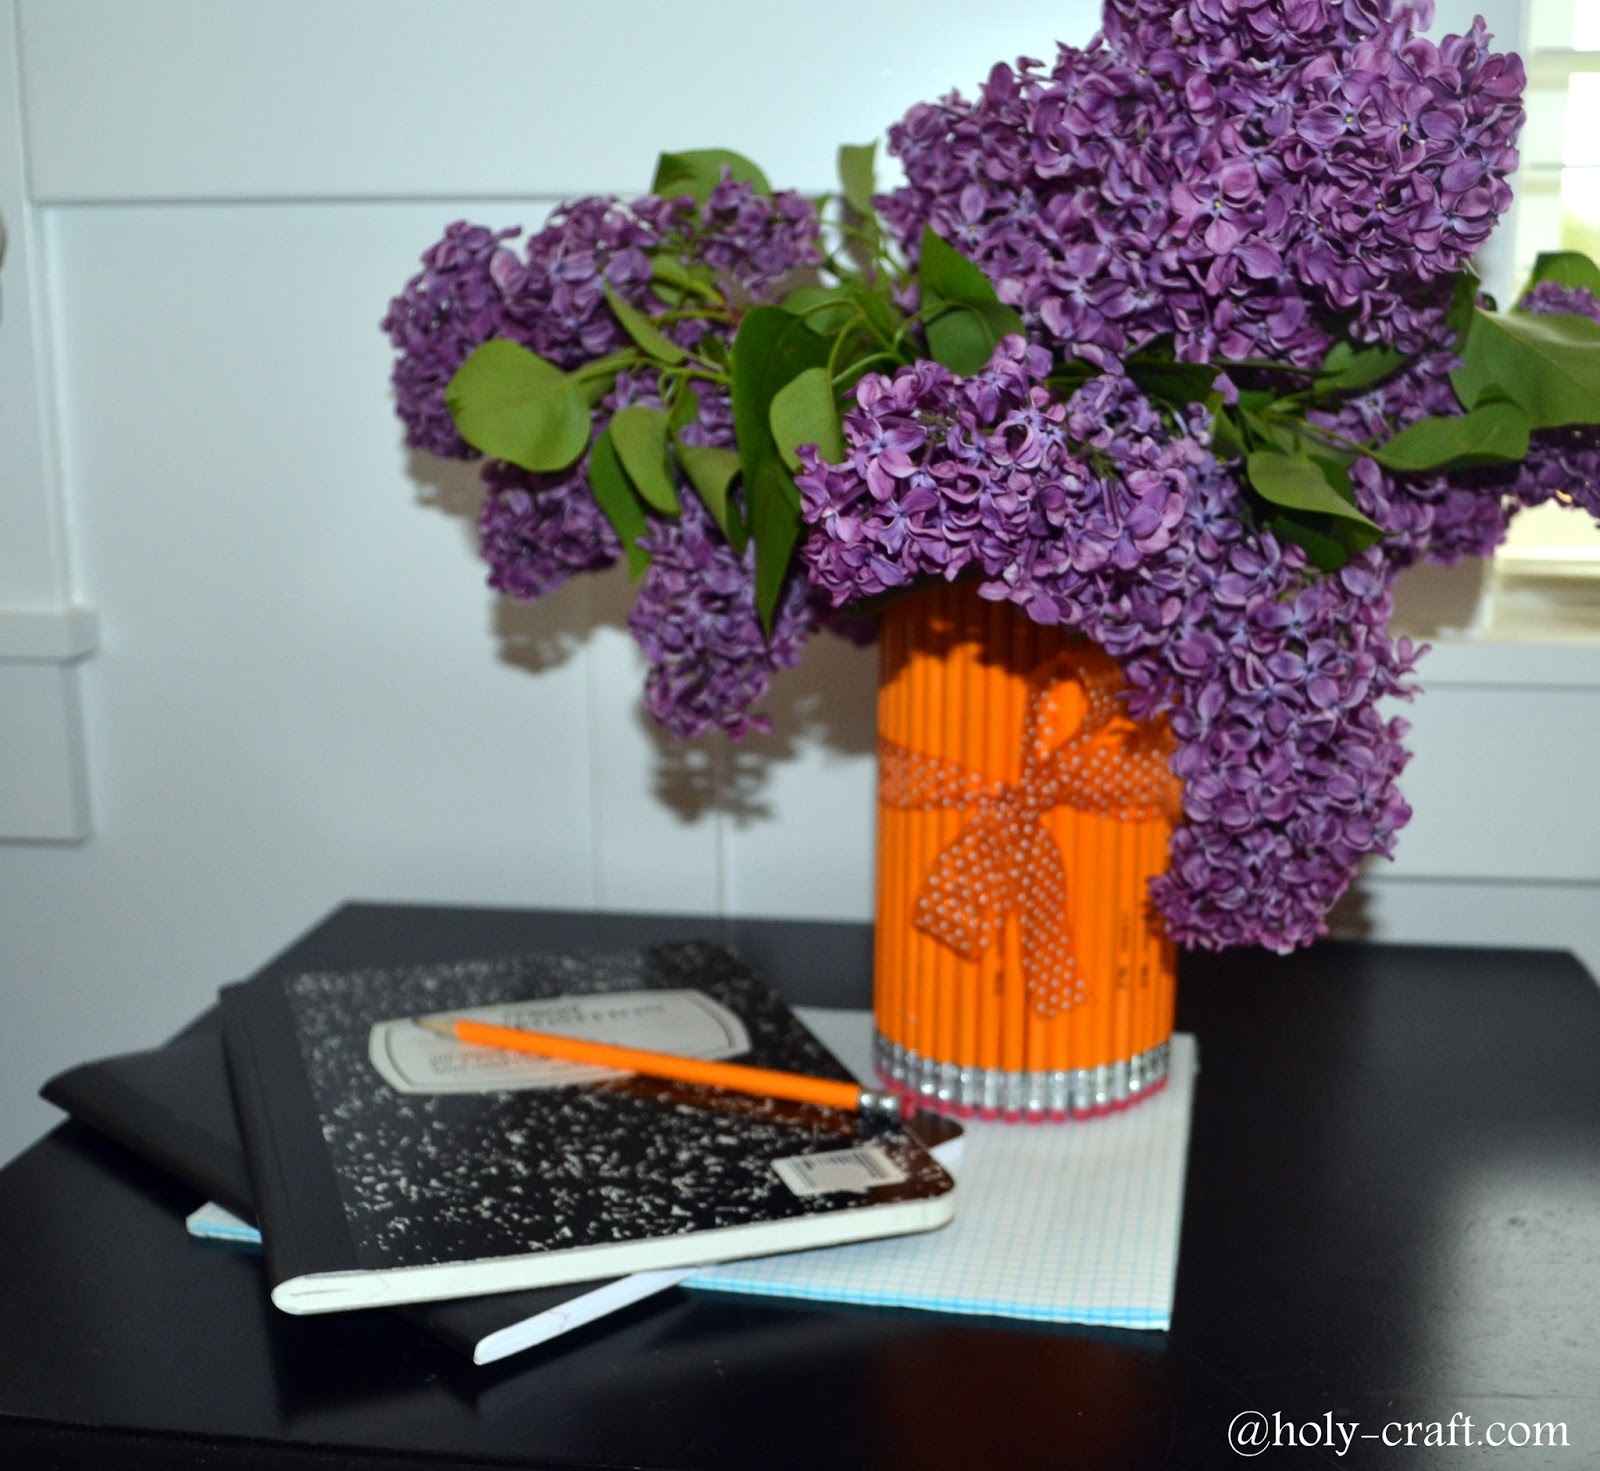
Easy to make pencil vase
On Wednesday I shared with you 20 teacher appreciation gifts that you could make today. Today, I want to show you a simple pencil vase that I whipped up in under an hour. This would make the perfect gift for teacher appreciation week.
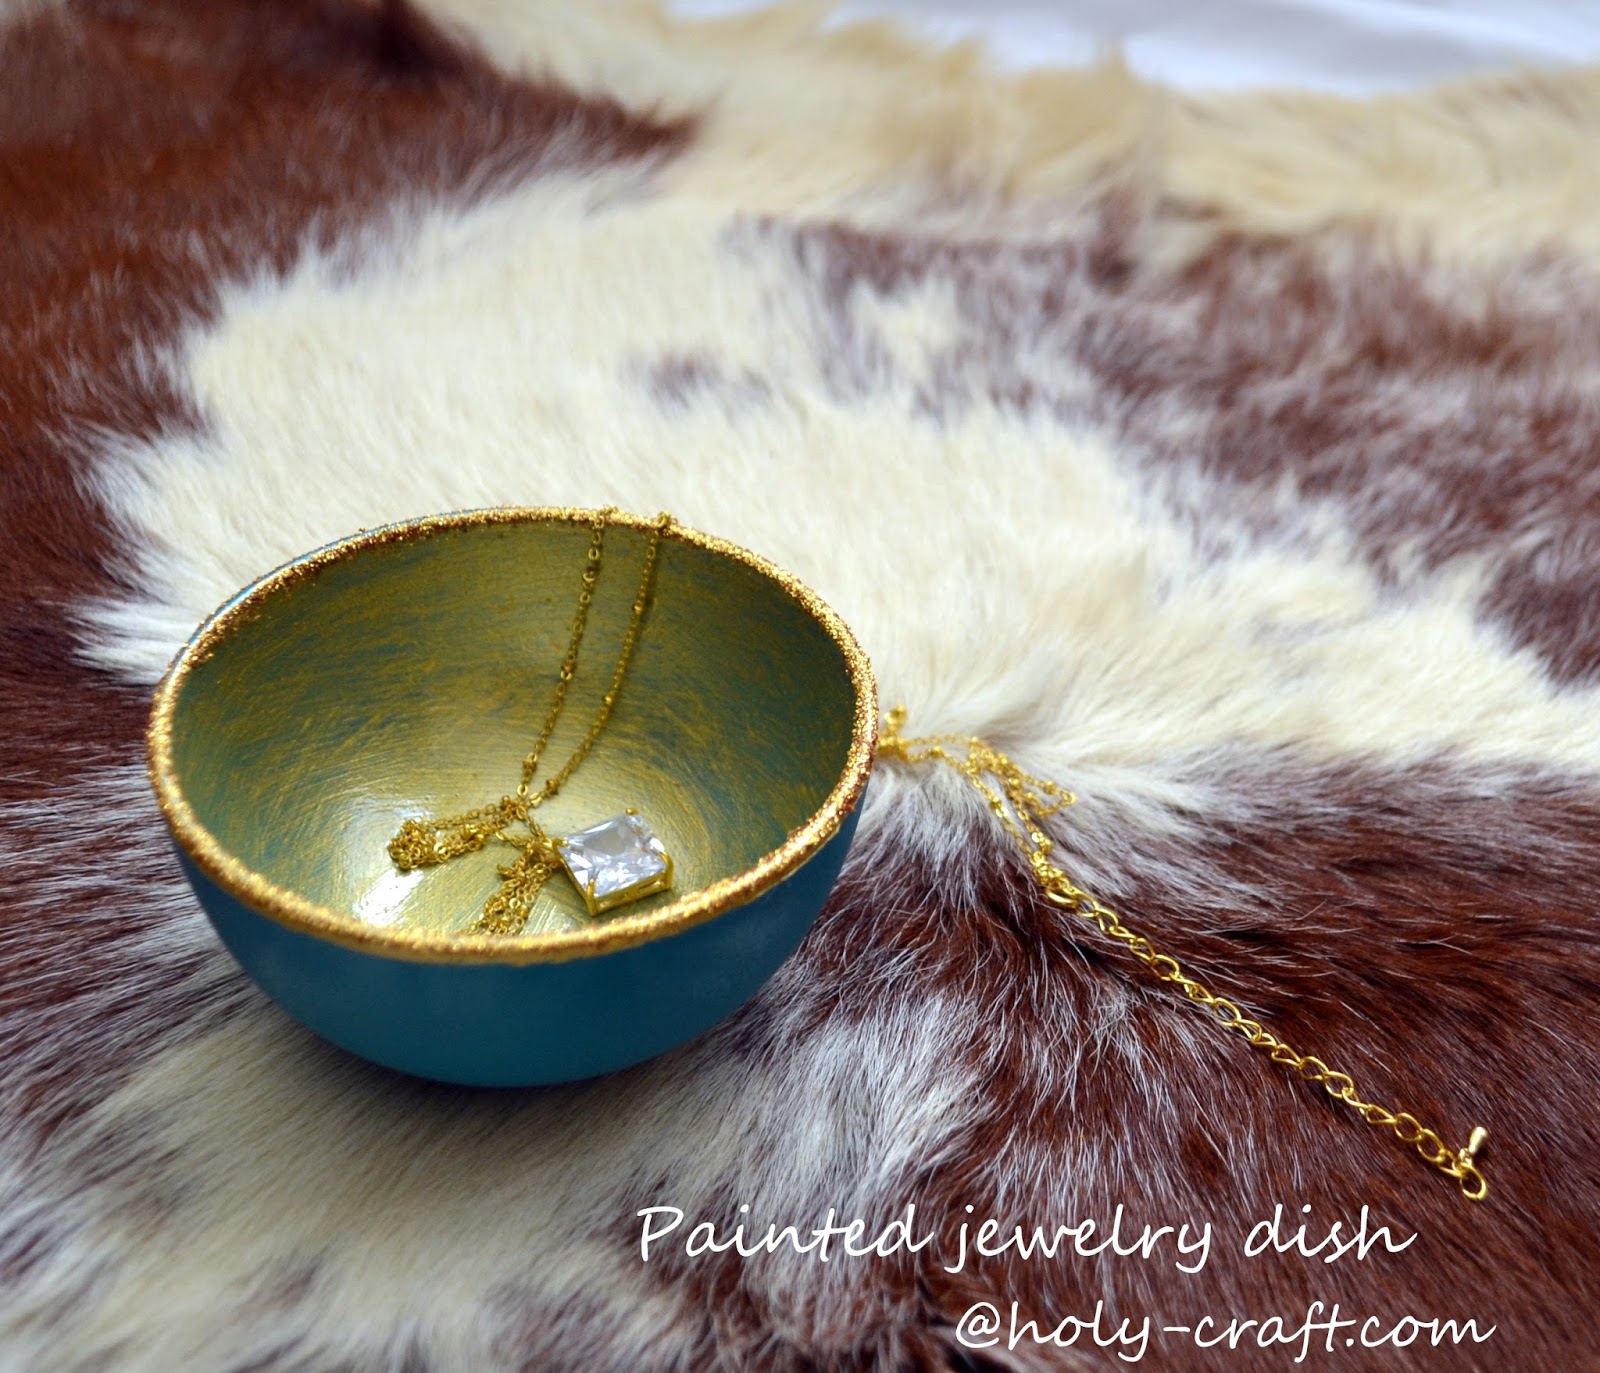
Monday, April 27, 2015
Plain turquoise bowl gets a face lift
Last week, I attended my first blog conference in Salt Lake City, Utah. I've been wanting to go to SNAP for years and I finally signed up and made the time to go and I am so glad that I did!
The part of SNAP that I was most looking forward to was connecting with other bloggers. For months leading up to the event, we were getting updates, connecting on our social media accounts and even being paired with secret sisters.
My secret sister was Mandy from Sugar Bee Crafts. I was excited and a little nervous since I've read Mandy's blog for years. She's one of those amazing bloggers that I admire and have on my every day reading list. When I found out that she liked turquoise, I started to see turquoise every where. I ended up making a little something for her and I love how it turned out and wanted to share it with you too.
Monday, April 20, 2015
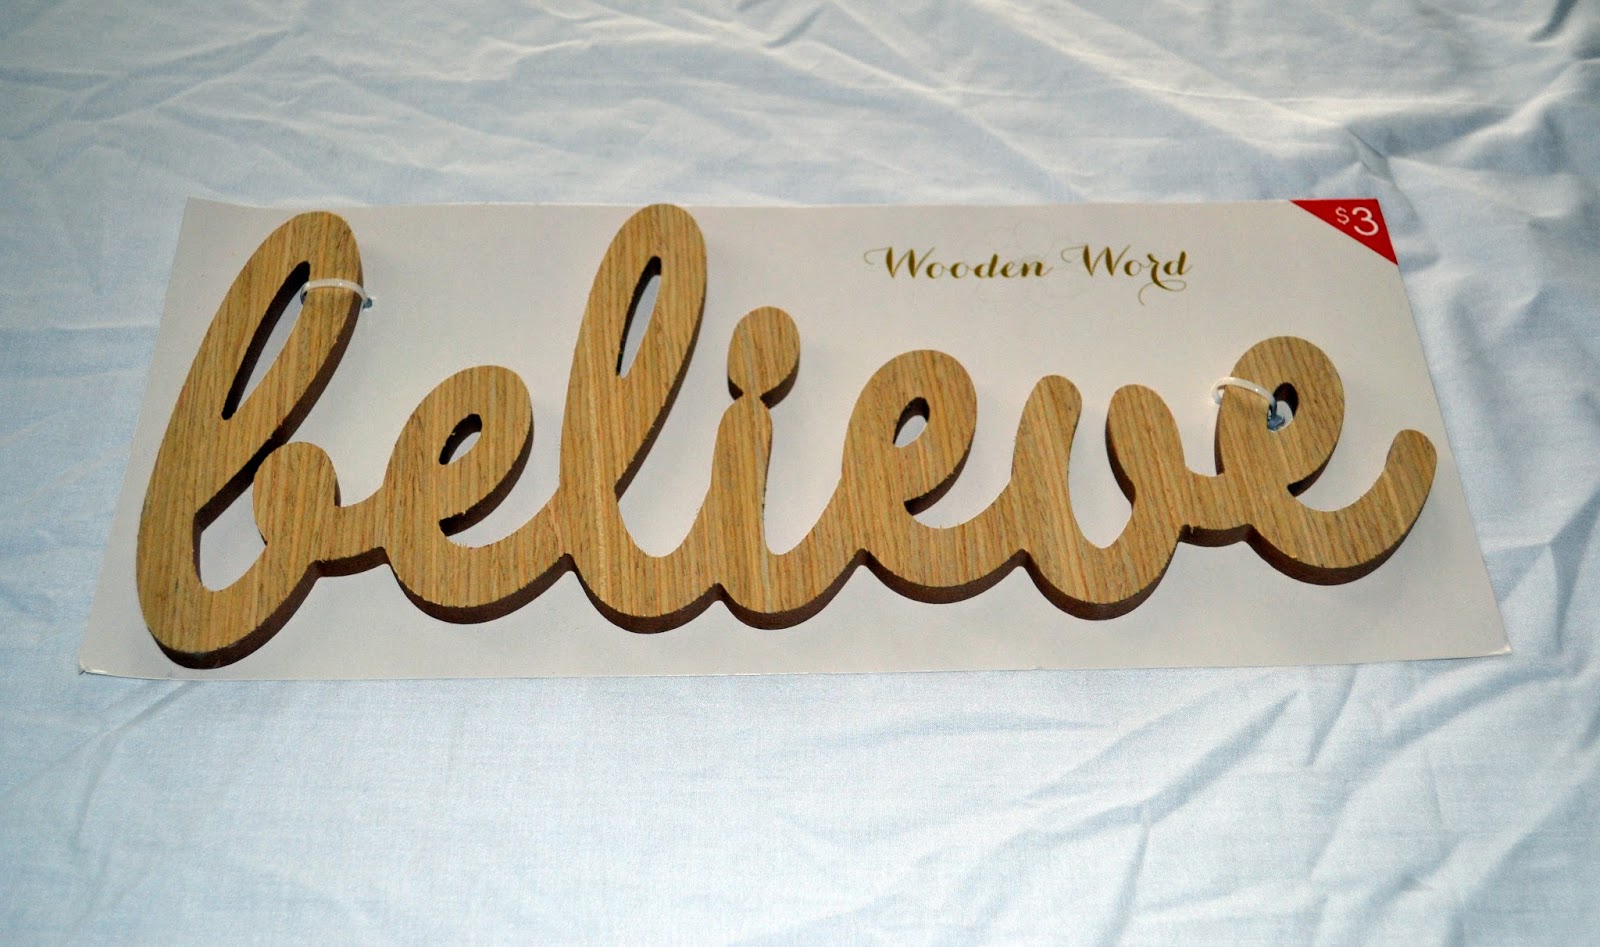
Gold glitter believe wood sign
Do you remember the day when Target didn't have a one spot? It's like thinking about peanut butter without the jelly. Or mac without the cheese. But I digress.
I'm sure the one spot is the first place you stop when you walk into Target. They didn't put it in front of the doors for nothing. Them there are marketing geniuses!
One such afternoon when I found myself in Target, I saw this plain wood sign for only $3.
Believe isn't the first word I would have been drawn to, but it's the only raw wood one they had and I thought it would look super awesome with a nice coat of gold glitter on it. I mean, heck, what doesn't look good with gold glitter on it?
Monday, March 9, 2015
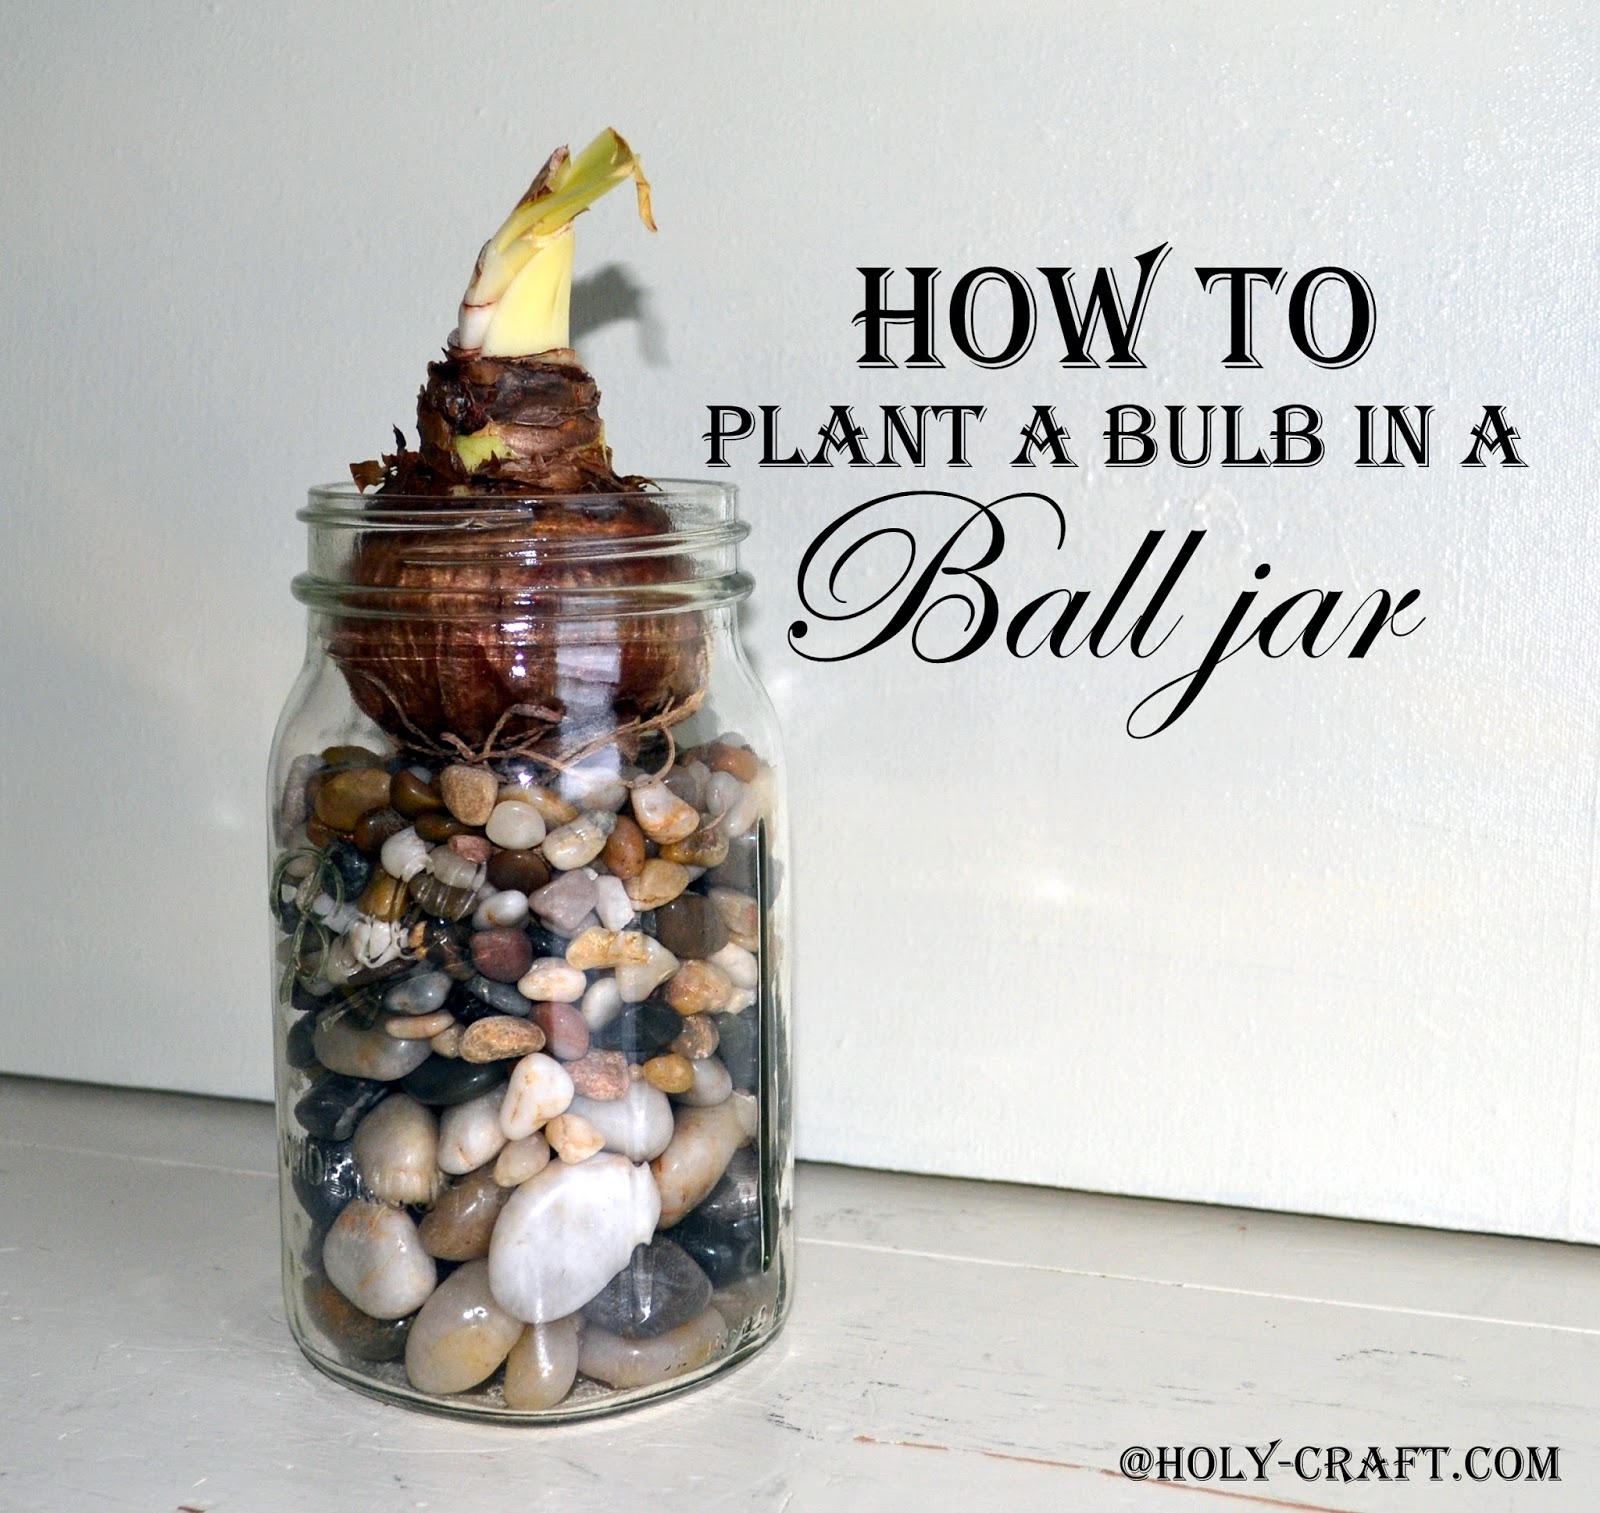
How to plant a bulb in a Ball jar
Our winter this year has been extremely mild. I'm not complaining because we have seen far more sun in our normally dark dreary rainy season than we normally do.
I'm pretty sure all this sun is to blame for my latest gardening itch. Though I'm in no hurry to weed my gardens outside so I'm just going to pretend that it's still too cold to do that and stick to my indoor plants {indoor plants beware! I am sort of a black thumb! You can read my confession about killing cacti here}.
When I found an Amaryllis bulb kit for $2.99 at the Grocery Outlet {love that place!} I decided to give it a go and try planting a bulb in a vintage Ball jar.
Wednesday, February 25, 2015
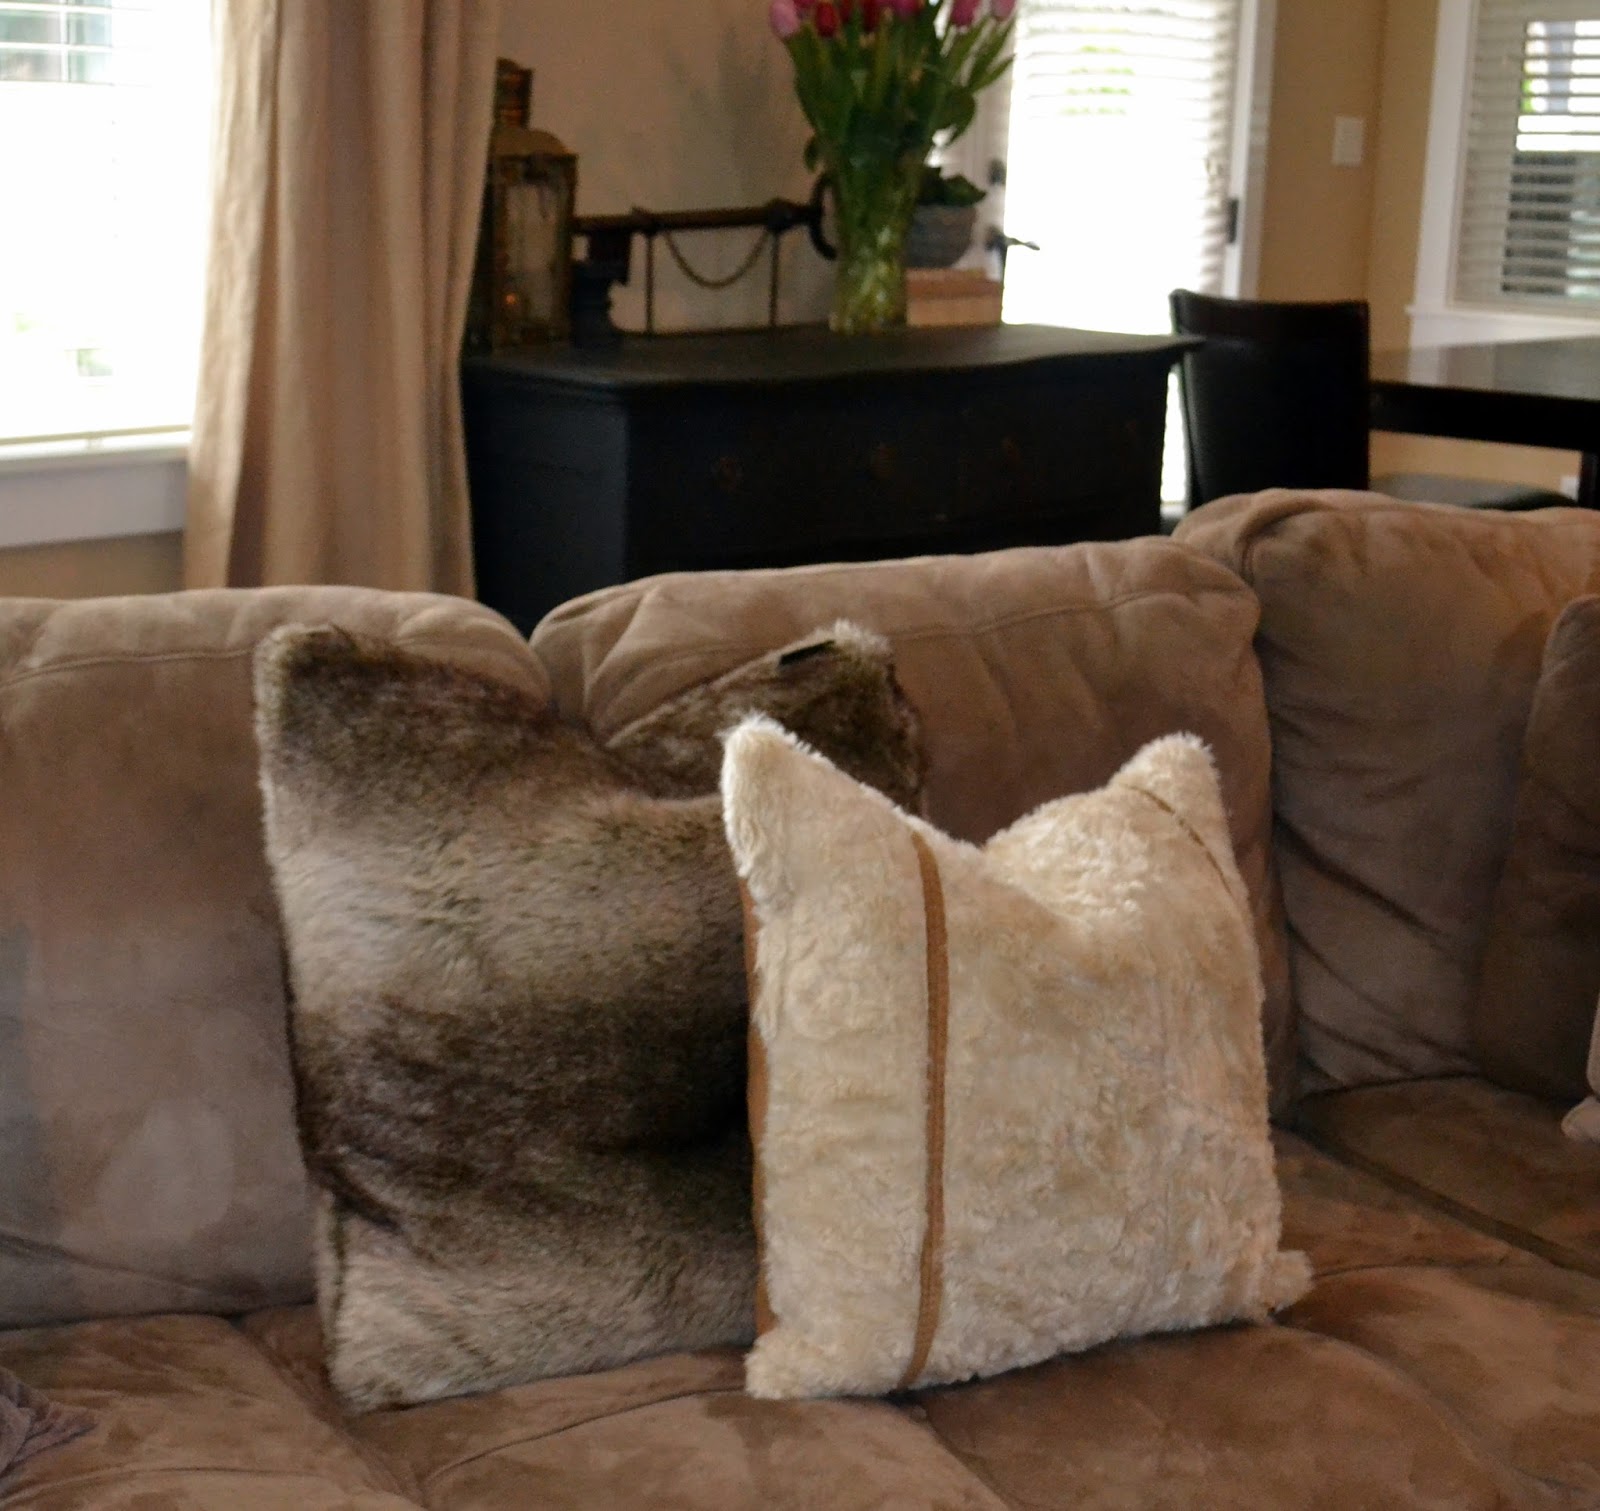
Leather coat turned into a pillow for around $2
It's actually one of the things I've been doing for the longest.
I think it's the ultimate recycling.
Crafting and DIY projects can end up breaking the bank and actually, sometimes making things yourself can actually cost you more than just buying the item at the store. I love all things thrifty and I will rarely make something just for the sake of making it when I can buy it cheaper.
However, in the case of this leather pillow, I was able to whip it up for around $2. You can't buy a decorative pillow for two bucks!
Monday, December 1, 2014
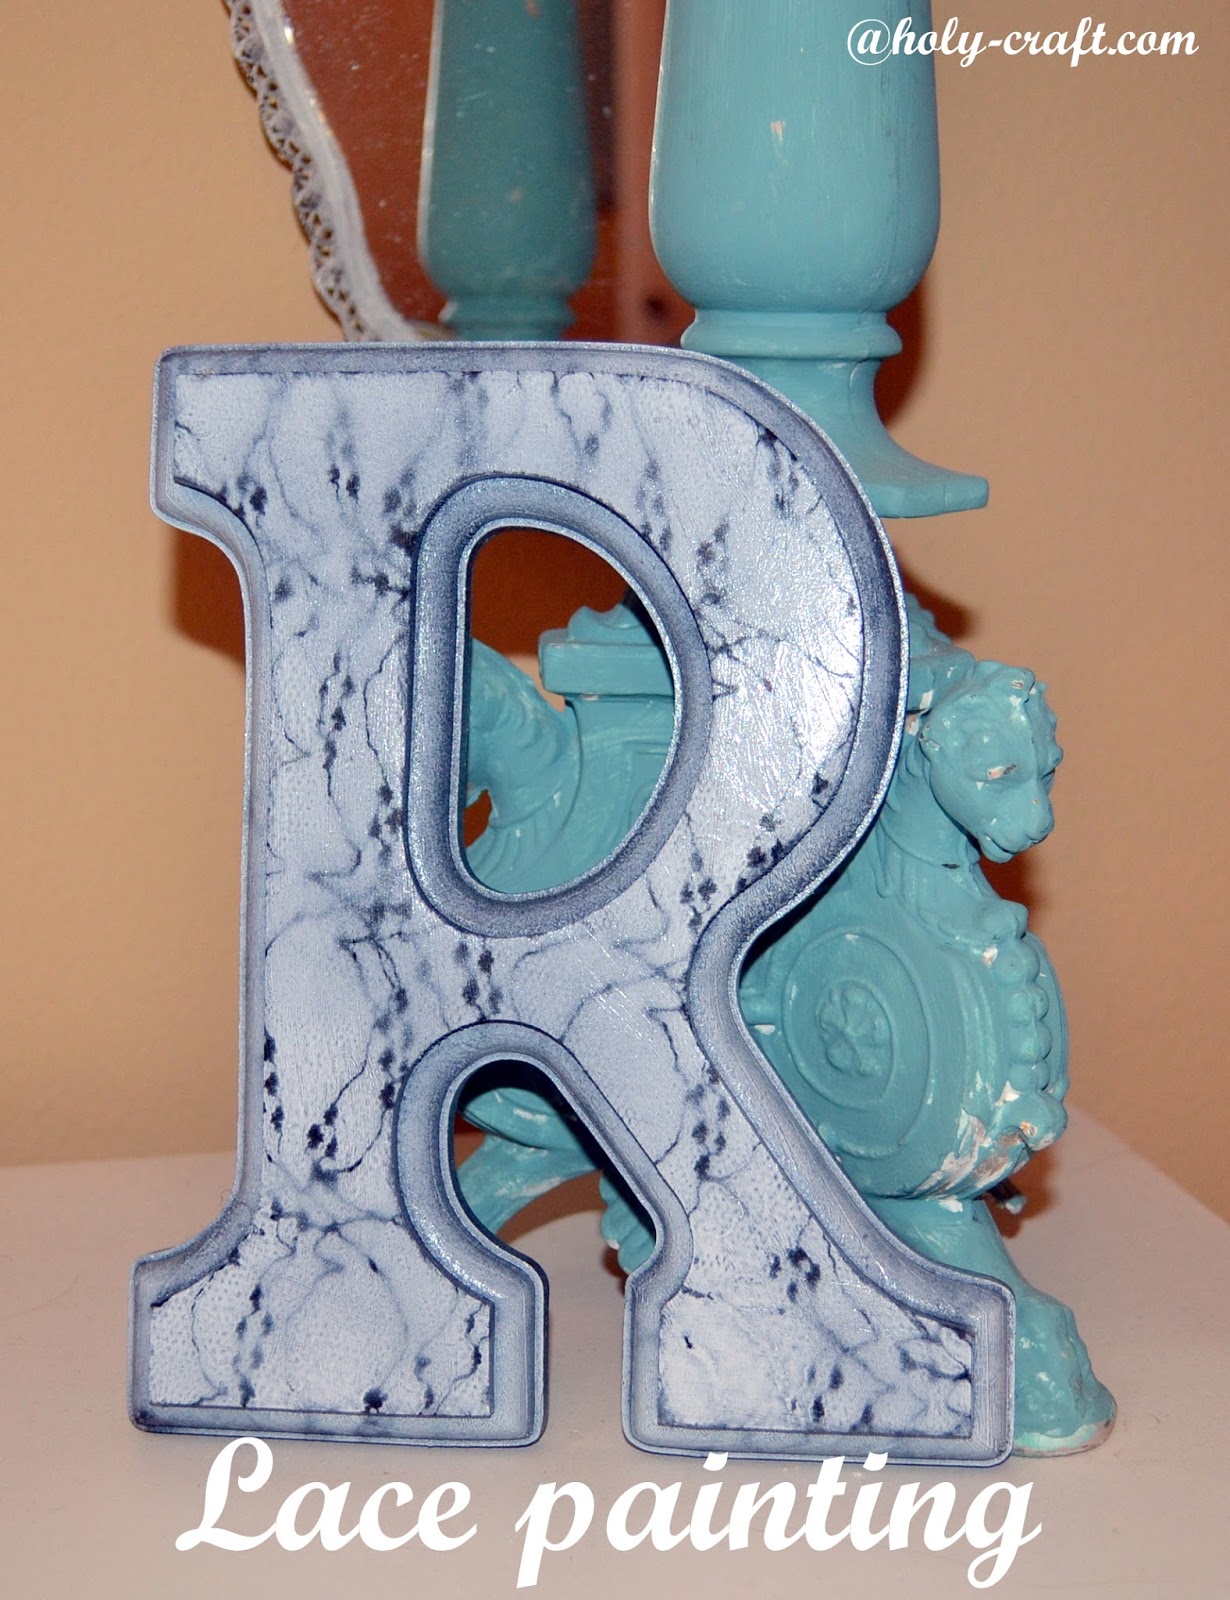
Painting with lace
I recently had a friend call and ask me about how to change up some letters that she had in her daughters room that she still liked, but once she redecorated would no longer go.
These letters were special since they were hand painted to match the crib bedding that sweet little Erin had when she was born, but now this seven year old was ready for a big girl room and wanted to get rid of anything flowery.
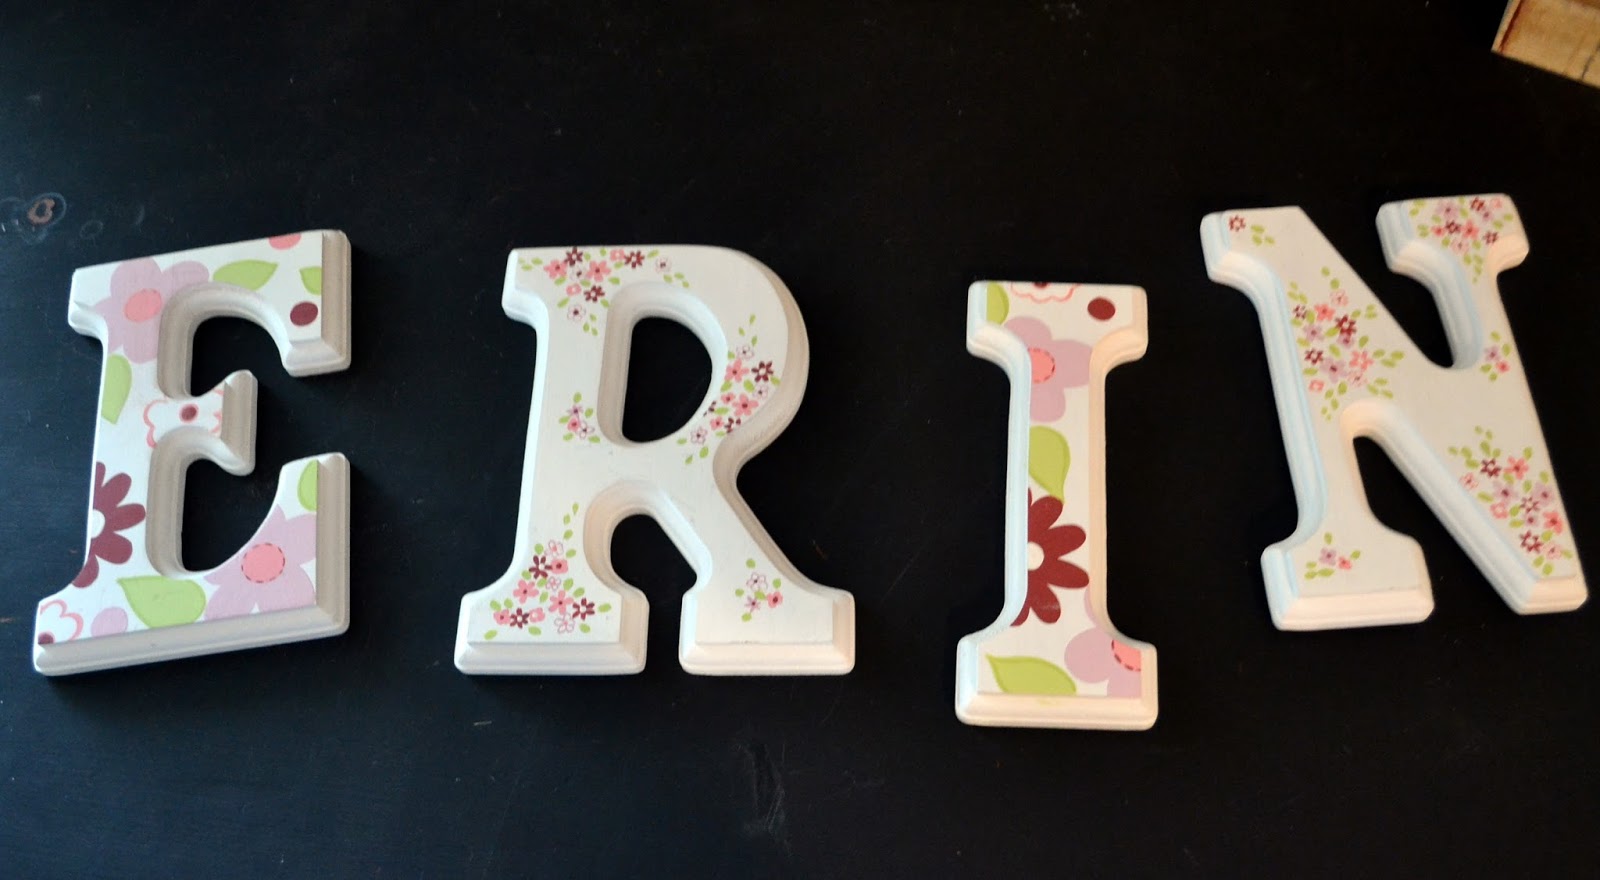
I had an idea and I asked if she would mind if I gave it a try.
A crafters best friend is spray paint, and believe me, I've used my fair share!
I wondered what would happen if I spray painted the letters and then covered them with lace and gave them another coat of paint.
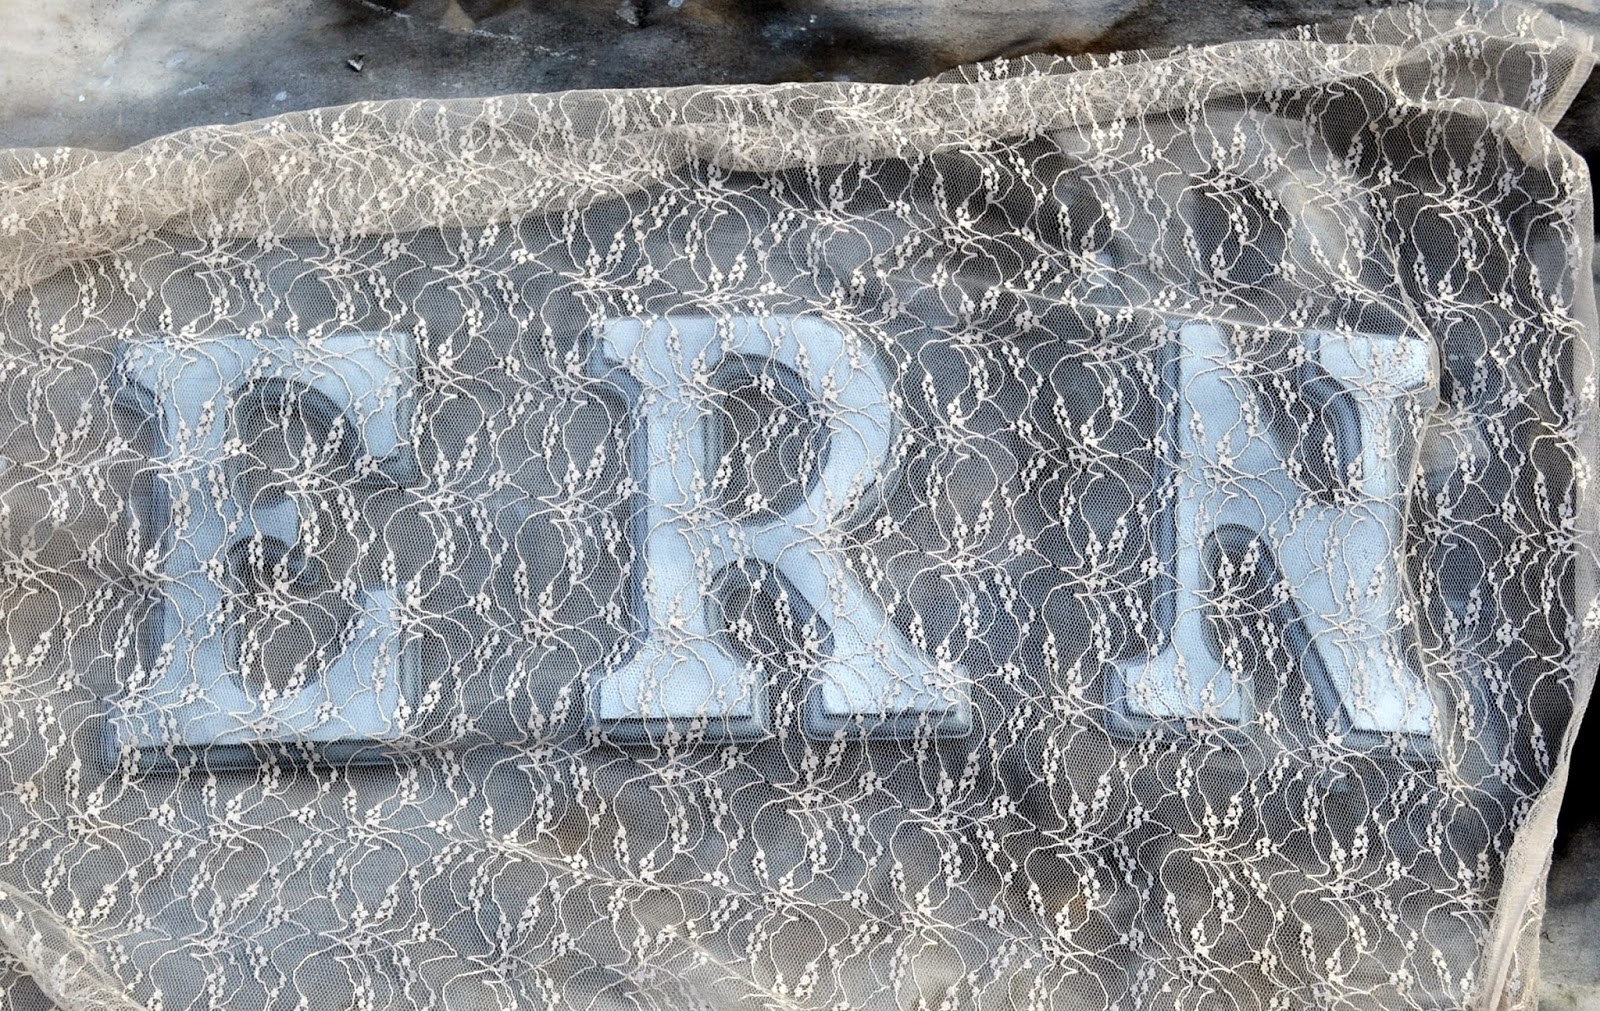
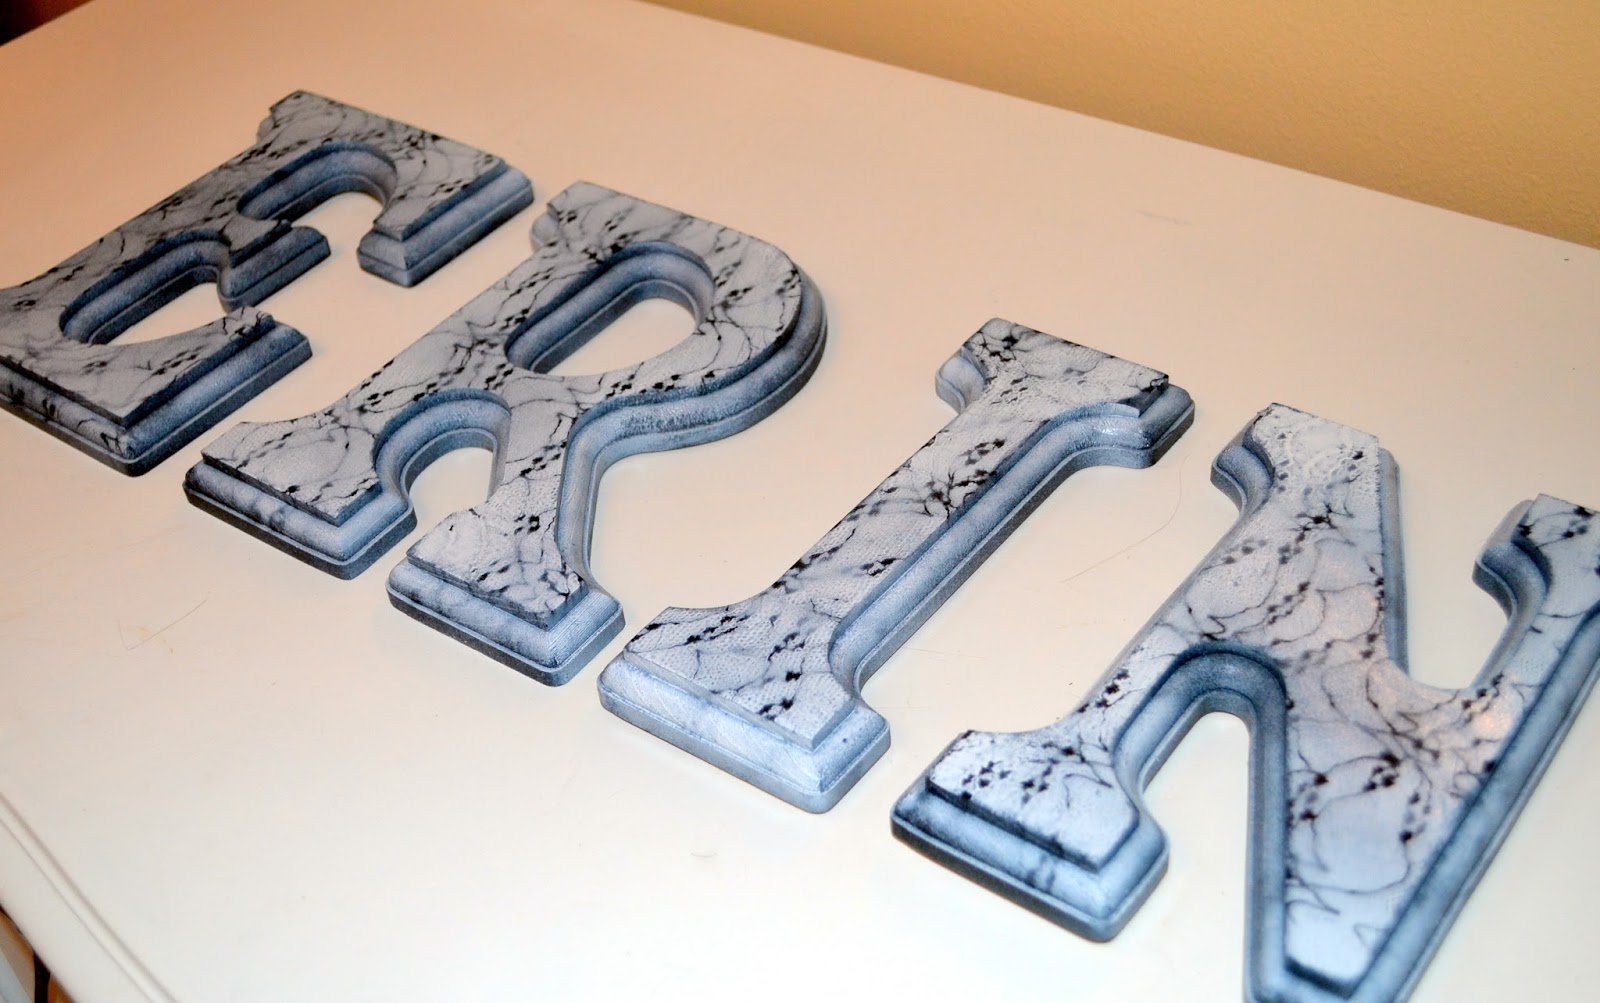
This is what happened!
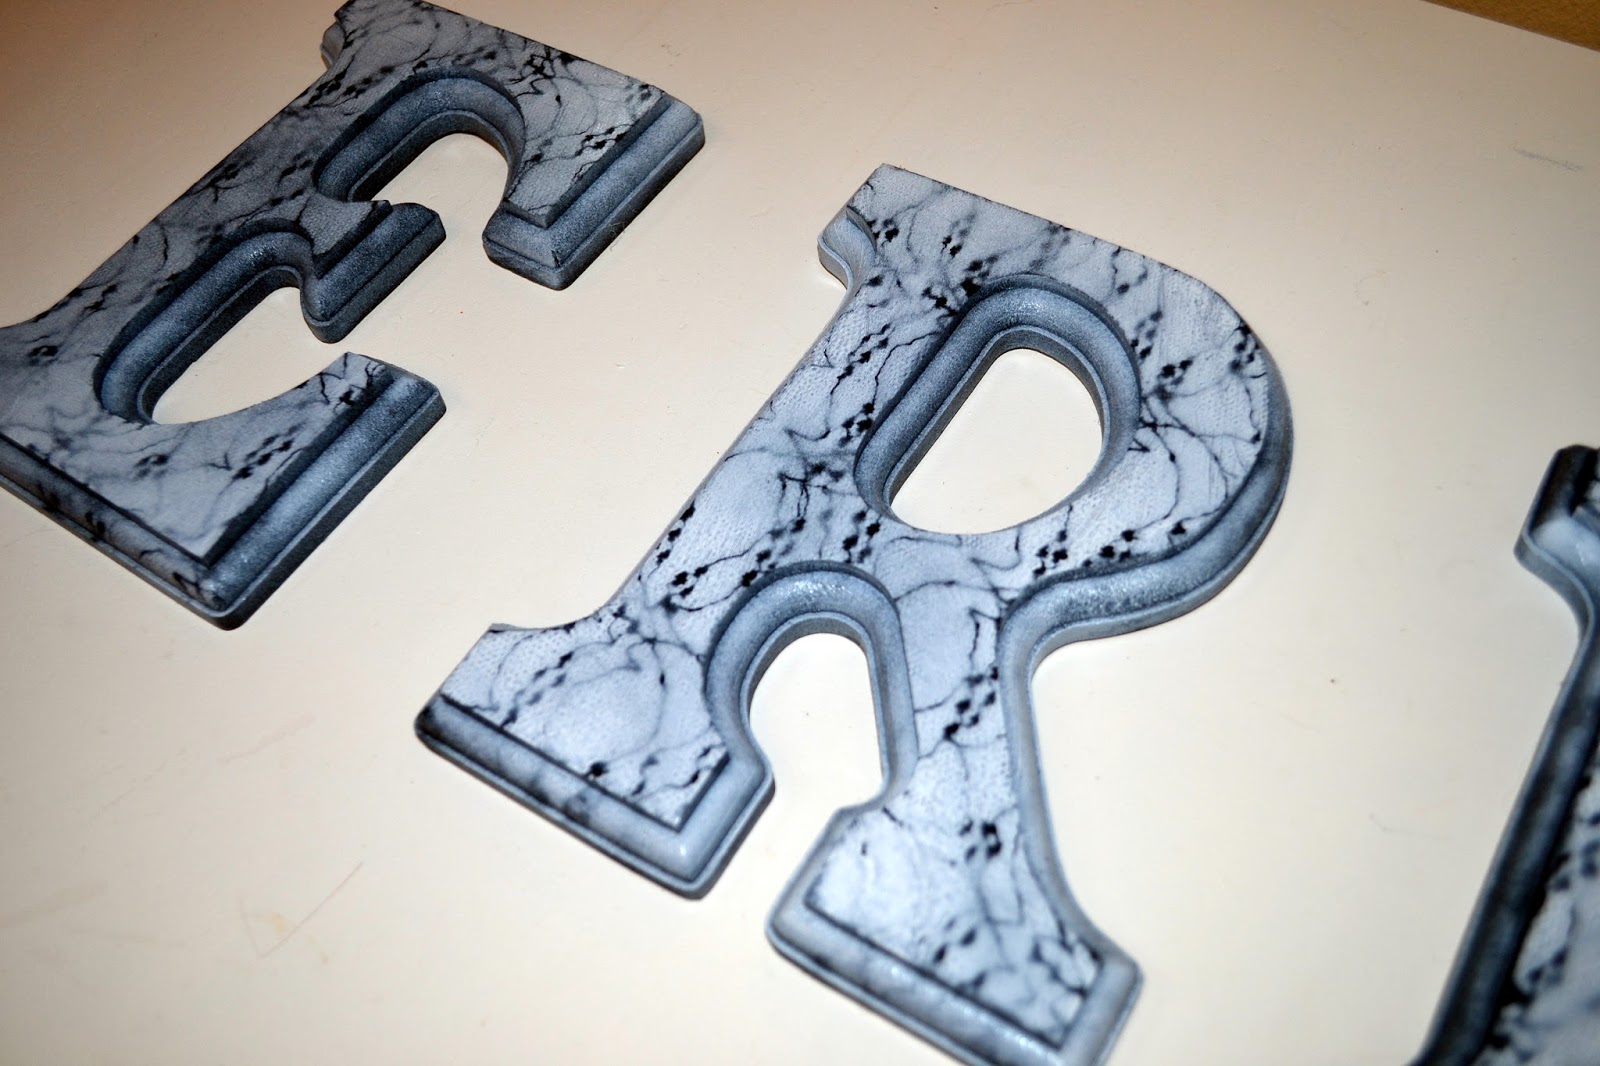
It's a pretty cool technique.
I'm sure you could get all kinds of different texture with a different piece of lace.

Monday, October 27, 2014
Large art for cheap
One of my favorite home decorating projects has been this
The store version was $550.
My grand total was under $5.
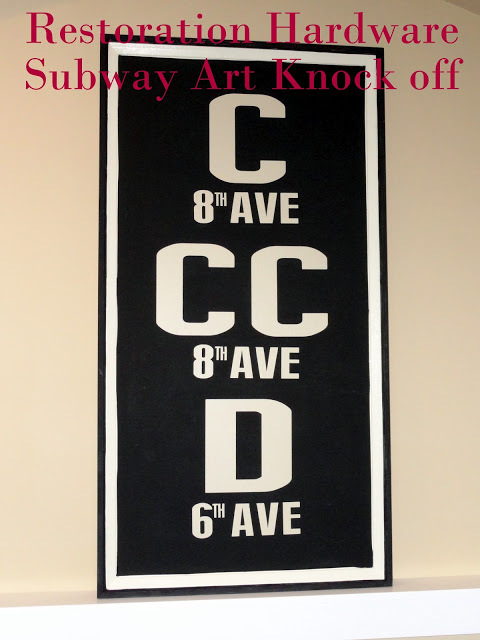
It started out at this large canvas that I purchased for $1.
Most people don't see the potential and wonder why anyone would want this old super 70's painting for their home.
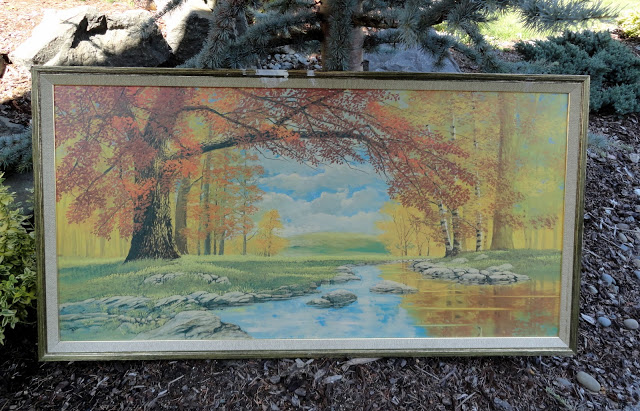
I am always on the lookout for large pieces of artwork that I can transform.
They are getting harder to come by, but I did happen on to this landscape scene for $7.
The frame is what drew me in.
I purchased it at an estate sale and the lady was surprised that I wanted to purchase it.
She told me that her mother painted it years ago.
She said to me "I'm so glad that someone can take this and appreciate it."
Little did she know what my plans were!
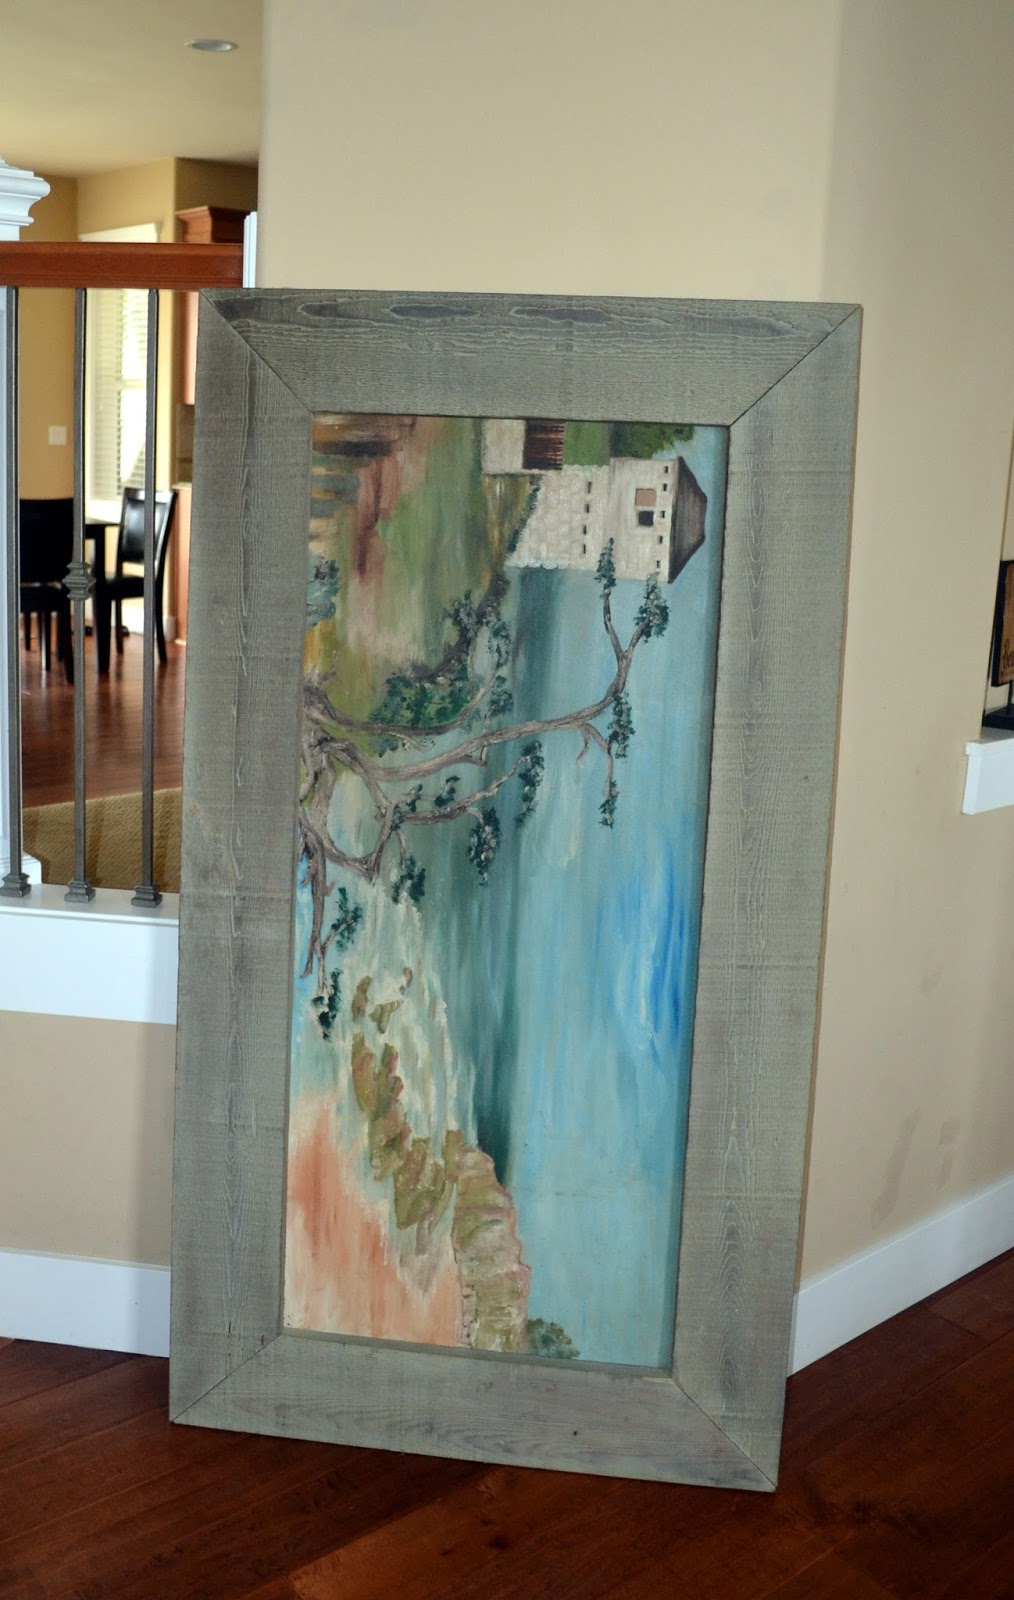
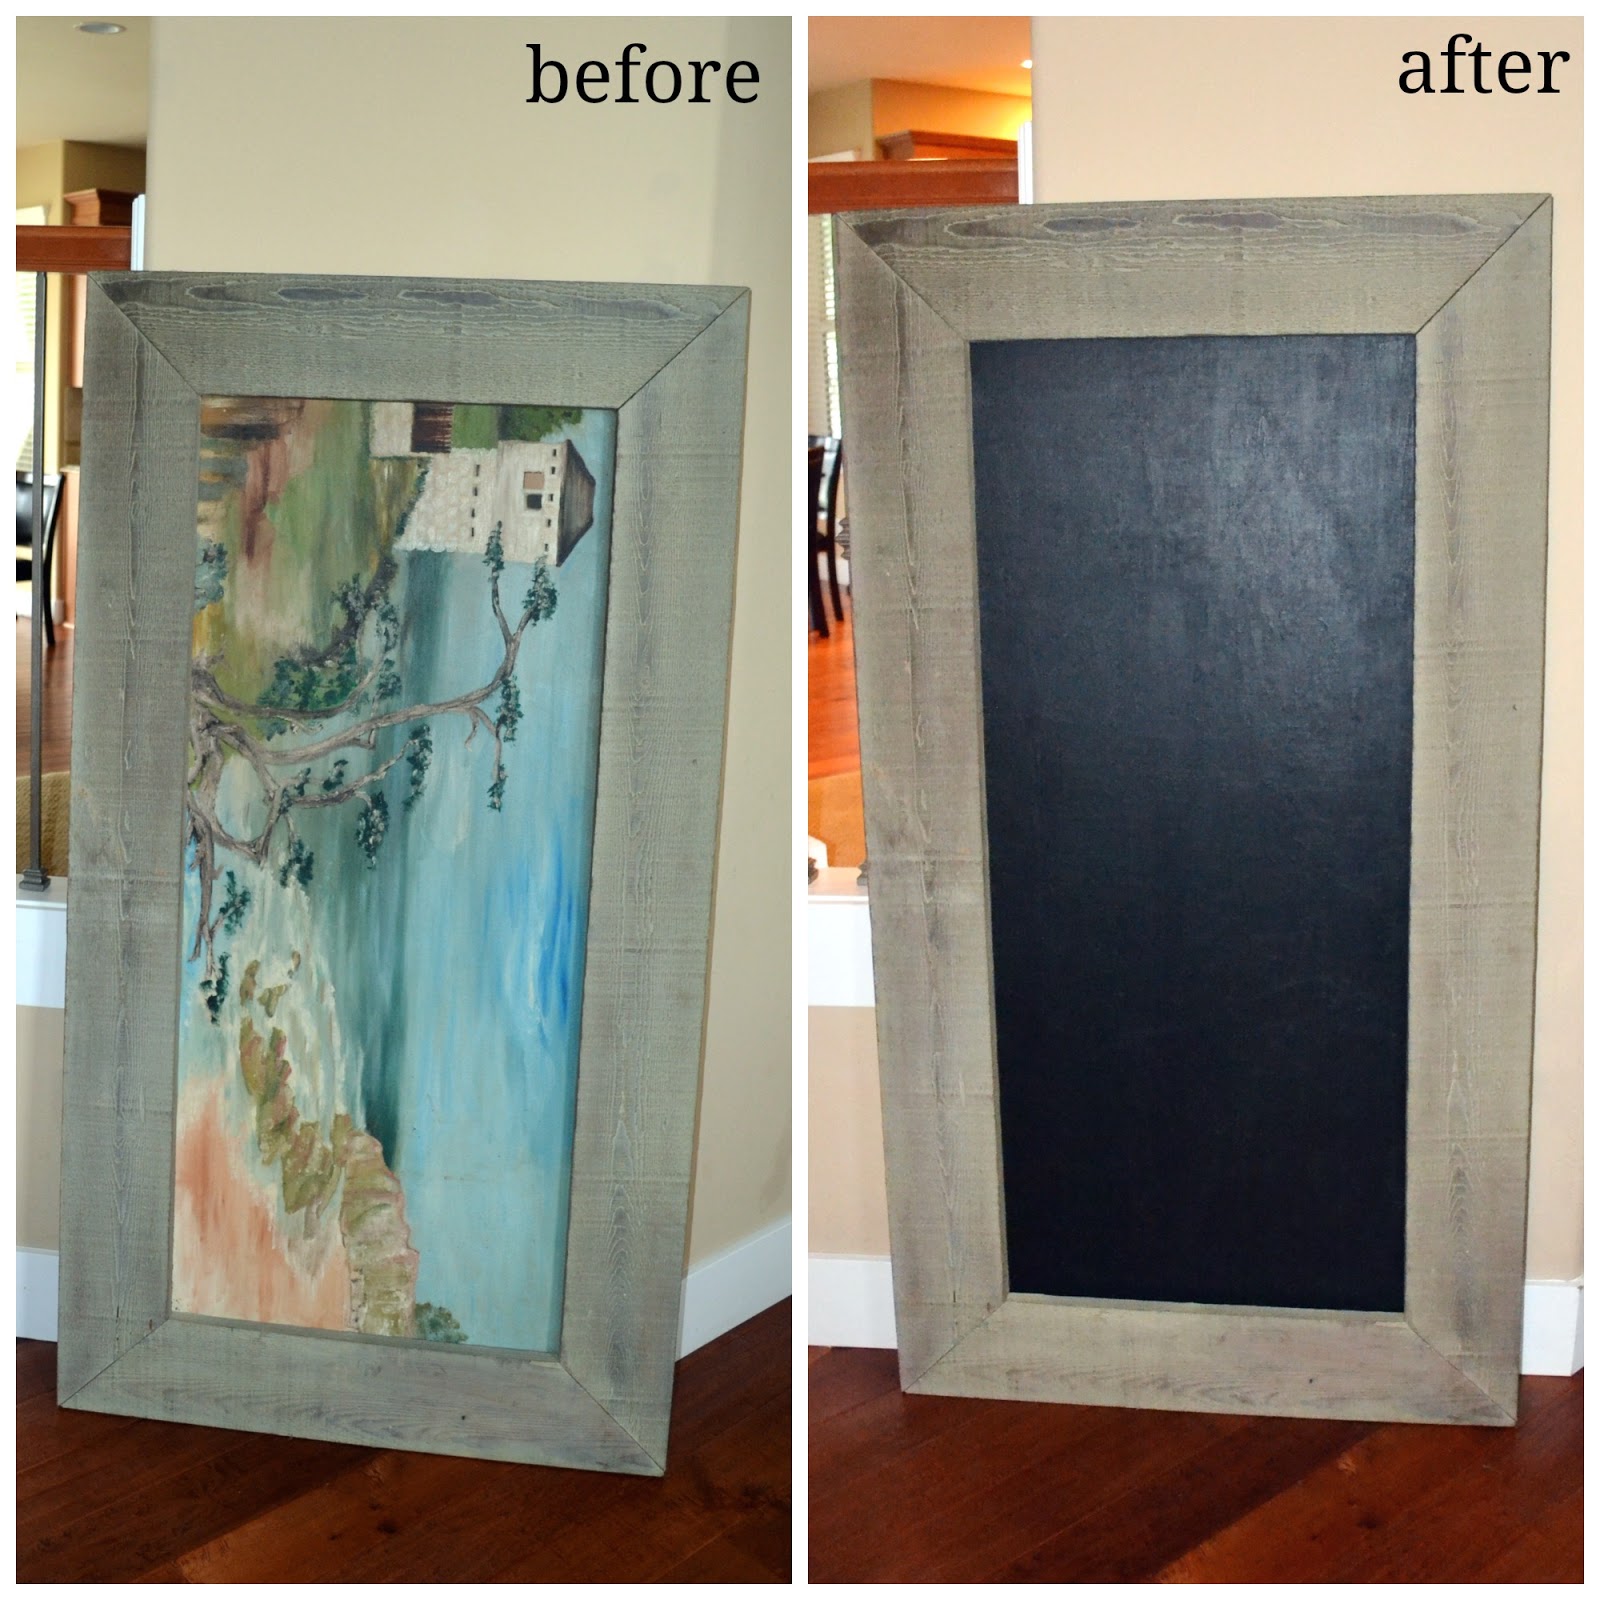
I ended up sanding down the paint on the picture to make a smooth surface and painted over the whole picture with a few layers of chalkboard paint.
While I'm not appreciating the picture the way that it was intended, I think I actually like the end result 1000x's better!
Can't you just see fun quotes, grocery lists, drawings and chalkboard art all over the new version?
Monday, October 20, 2014
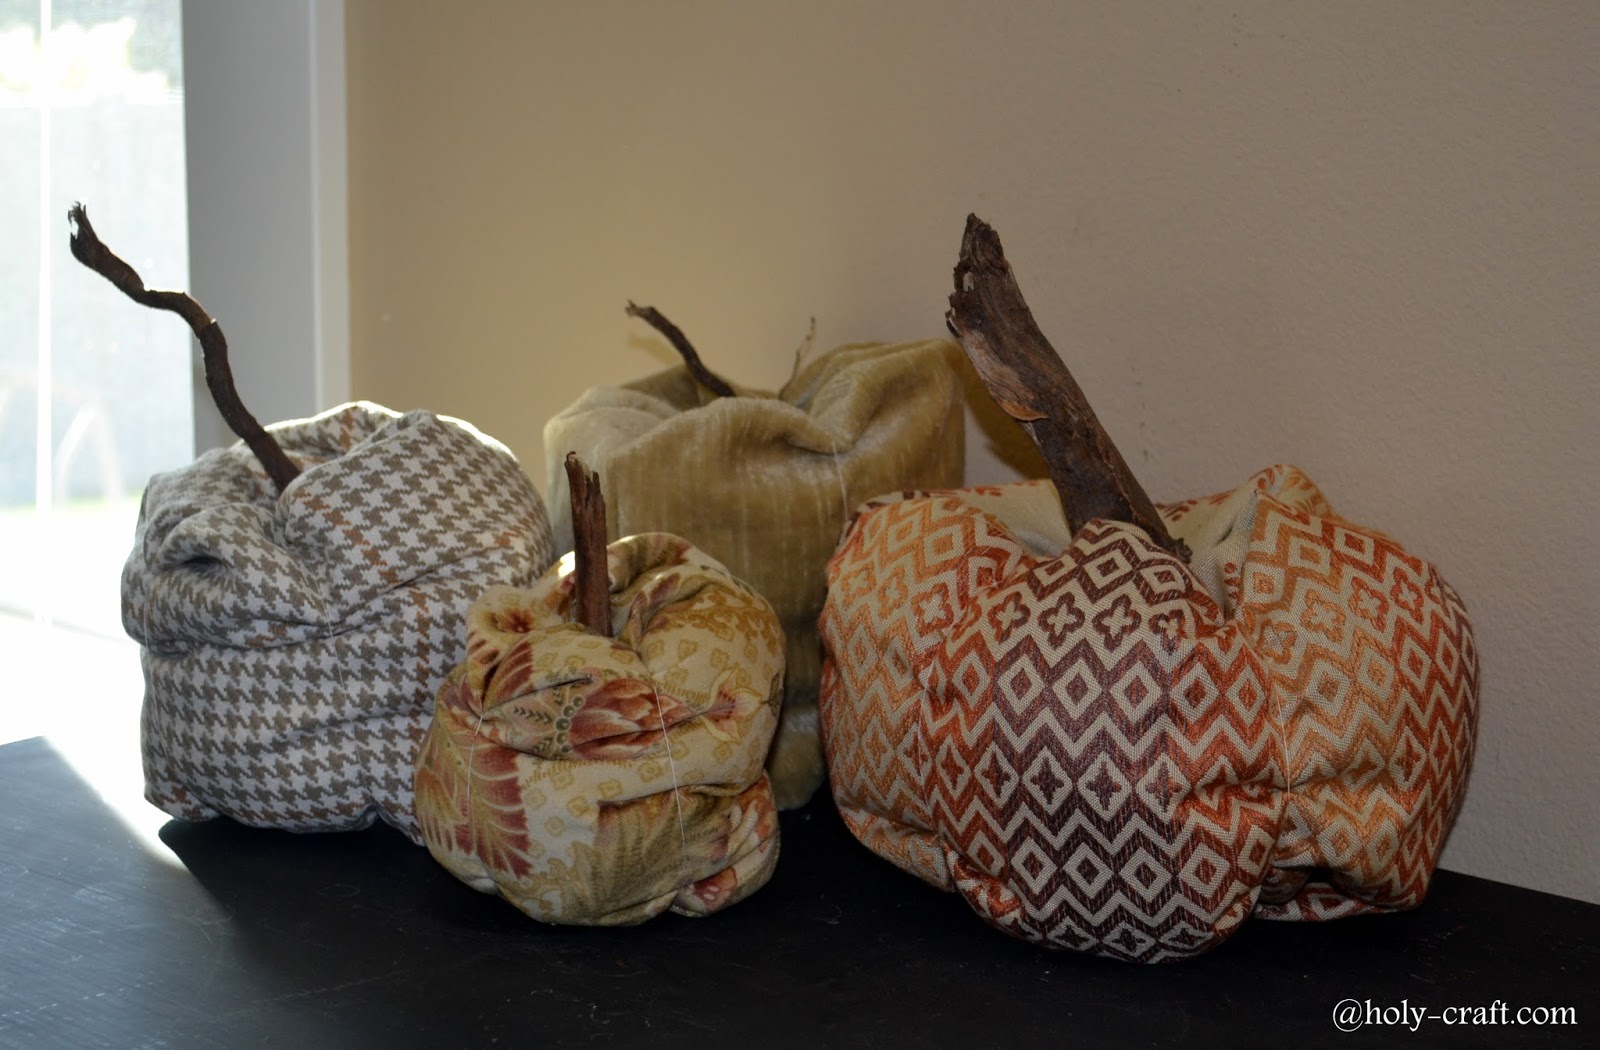
Fabric pumpkin tutorial
I've been on a role lately creating and crafting pumpkins for my fall decor.
Last week I shared with you a whole week of pumpkin projects from birch candle holders made from a faux pumpkin, to ruffle pumpkins and a few other projects in between.
This week I'm sharing with you a tutorial for fabric pumpkins.
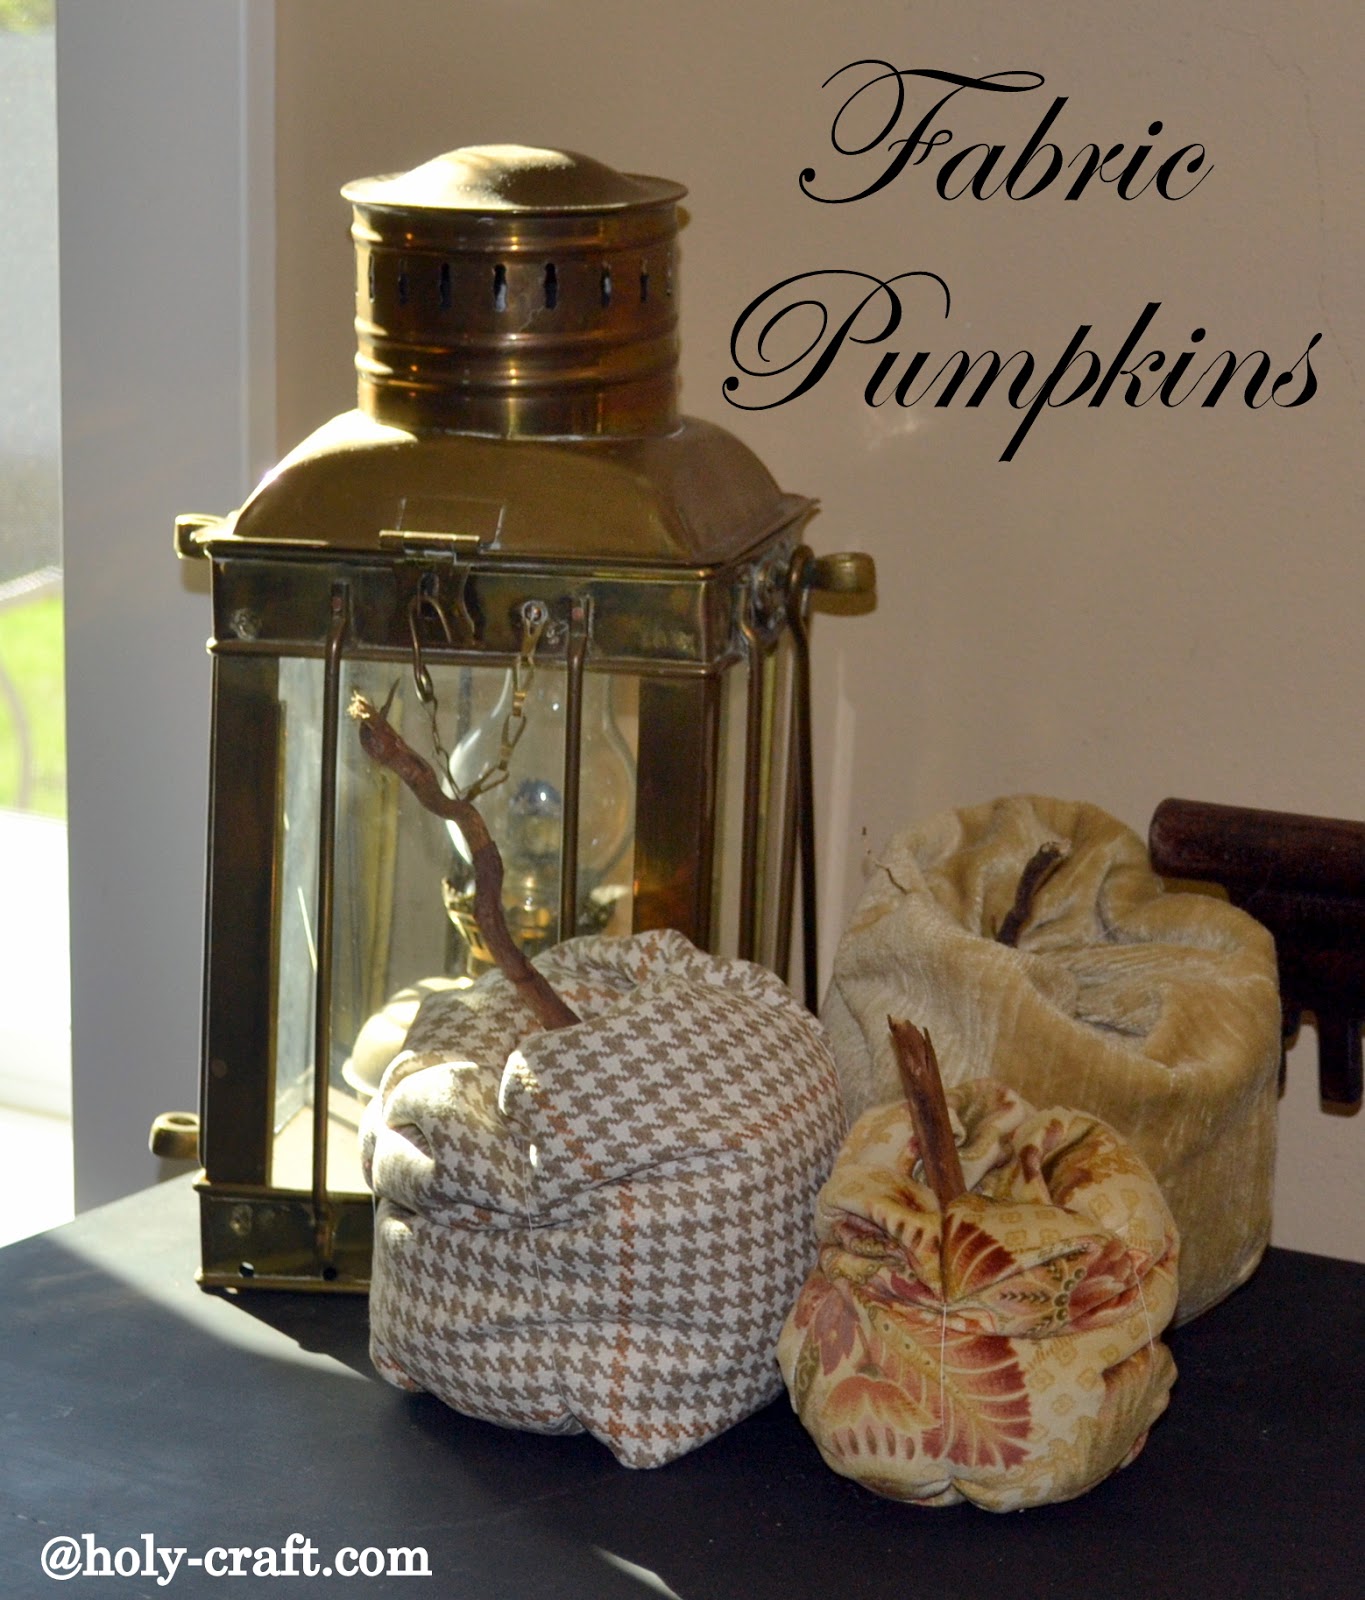
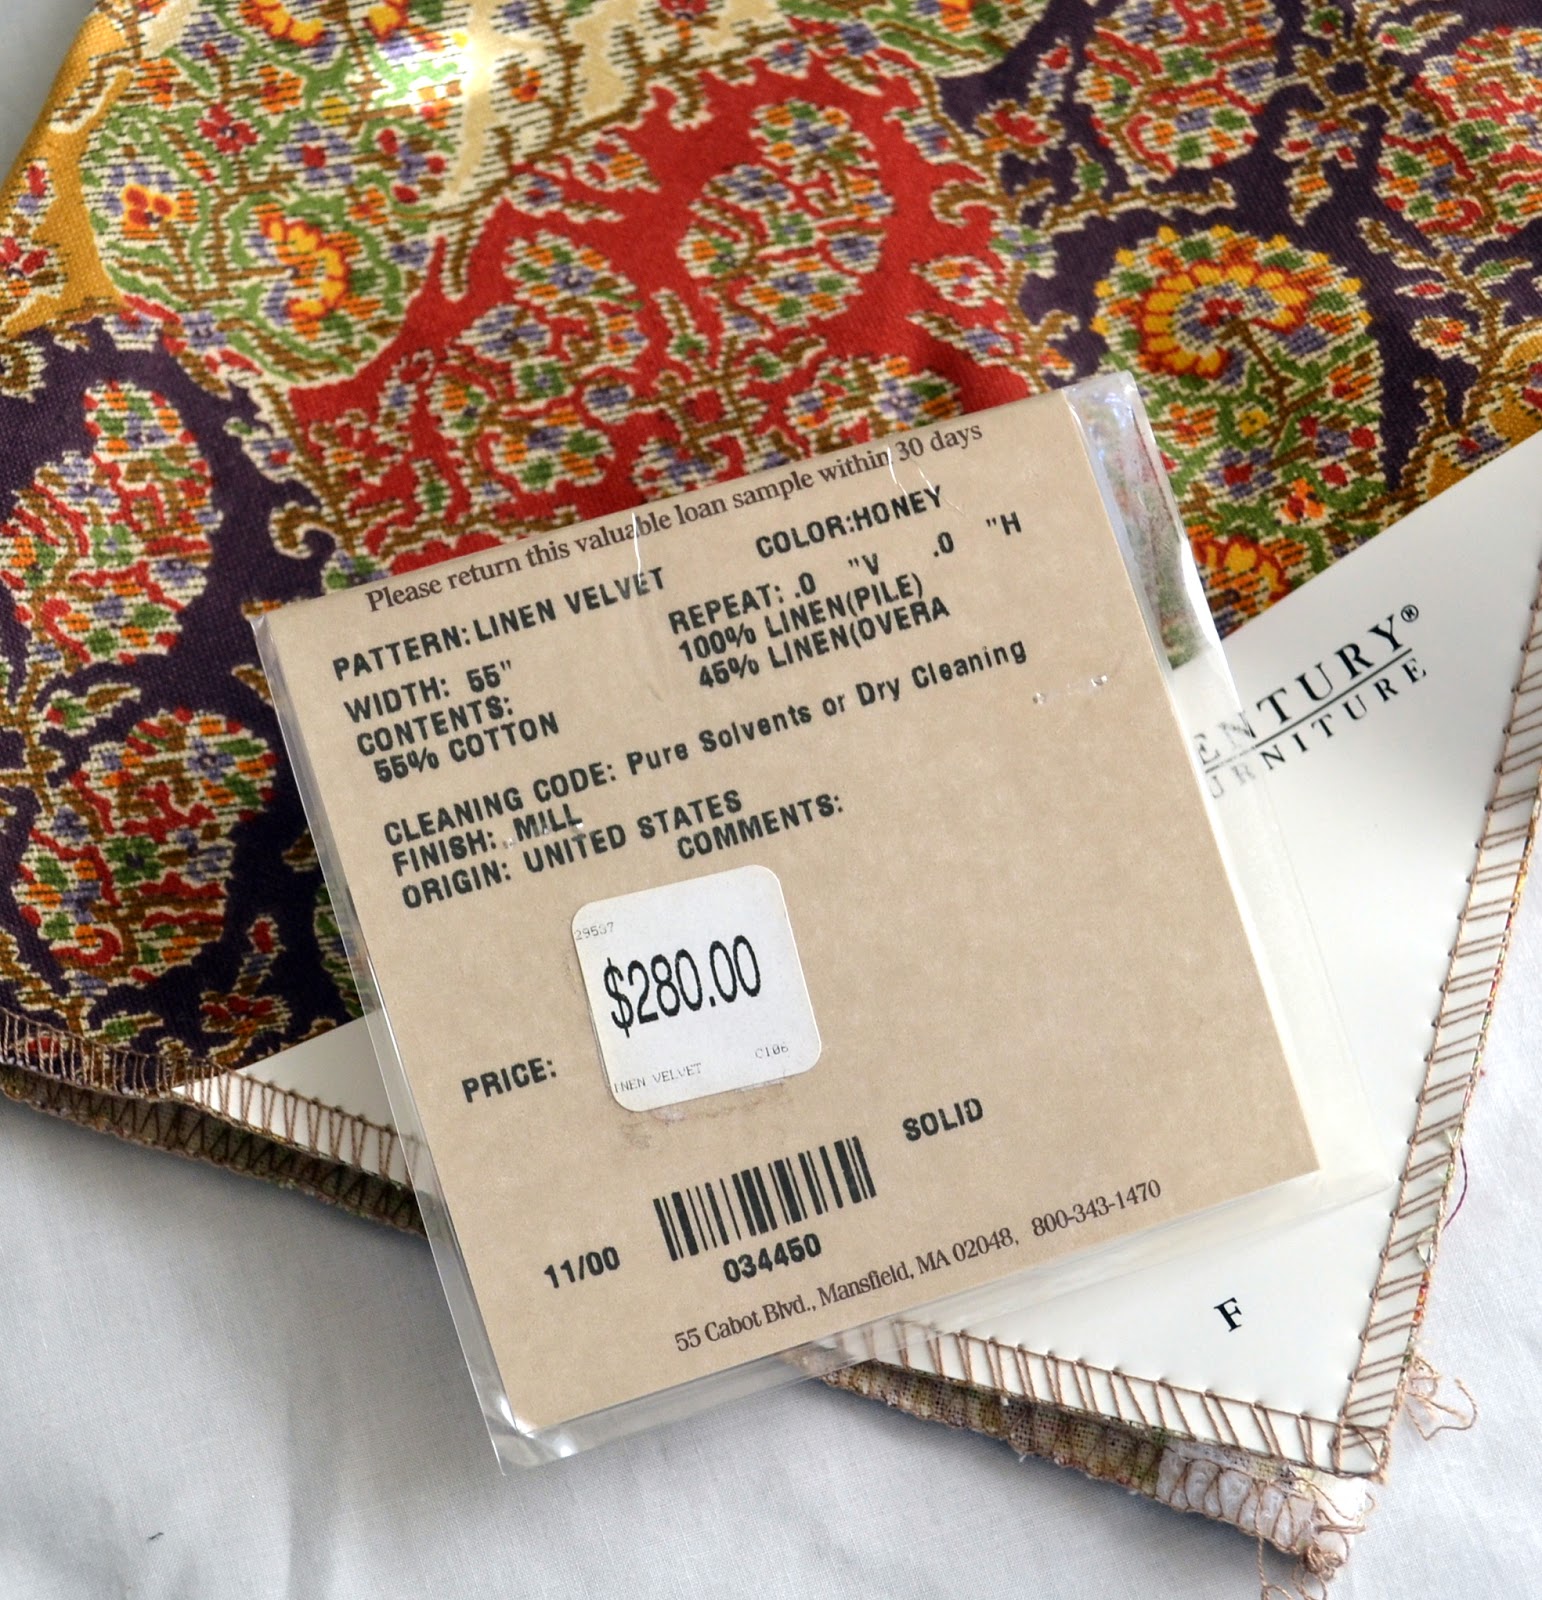
It's been over a year since I picked up some designer fabric swatches from the Goodwill outlet in Seattle. Like any good hoarder crafter, I didn't know what I was going to do with the swatches at the time, but I kept them in a box ready to use when inspiration struck. They were great pieces of fabric, just not quite big enough to make a pillow, so I was stuck...until, I decided one day to make a fabric pumpkin. That's what everyone does with $280 a yard fabric right?!
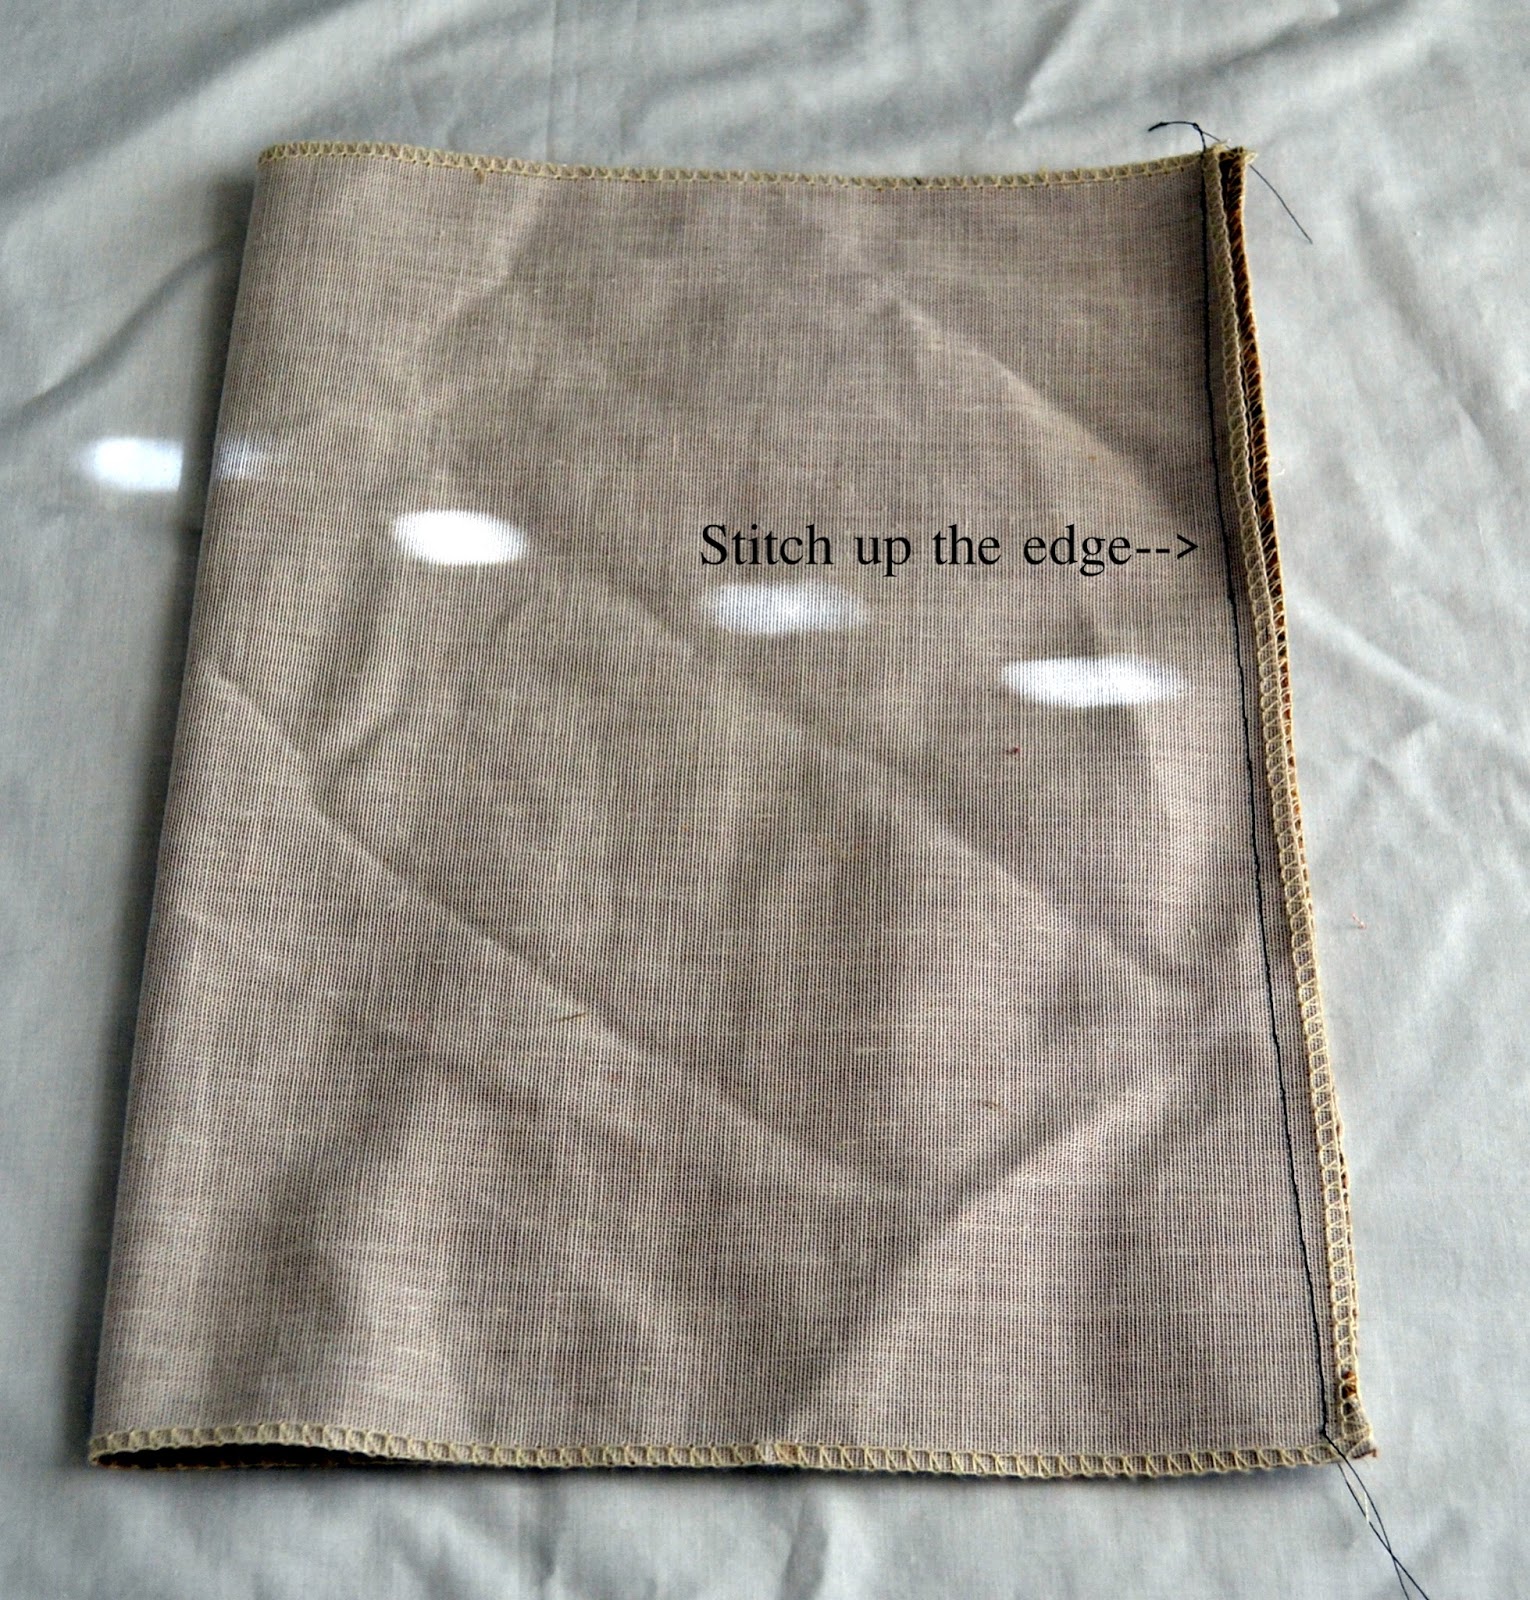
I started by taking the fabric and cutting a rectangle.
You can make your pumpkins as big or as small as you would like.
Turn the fabric inside out and stitch up one side.
The other side will be on your fold, so no stitch needed.
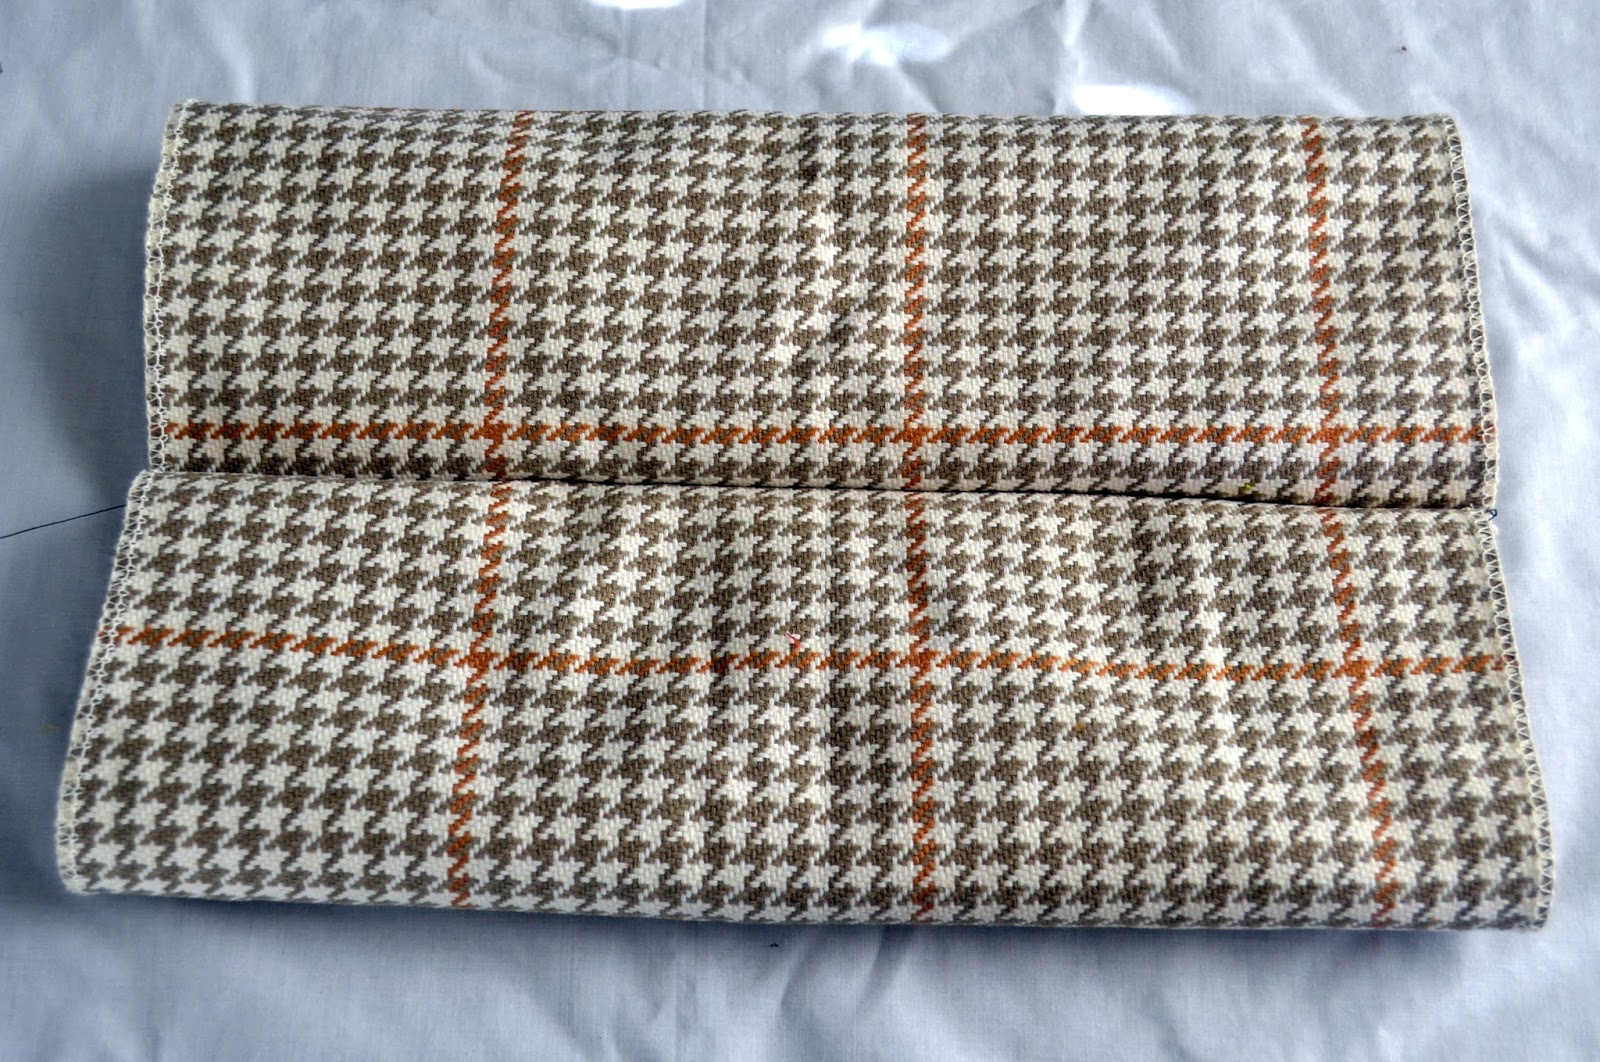
Turn your fabric inside out and move your seam down the middle.
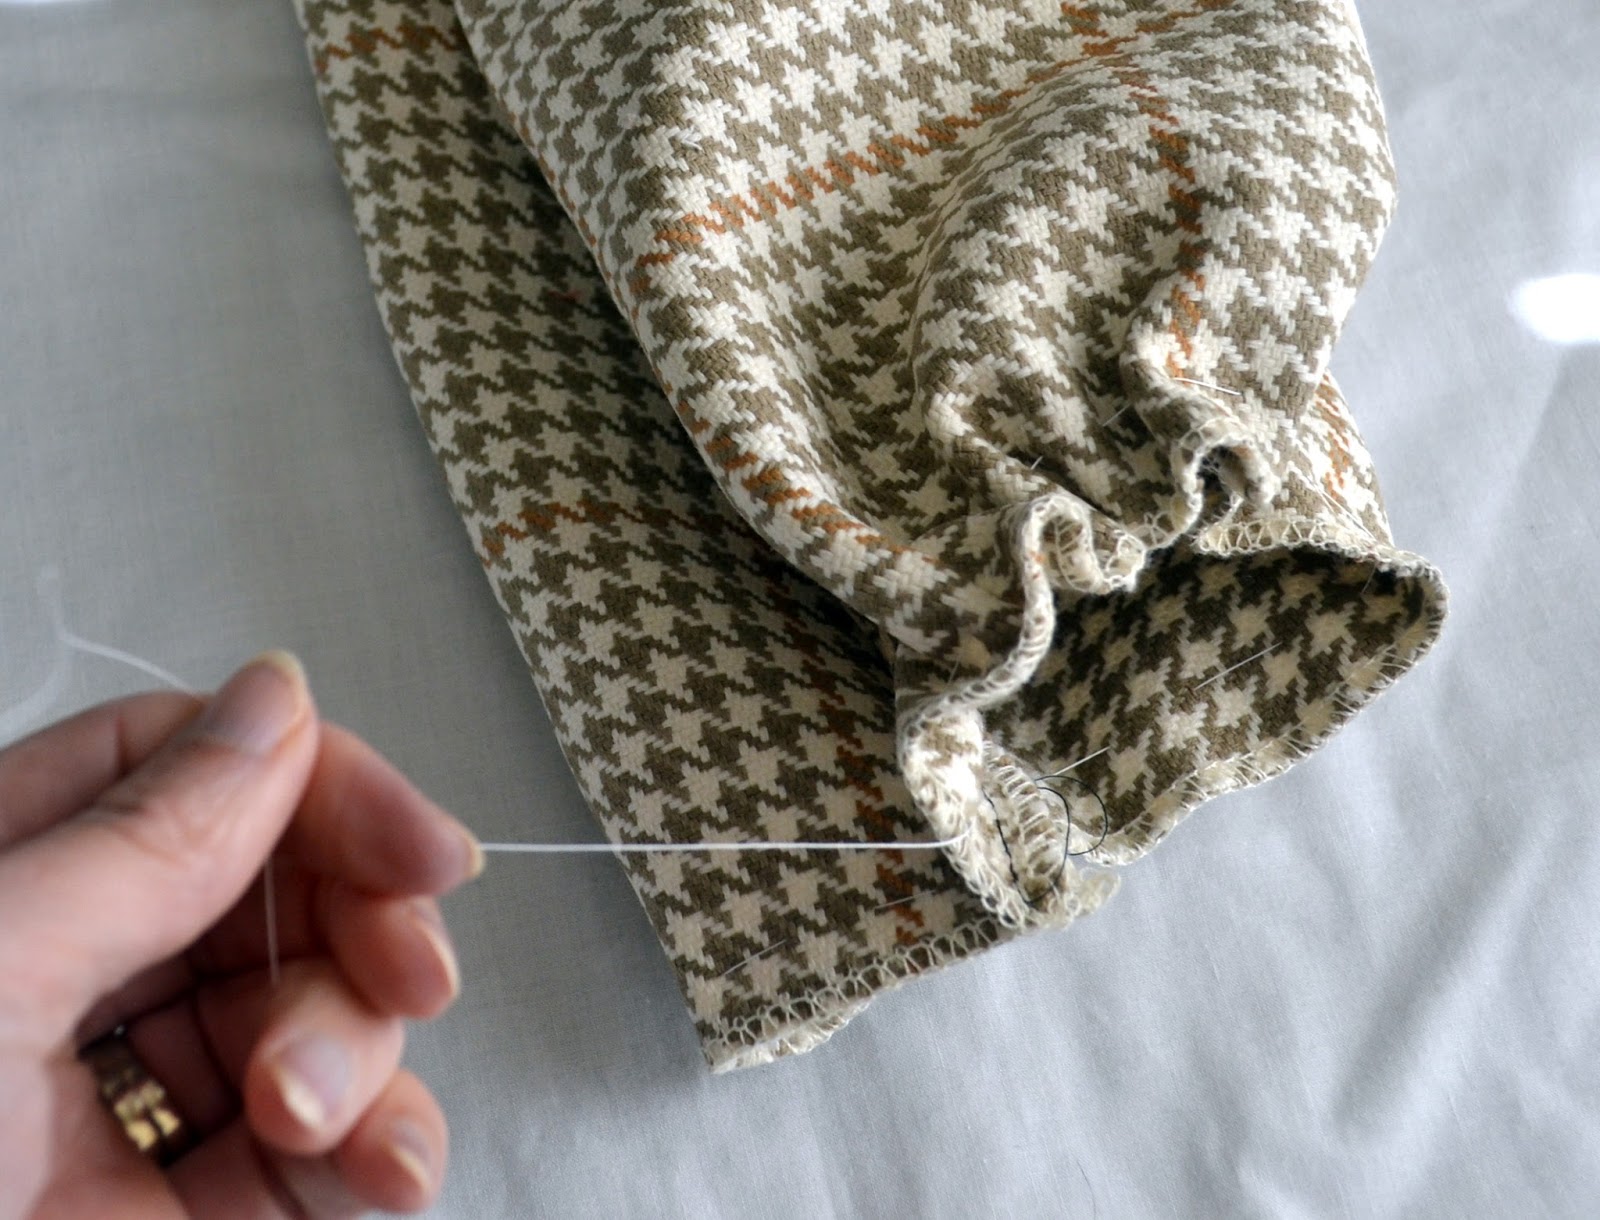
Take a long piece of thread and a needle and about a half inch from the bottom start making a wide stitch around the whole length of the bottom.
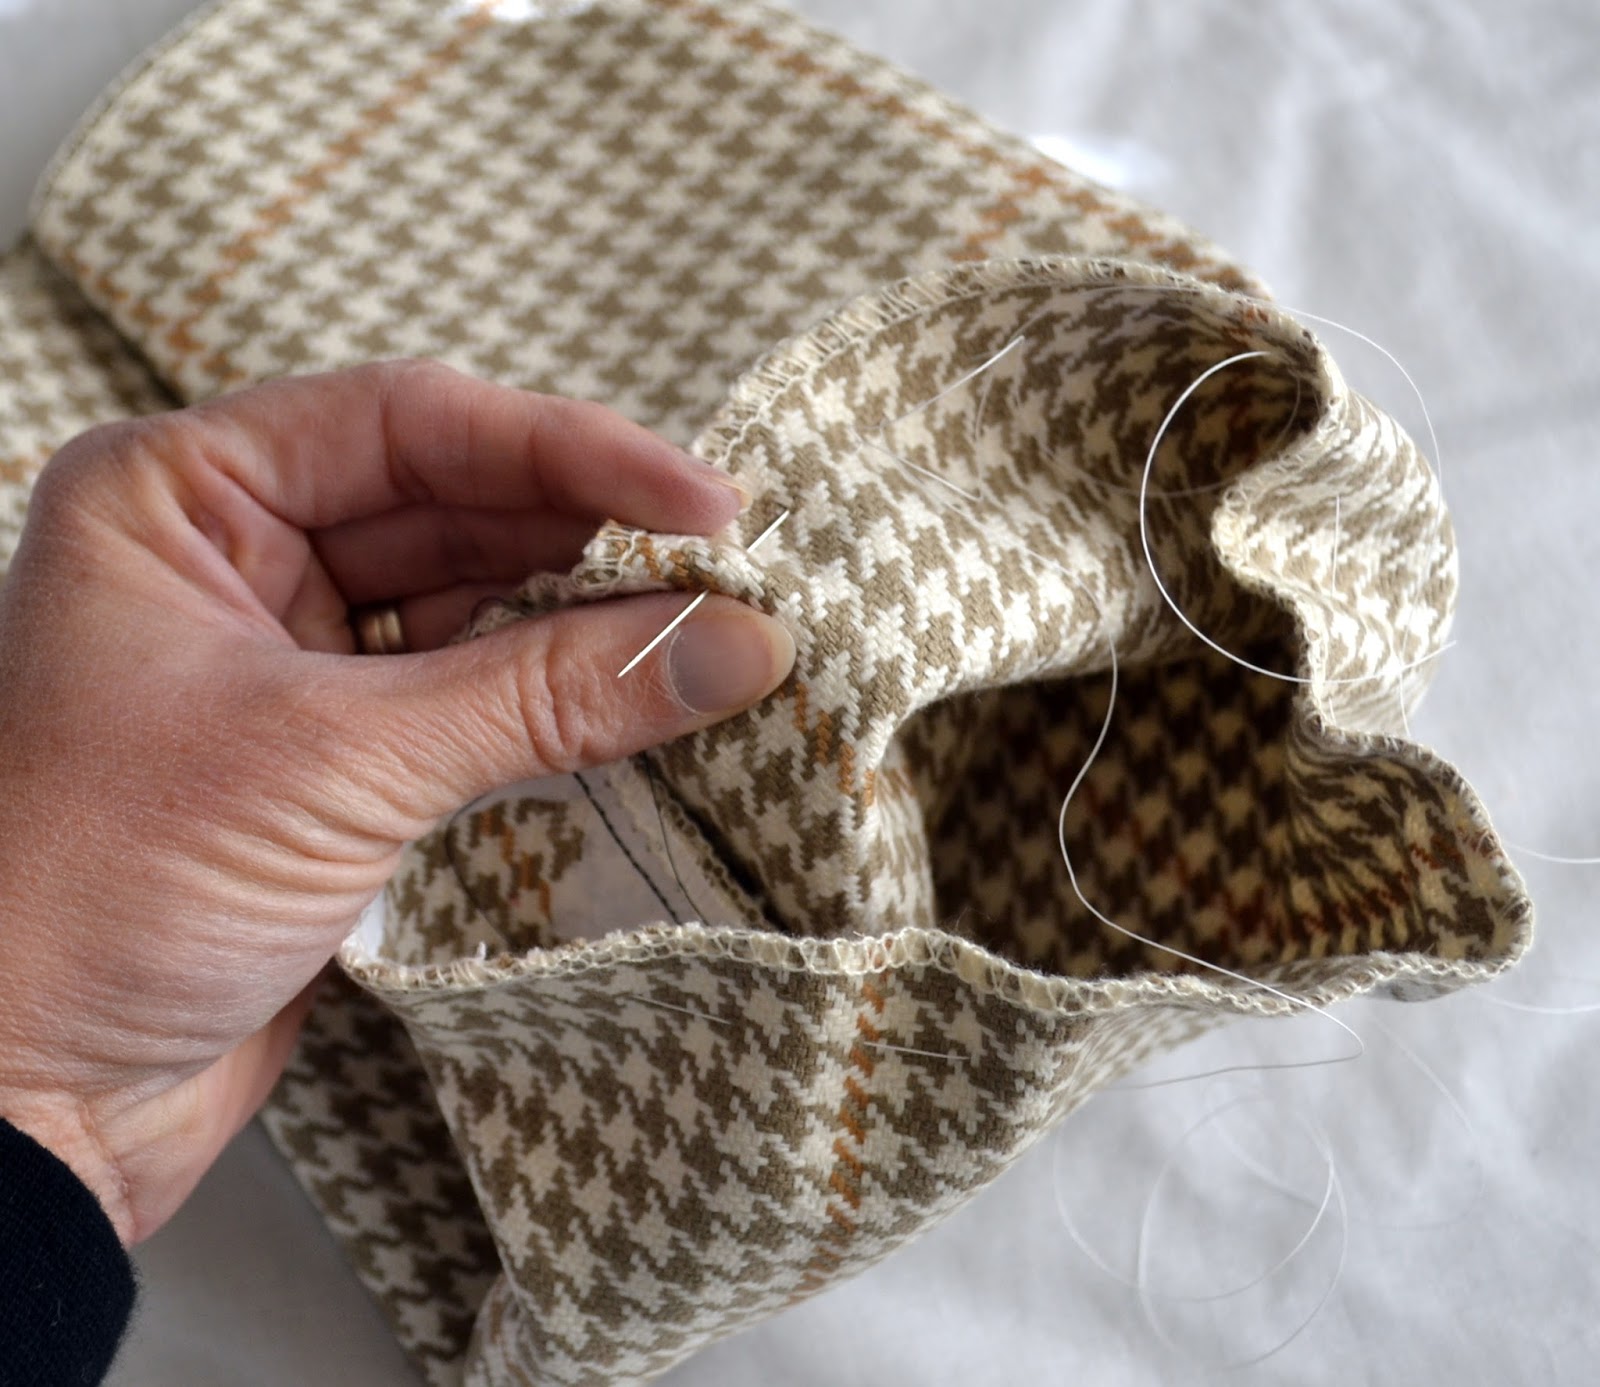
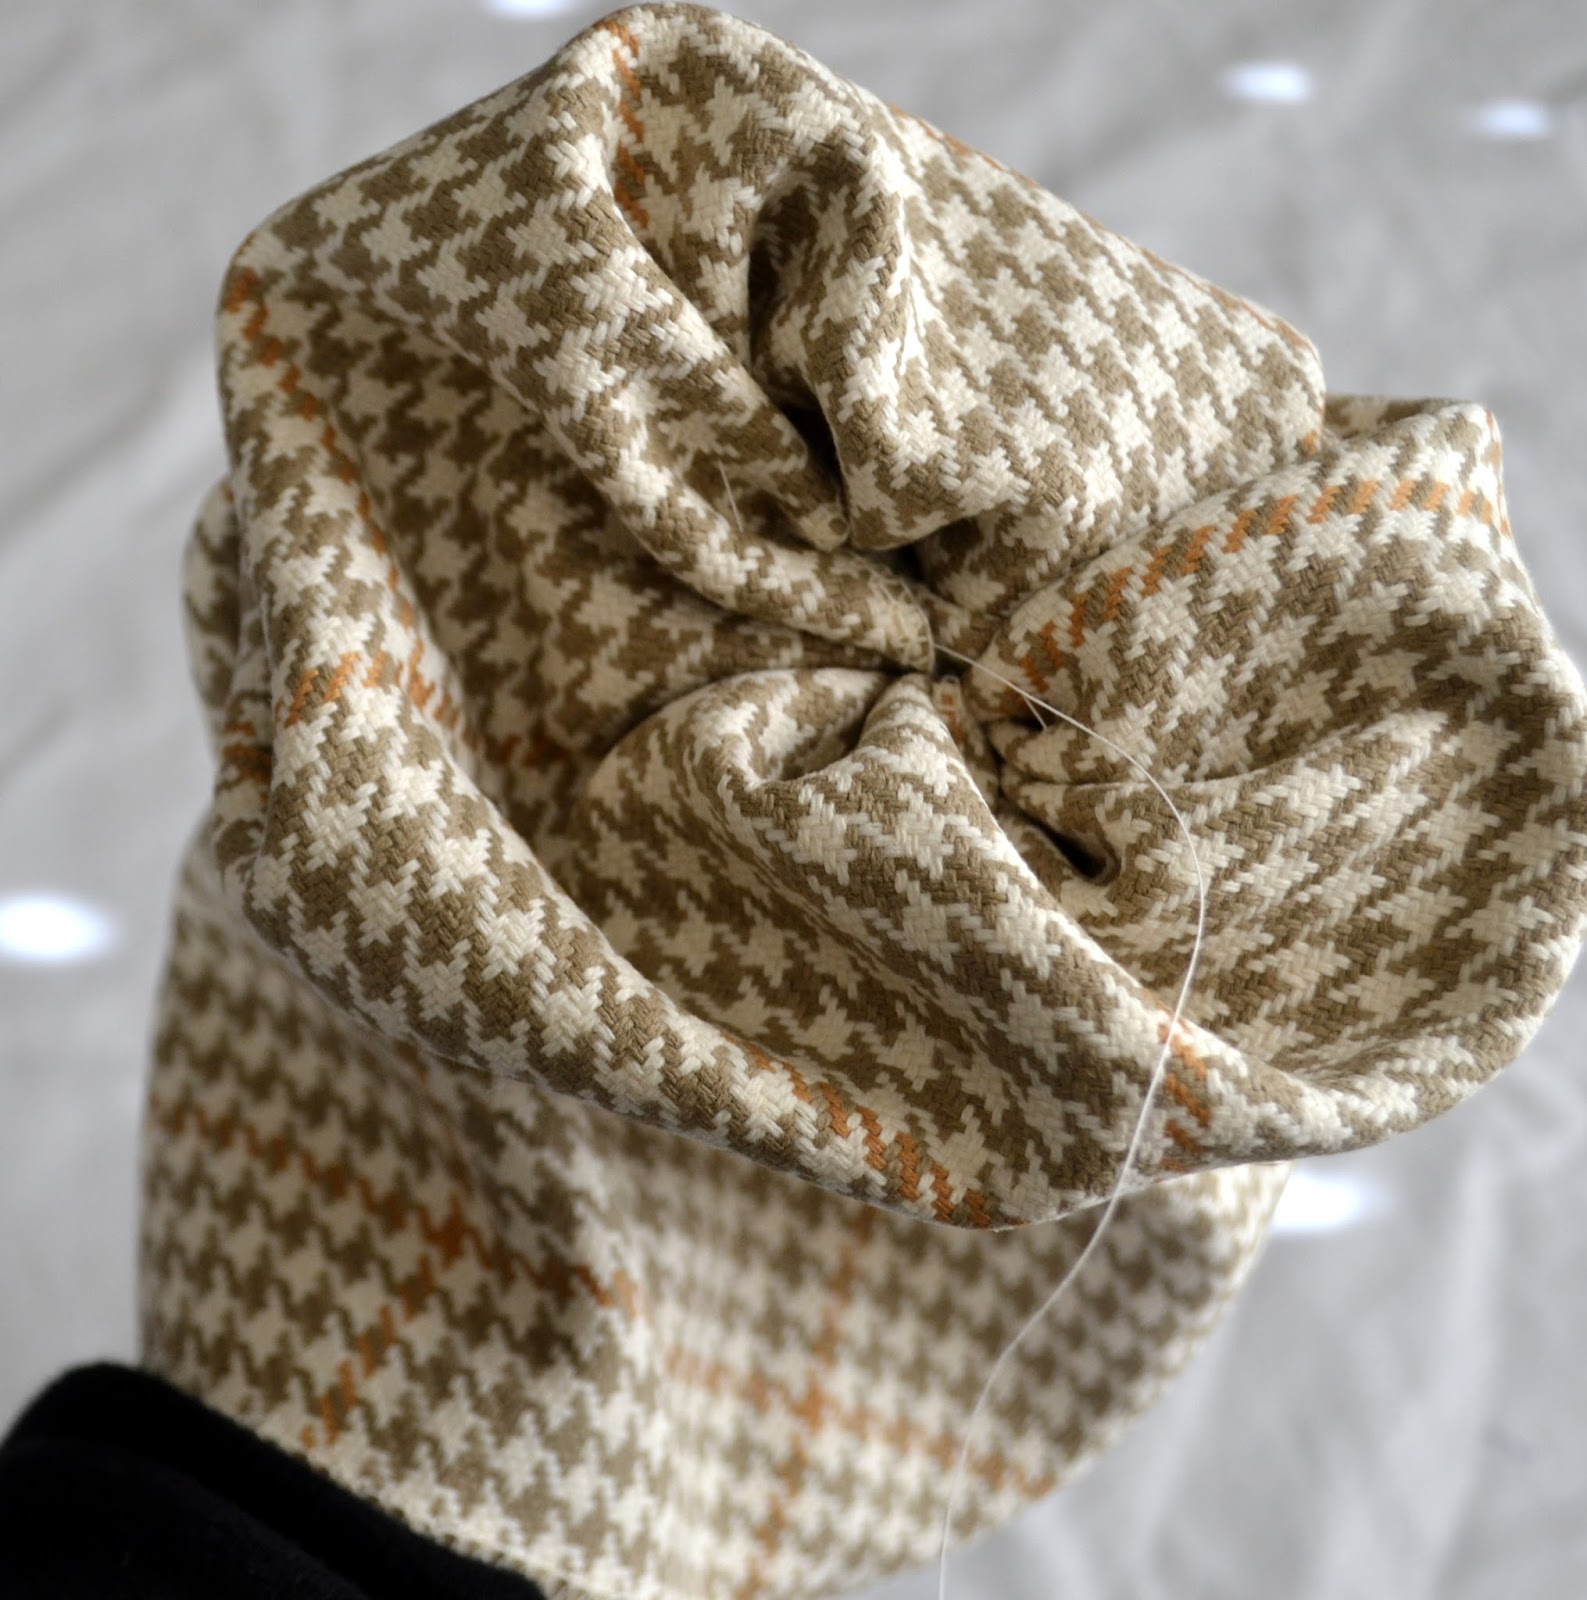
Once you sew all the way around the bottom gently pull your thread gathering the ends of your fabric.
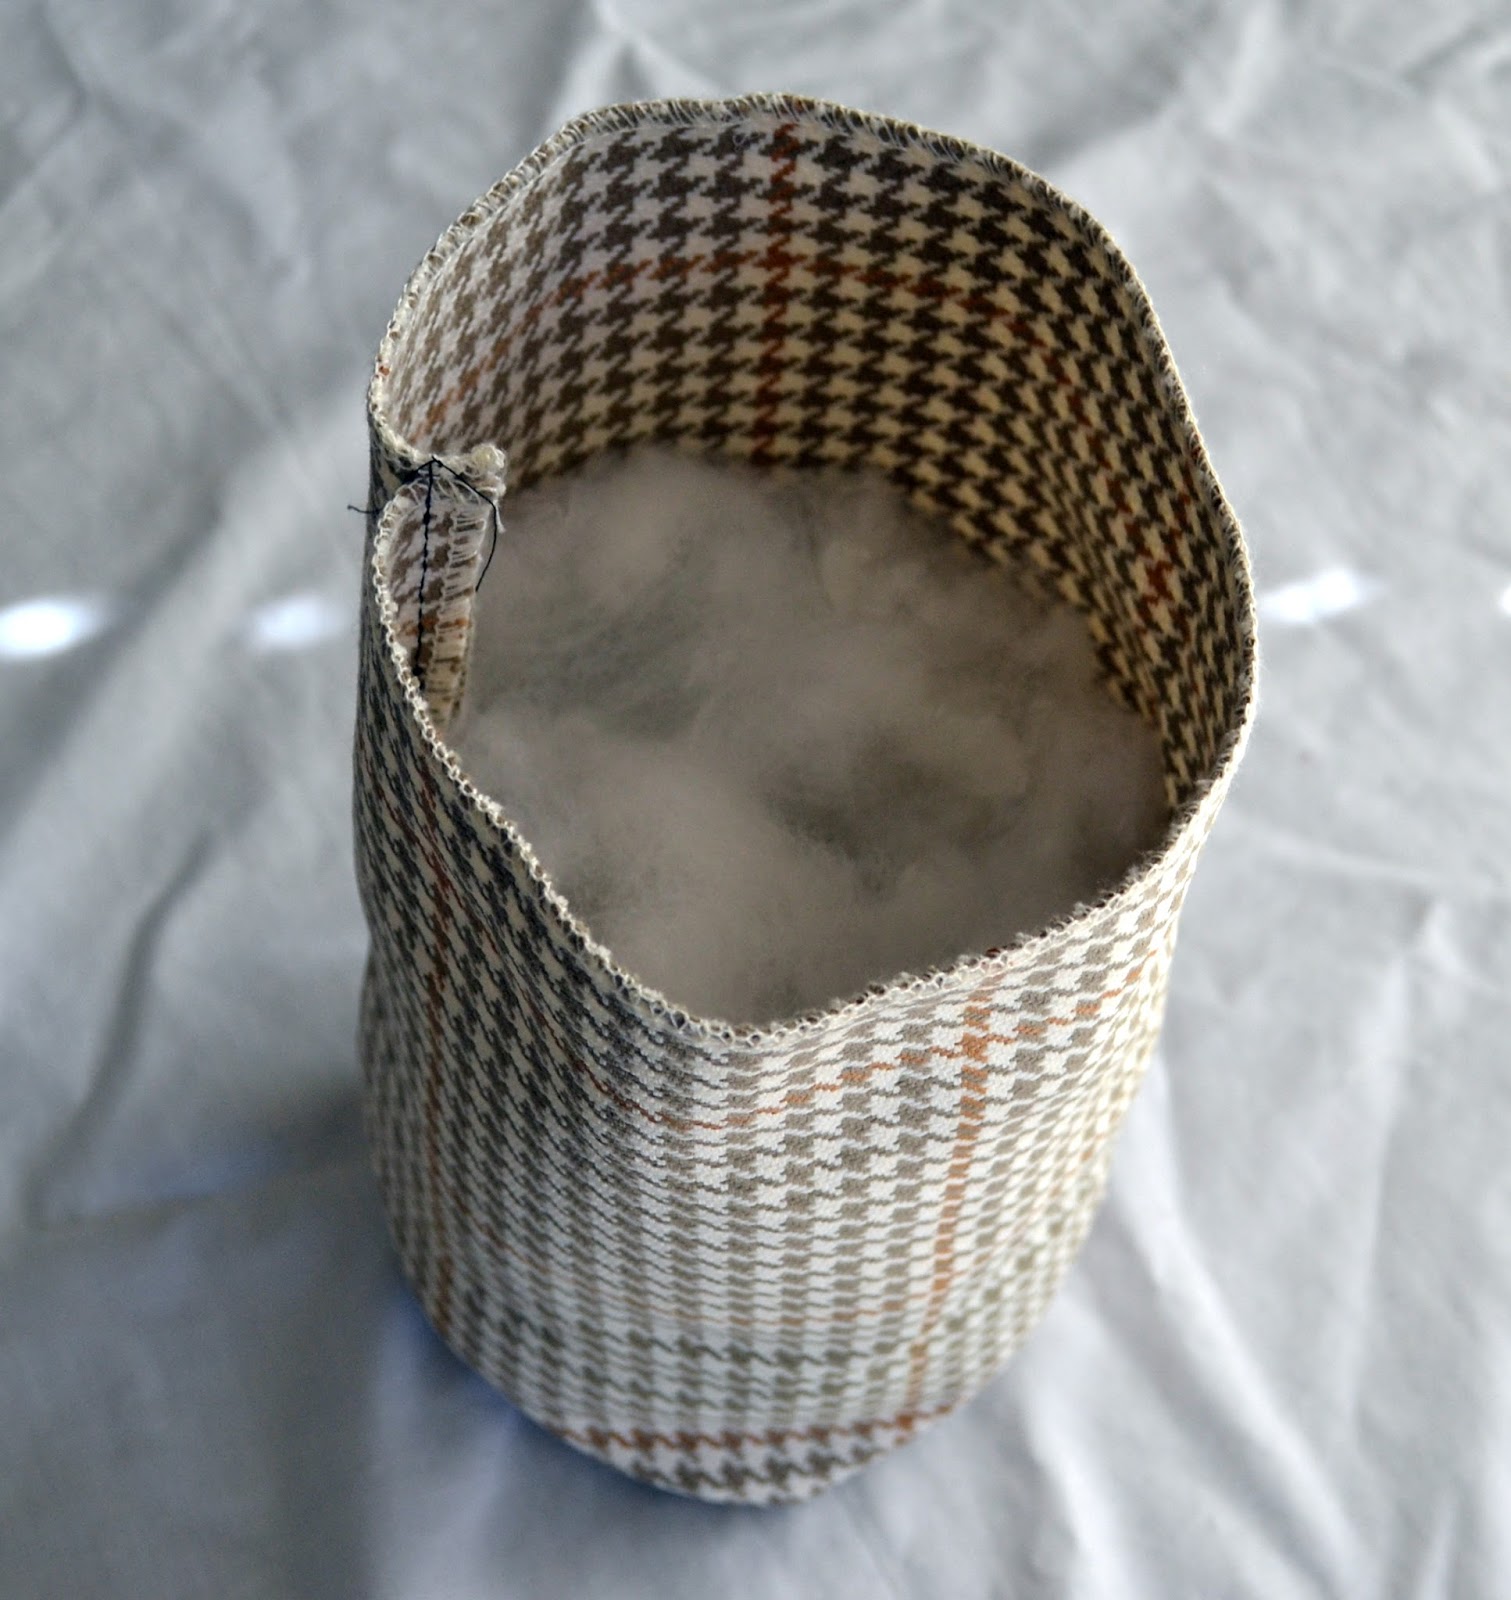
From the inside of your pumpkin reach down to the base and pull the unfinished ends into the inside of the pumpkin and with your leftover thread stitch the ends together on the inside.
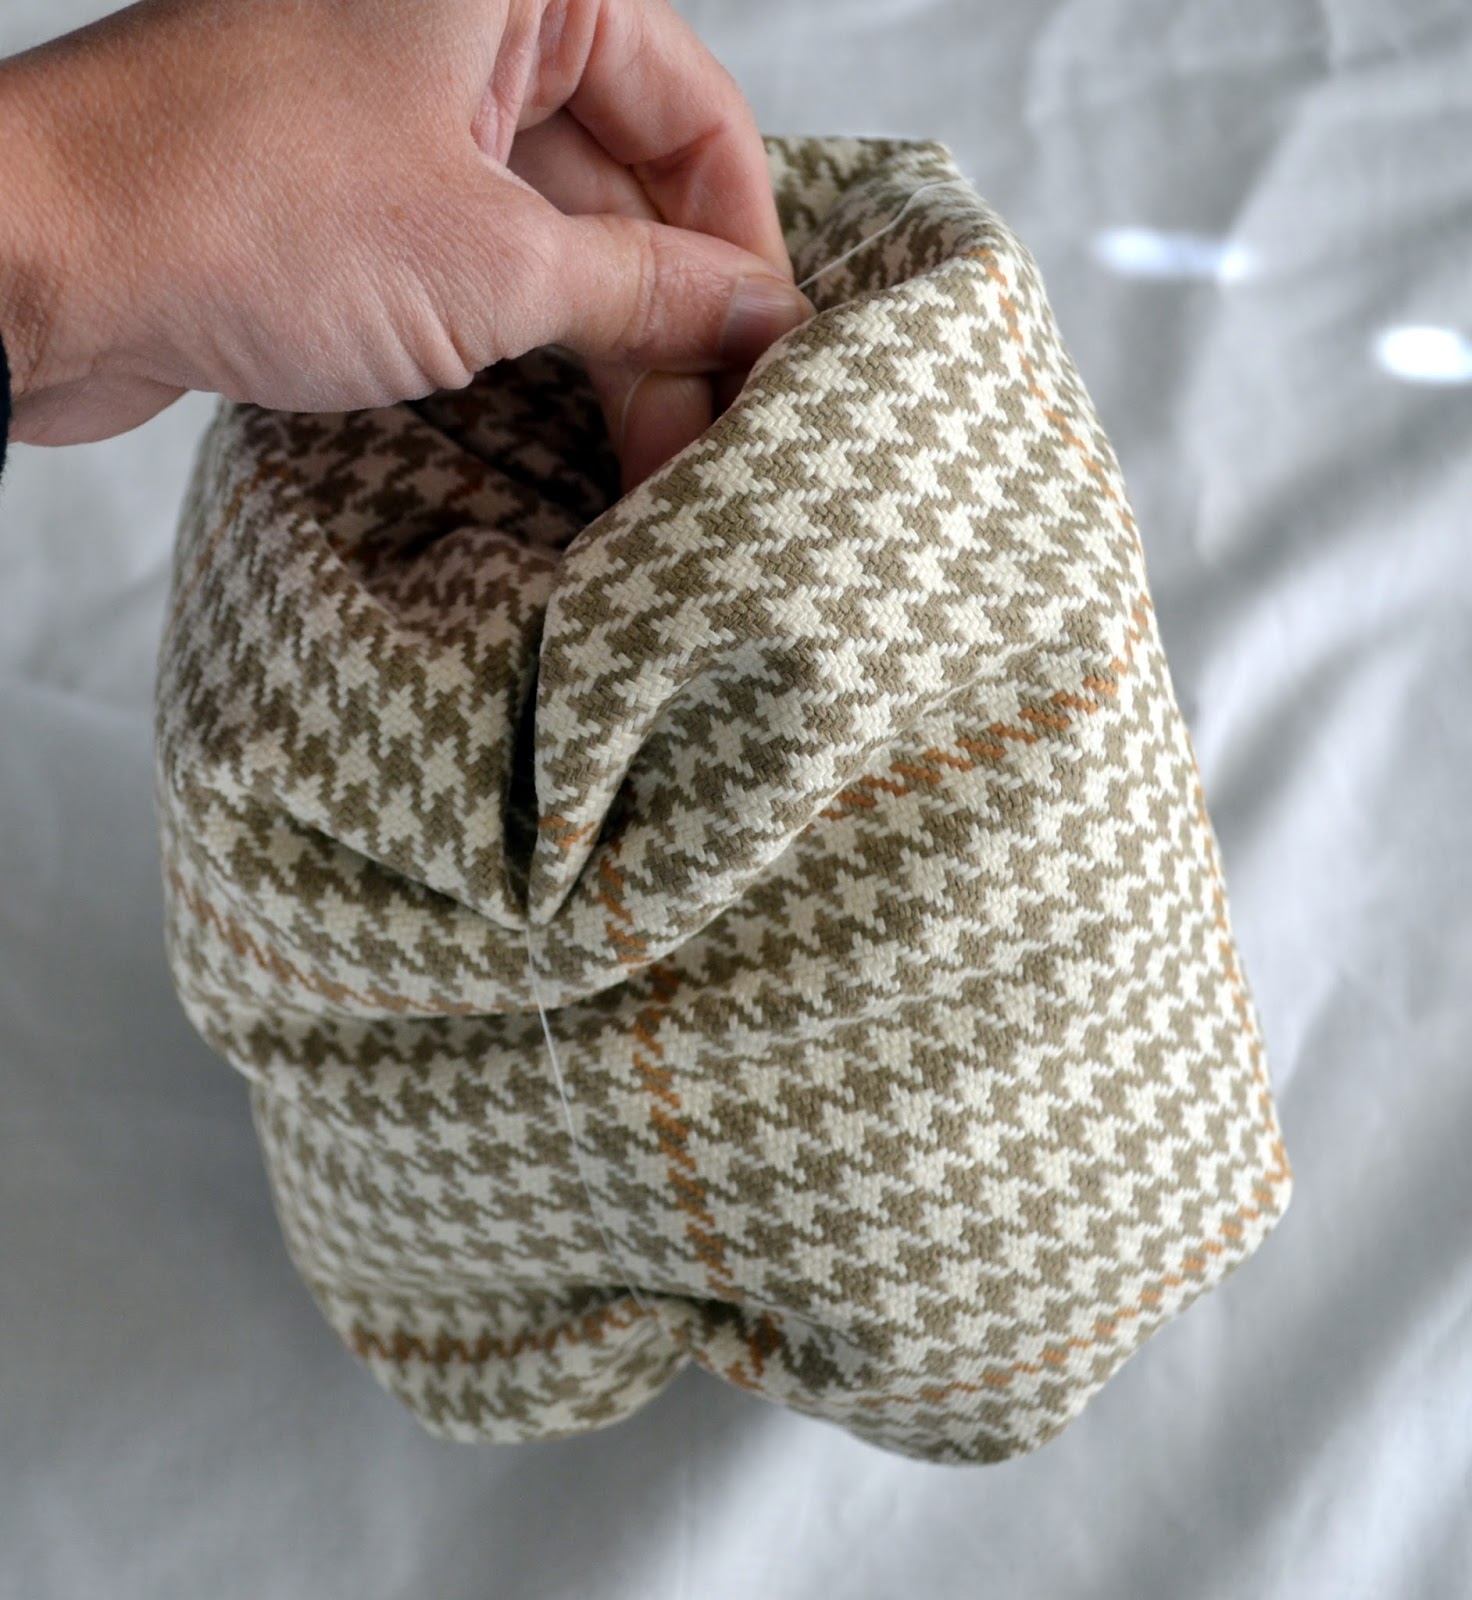
Fill your fabric tube with stuffing and repeat the same process on the top of your pumpkin that you did on the bottom. This time, use an even longer piece of thread since you will be making the pumpkin segments with it.
Once your top is gathered squish together your pumpkin and push your needle and thread all the way through the bottom. Once it goes through the bottom pull it up through the top. Repeat this process as you make the various segments on your pumpkin.
Finish the end by knotting it.
Add a twig through the top for a stem.
They aren't perfect, but they are fun don't you think?!
Monday, September 29, 2014
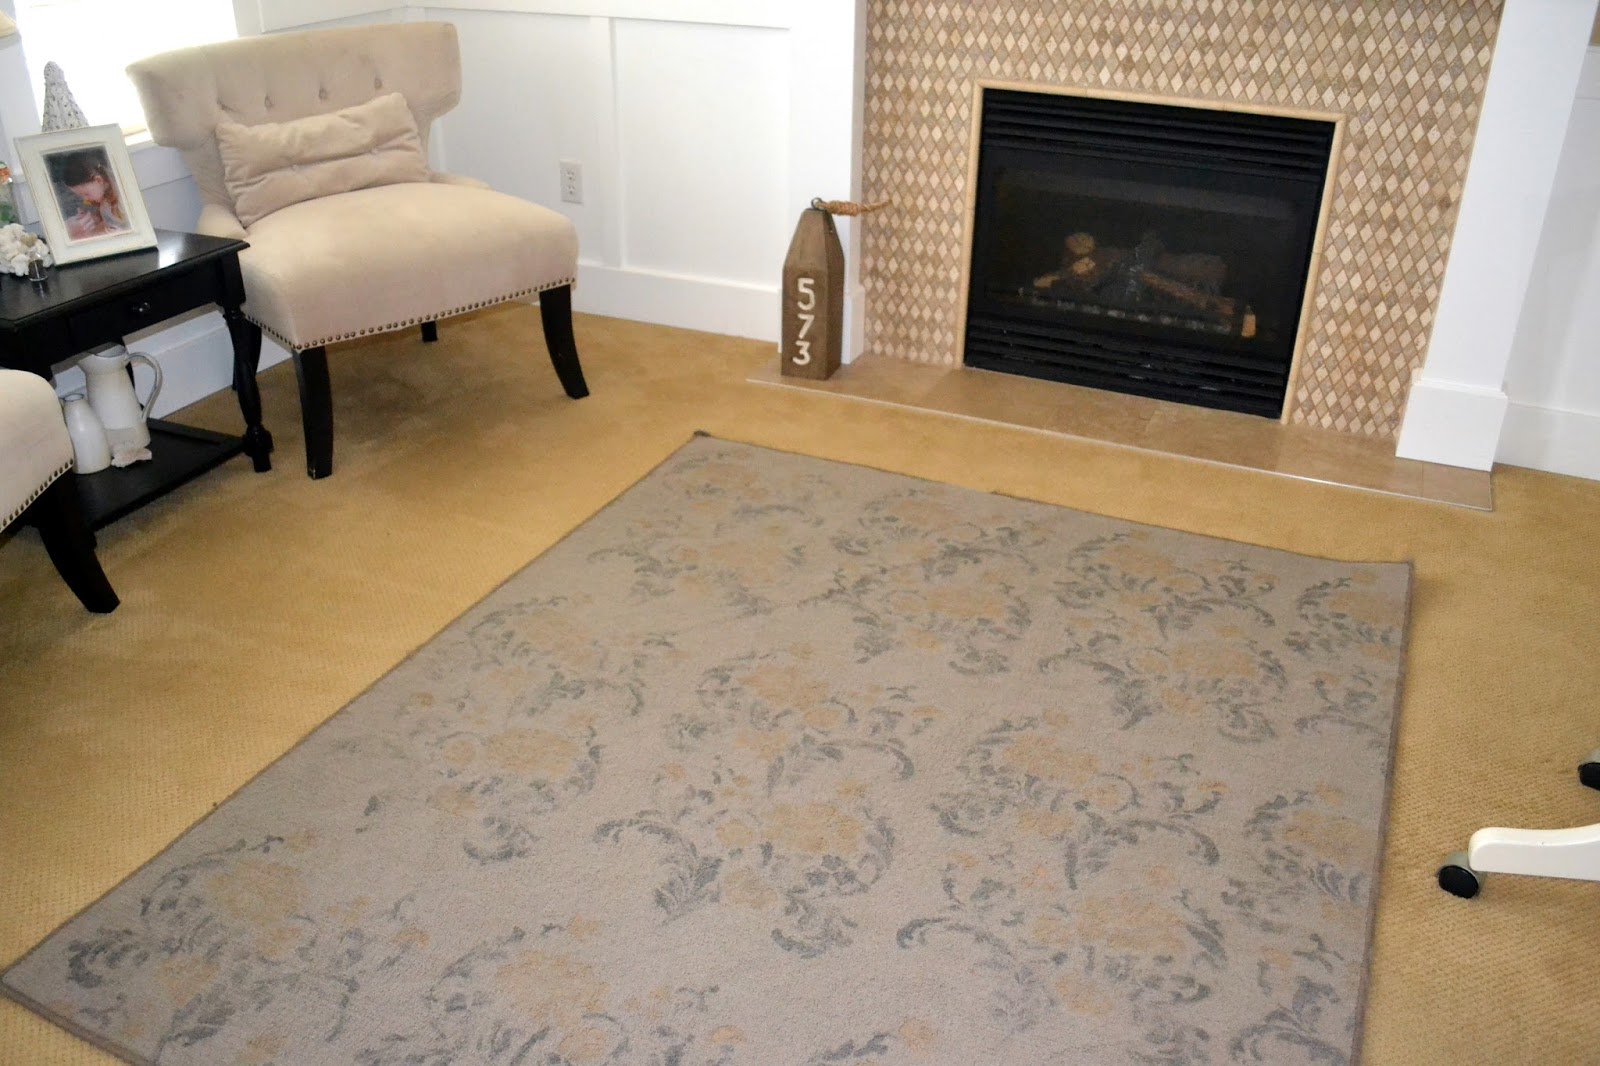
Stenciled $10 rug update
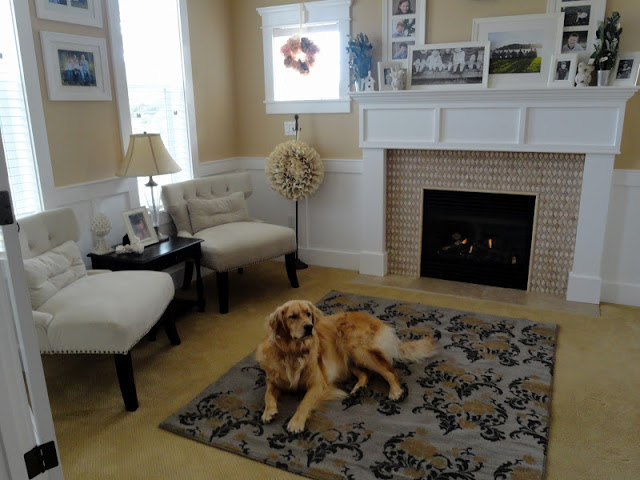
I'm happy to report that while the rug has faded, it has held up remarkably well.
The room that the rug is in receives the most light and is one of the highest traffic spots in the whole house.
The stenciled rug is by far one of my favorite projects to date.
Subscribe to:
Posts (Atom)