
Showing posts with label sewing. Show all posts
Showing posts with label sewing. Show all posts
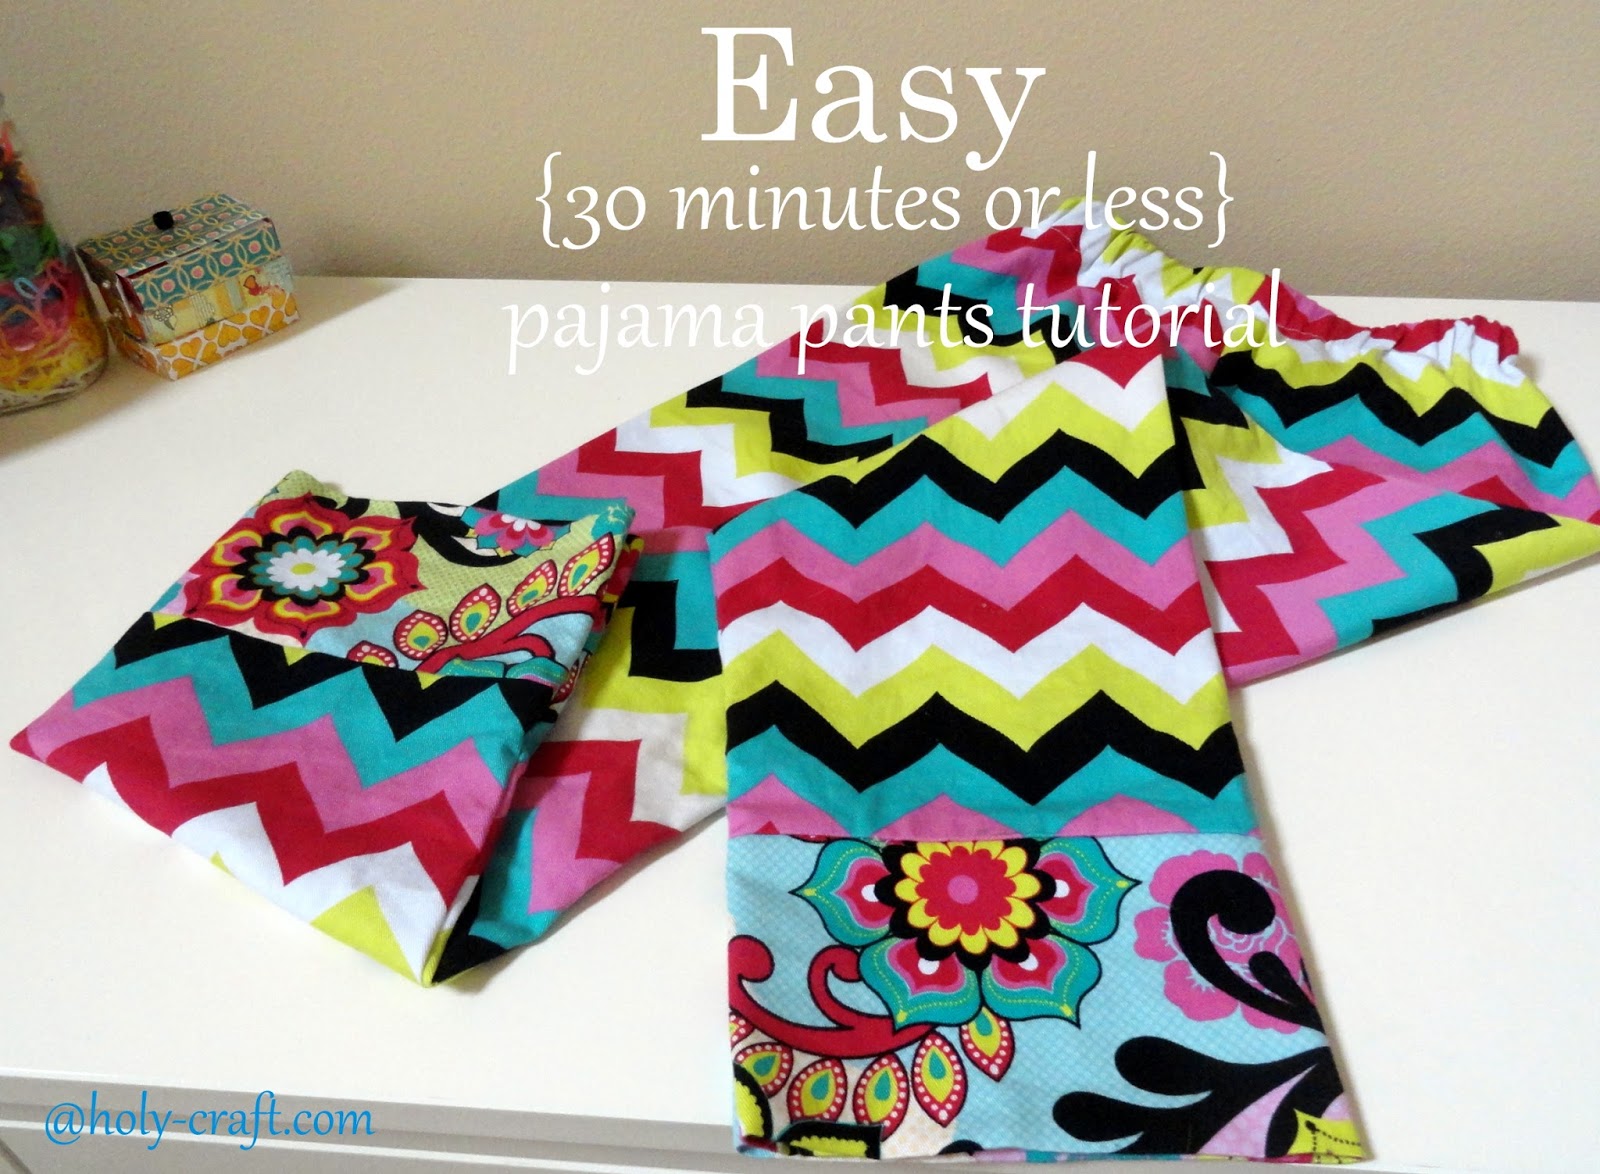
Wednesday, January 13, 2016
Easy to sew, easy to give beginners pajama pant kit with free downloadable directions file

Monday, October 5, 2015
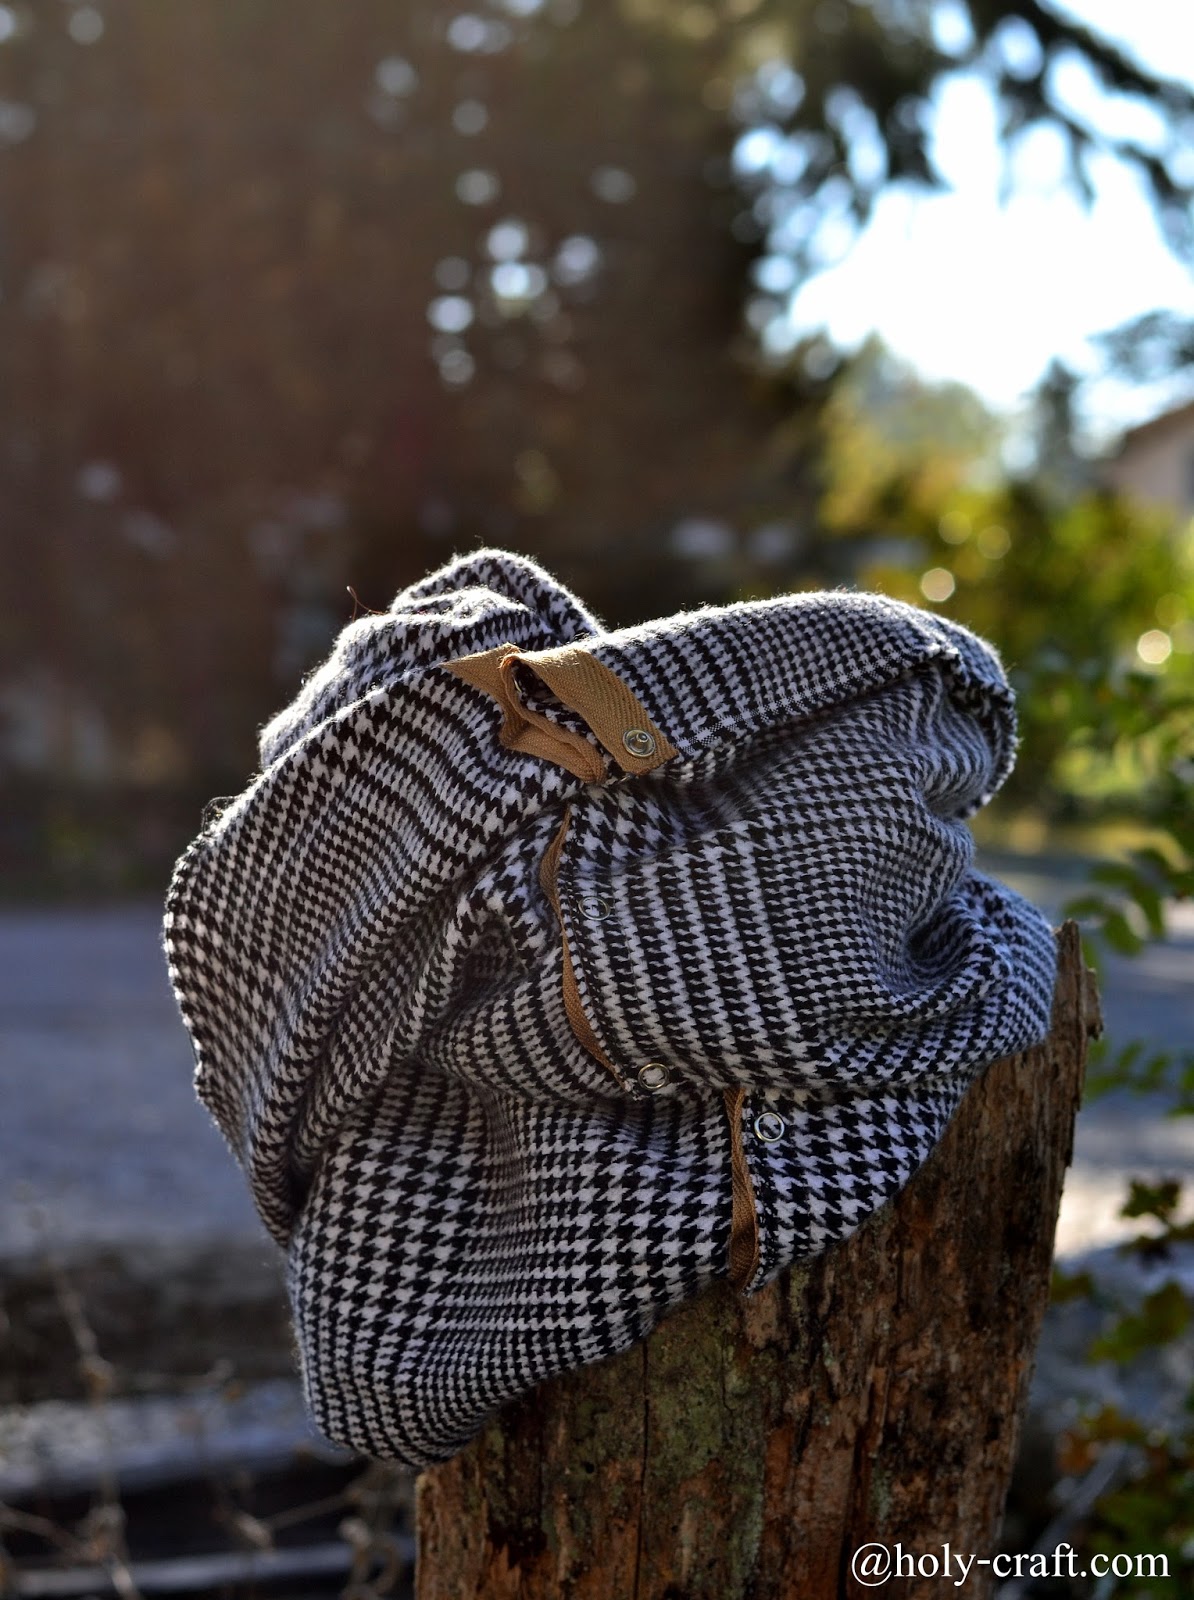
DIY infinity scarf with snaps--a Lululemon vinyasa scarf knockoff tutorial
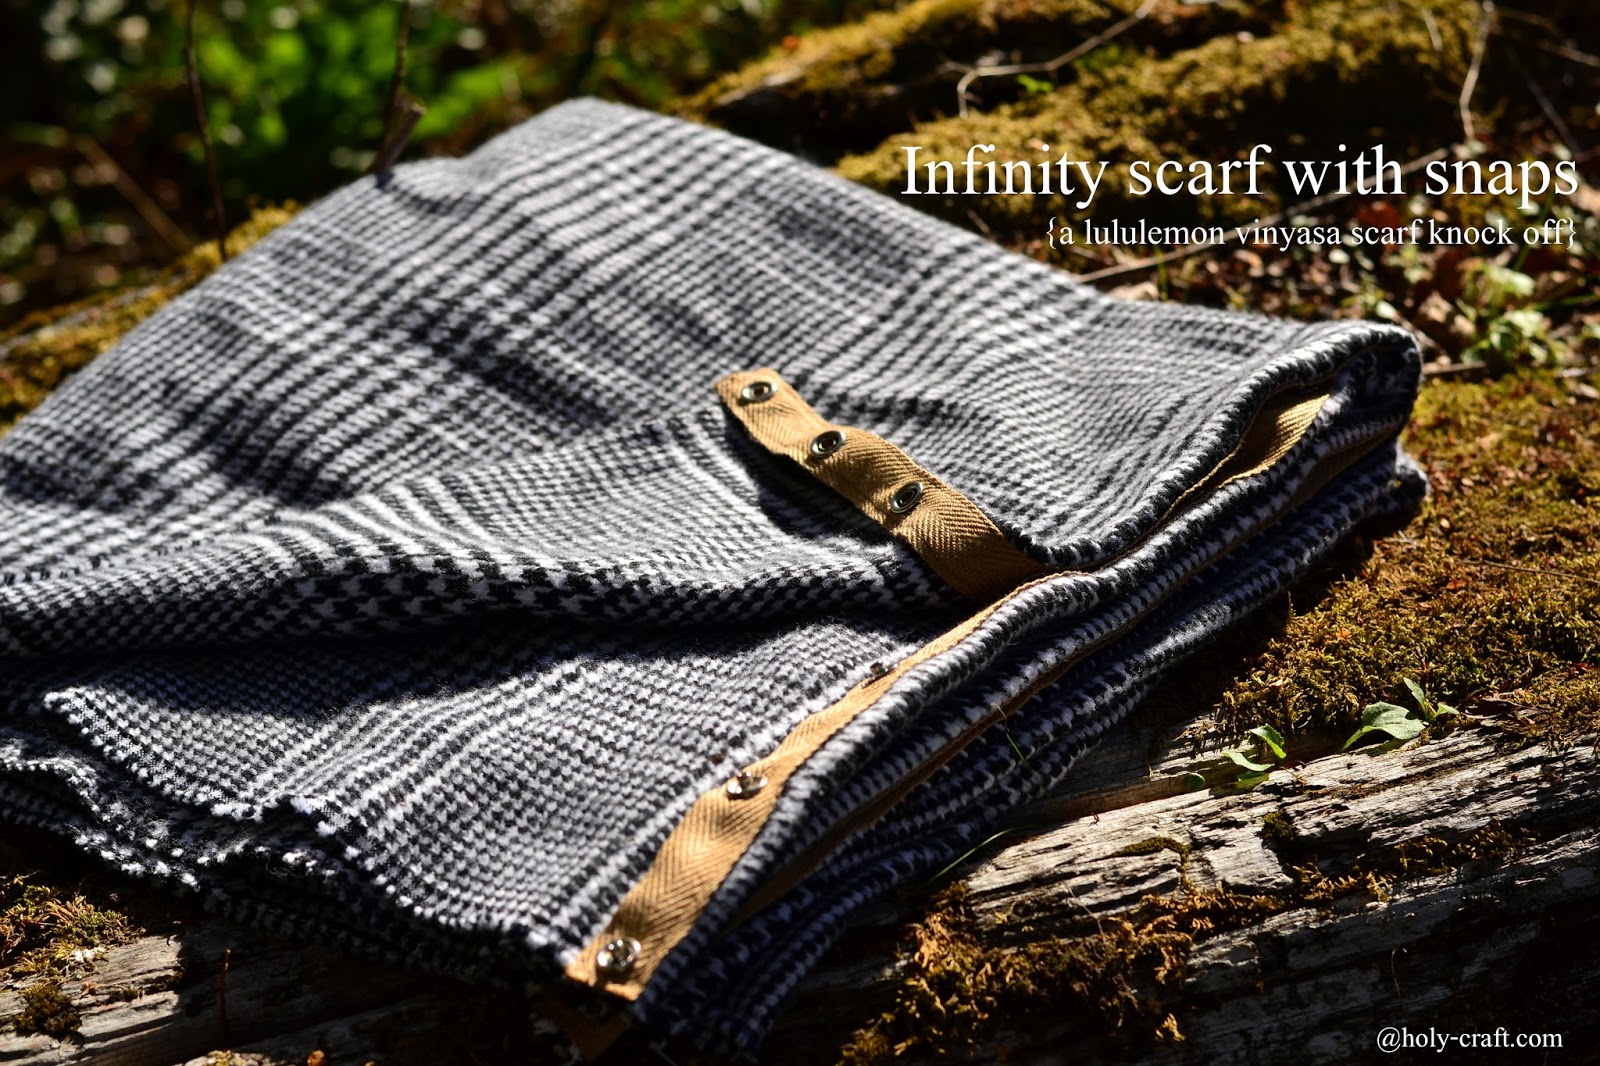
It's fall. My least favorite time of the year. Don't get me wrong, I totally understand why the rest of you love it. I used to love it too when I lived in the Midwest, but now as a pacific northwest transplant, fall marks the start of our rainy season and nine long months of doom and gloom. But I digress.
Fall means cooler weather, dressing in layers and scarves. Lots of scarves! One of my favorite scarves of all time is the Lululemon Vinyasa scarf. I received it last Christmas as a gift and love the tutorial on how to wear it 10 ways, though I really only wear it one or two of those ways most of the time.
I'm too cheap to buy another at the $48 price tag so I used my current scarf as a guide to sew a knockoff that I love.
Monday, August 24, 2015
Three different ways to create the perfect pair of jeans. Tutorial on how to make skinny jeans, dye your jeans and hem jeans with the original hem
Wednesday, March 4, 2015
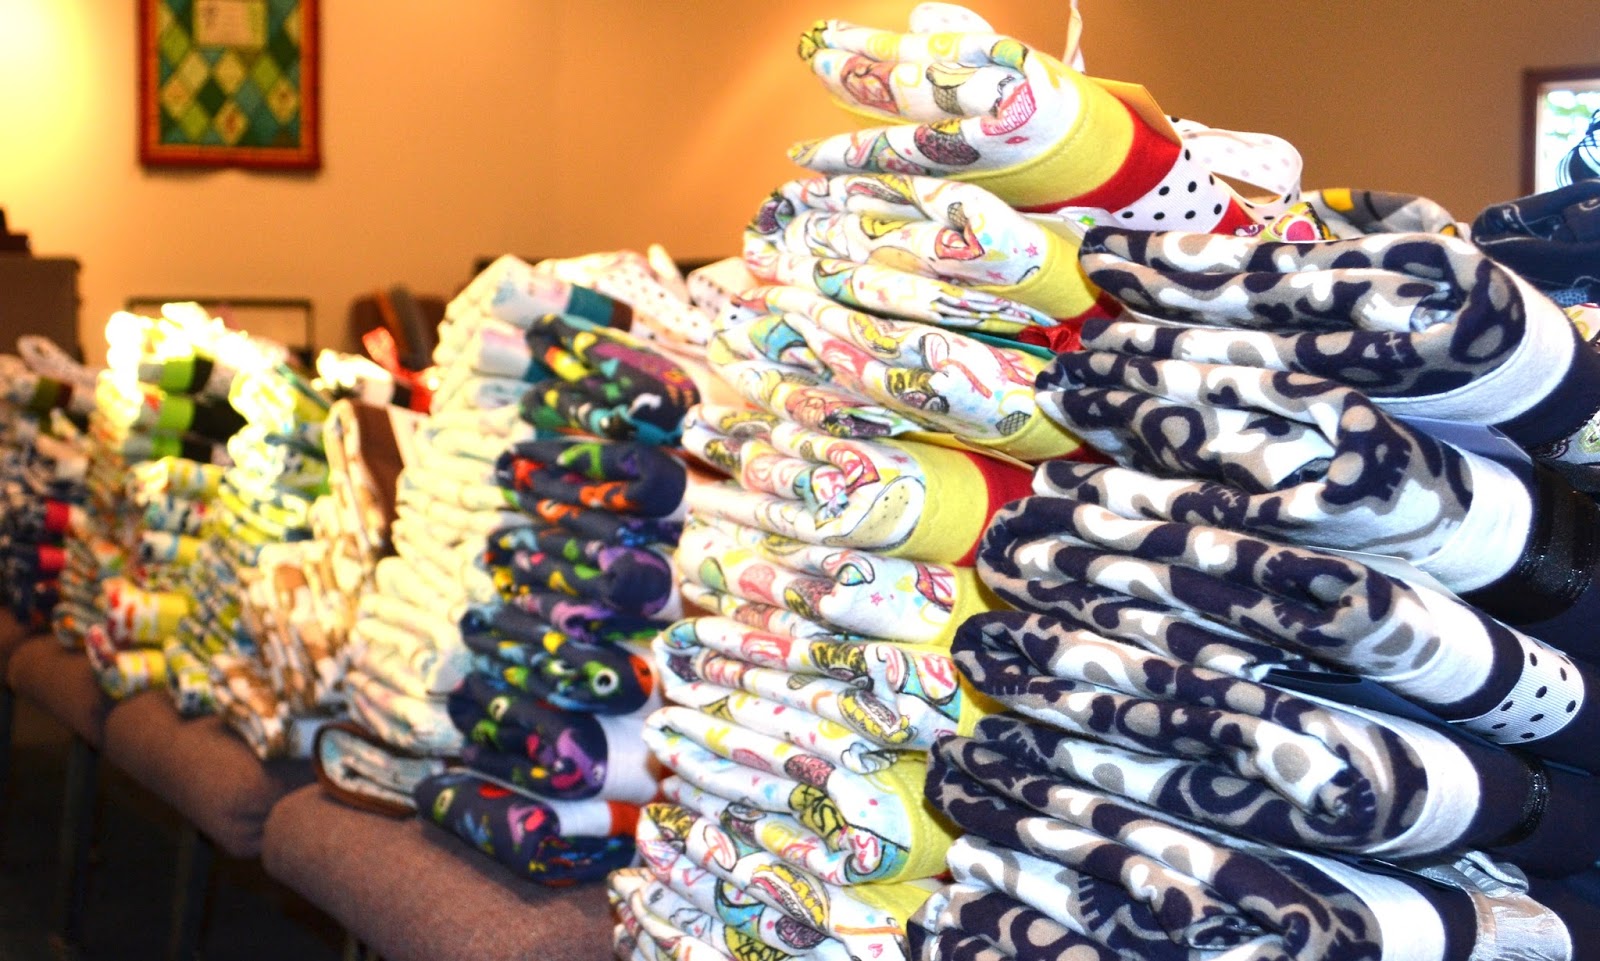
Sewing pillowcases for kids with cancer
That's it folks. Another Paula's Pillowcase Day in the books. This year marks seven years of my friend Paula gathering her friends and her friends friends from near and far to spend a weekend cutting, sewing and wrapping up handmade fleece pillowcases for kids with cancer.
Paula's son was diagnosed nearly ten years ago with a rare form of cancer called Sarcoma. While he was in the hospital getting treatment they realized how uncomfortable the pillowcases were on bald Chemo heads. A handmade pillowcase that was a gift from a friend became a treasured item and Paula's Pillowcase Project was born.
Wednesday, April 30, 2014
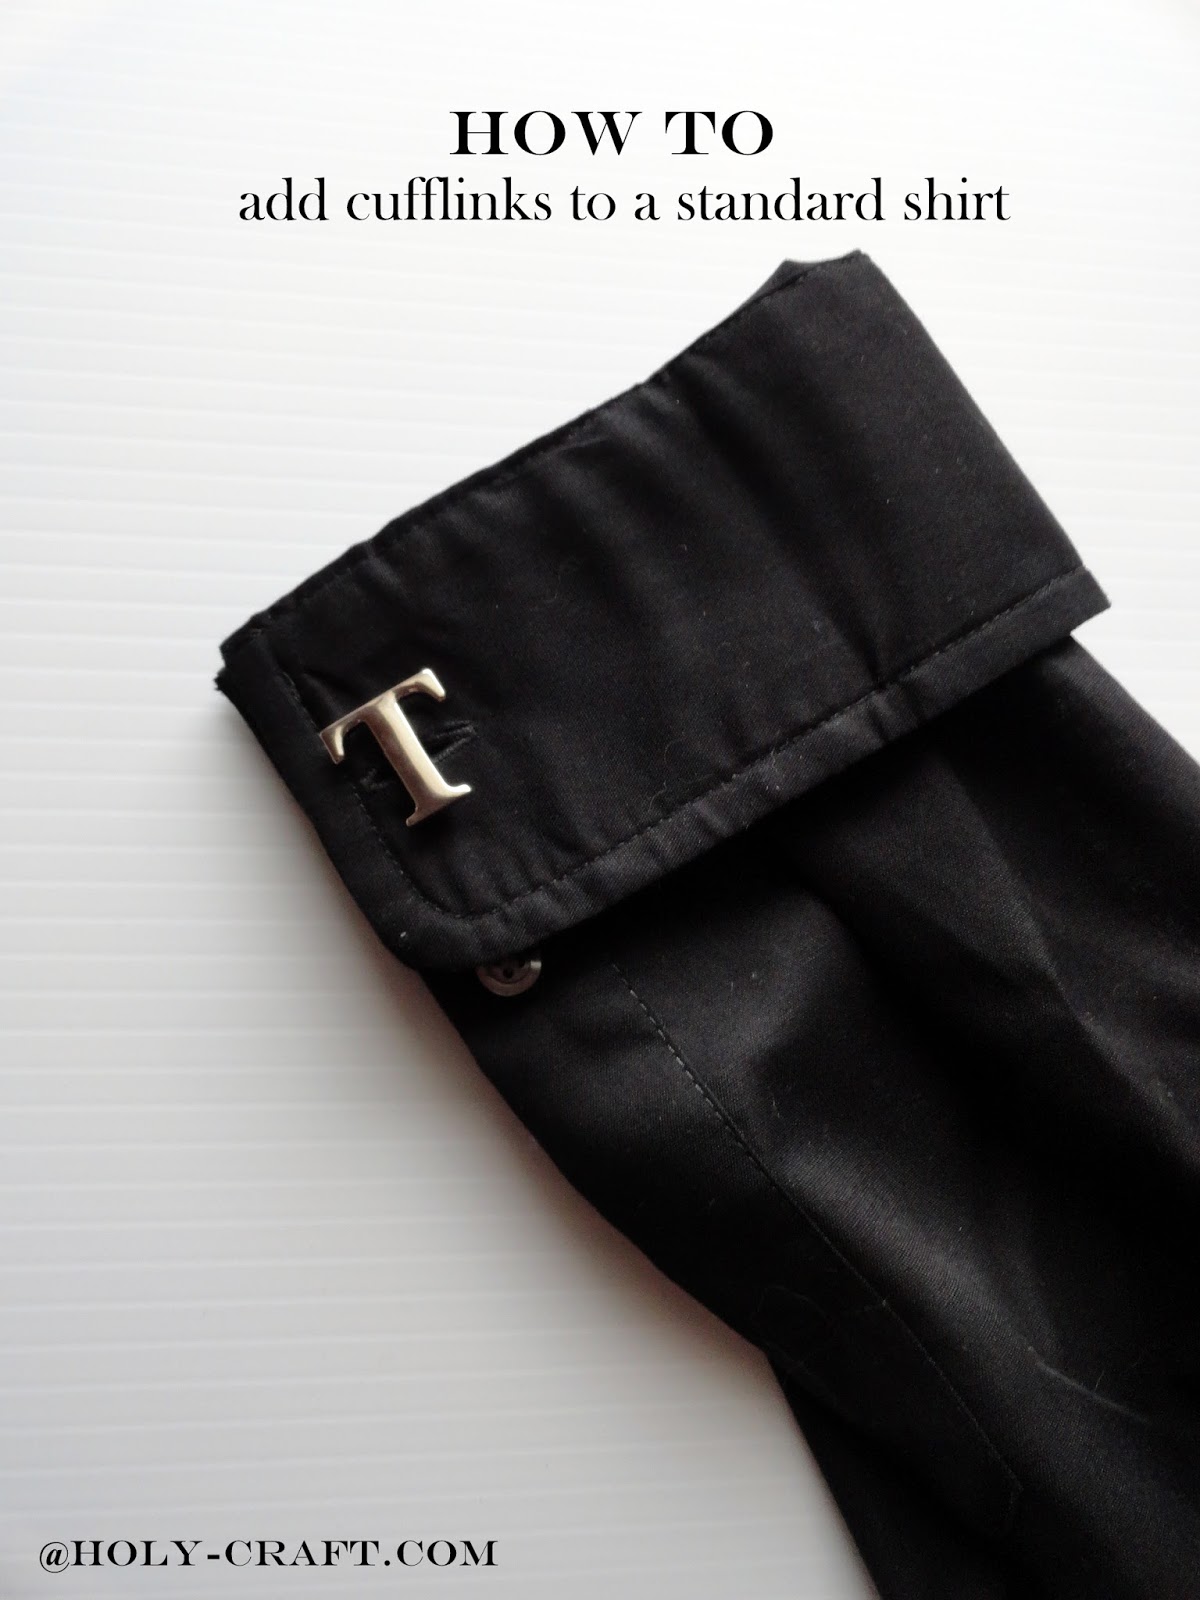
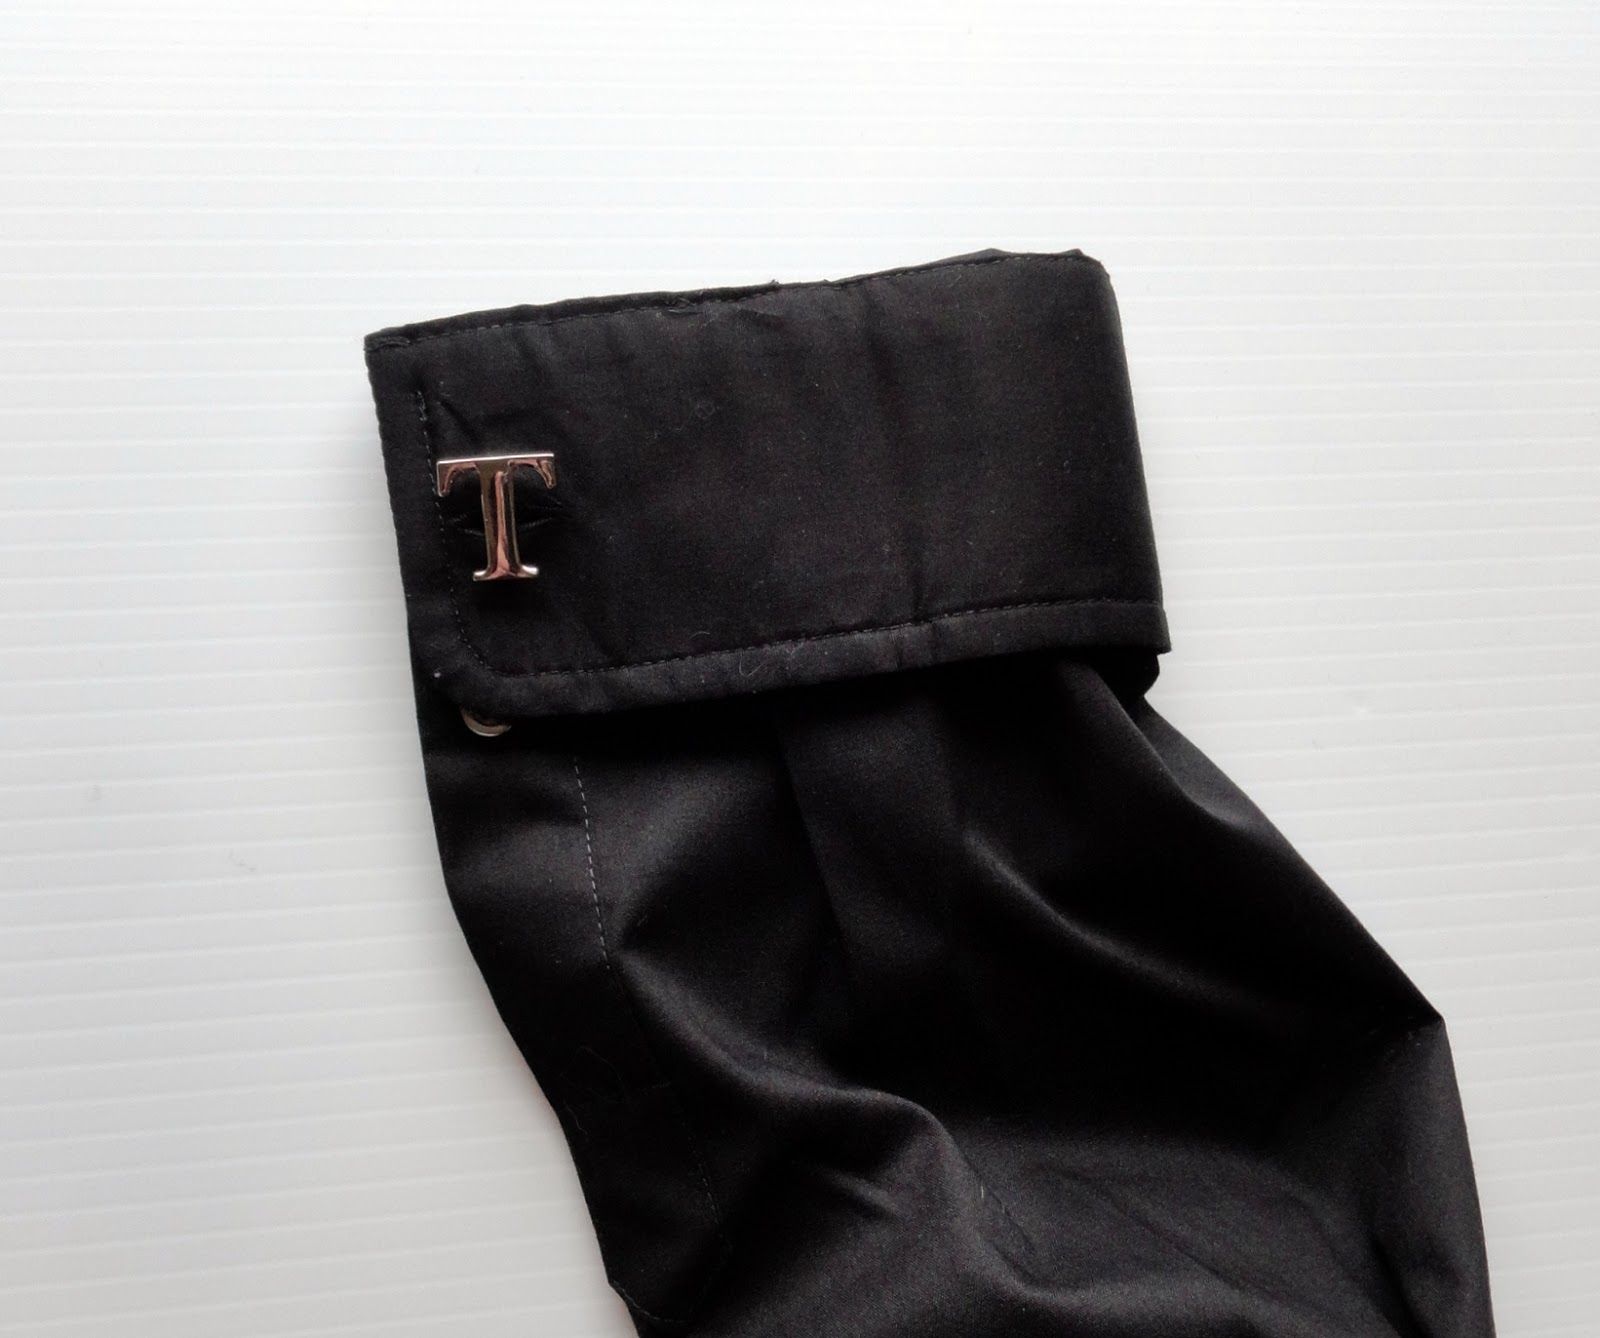
How to make a standard shirt cuff link ready
My oldest son is kind of a fan of dressing up.
He is a member of his High School FBLA team and recently went to the state competition {where you have to dress in full suit} and begged me to put cufflink holes in his standard shirt so that he could sport his cufflinks that he got for Christmas.
Apparently, shirts with cufflink holes are far more expensive then your run of the mill standard dress shirt.
Who knew?
And more expensive is just not my MO, so alas, I knew there was a way to do it on my own and save money.
Here's how I did it!
I started with my son's standard dress shirt.
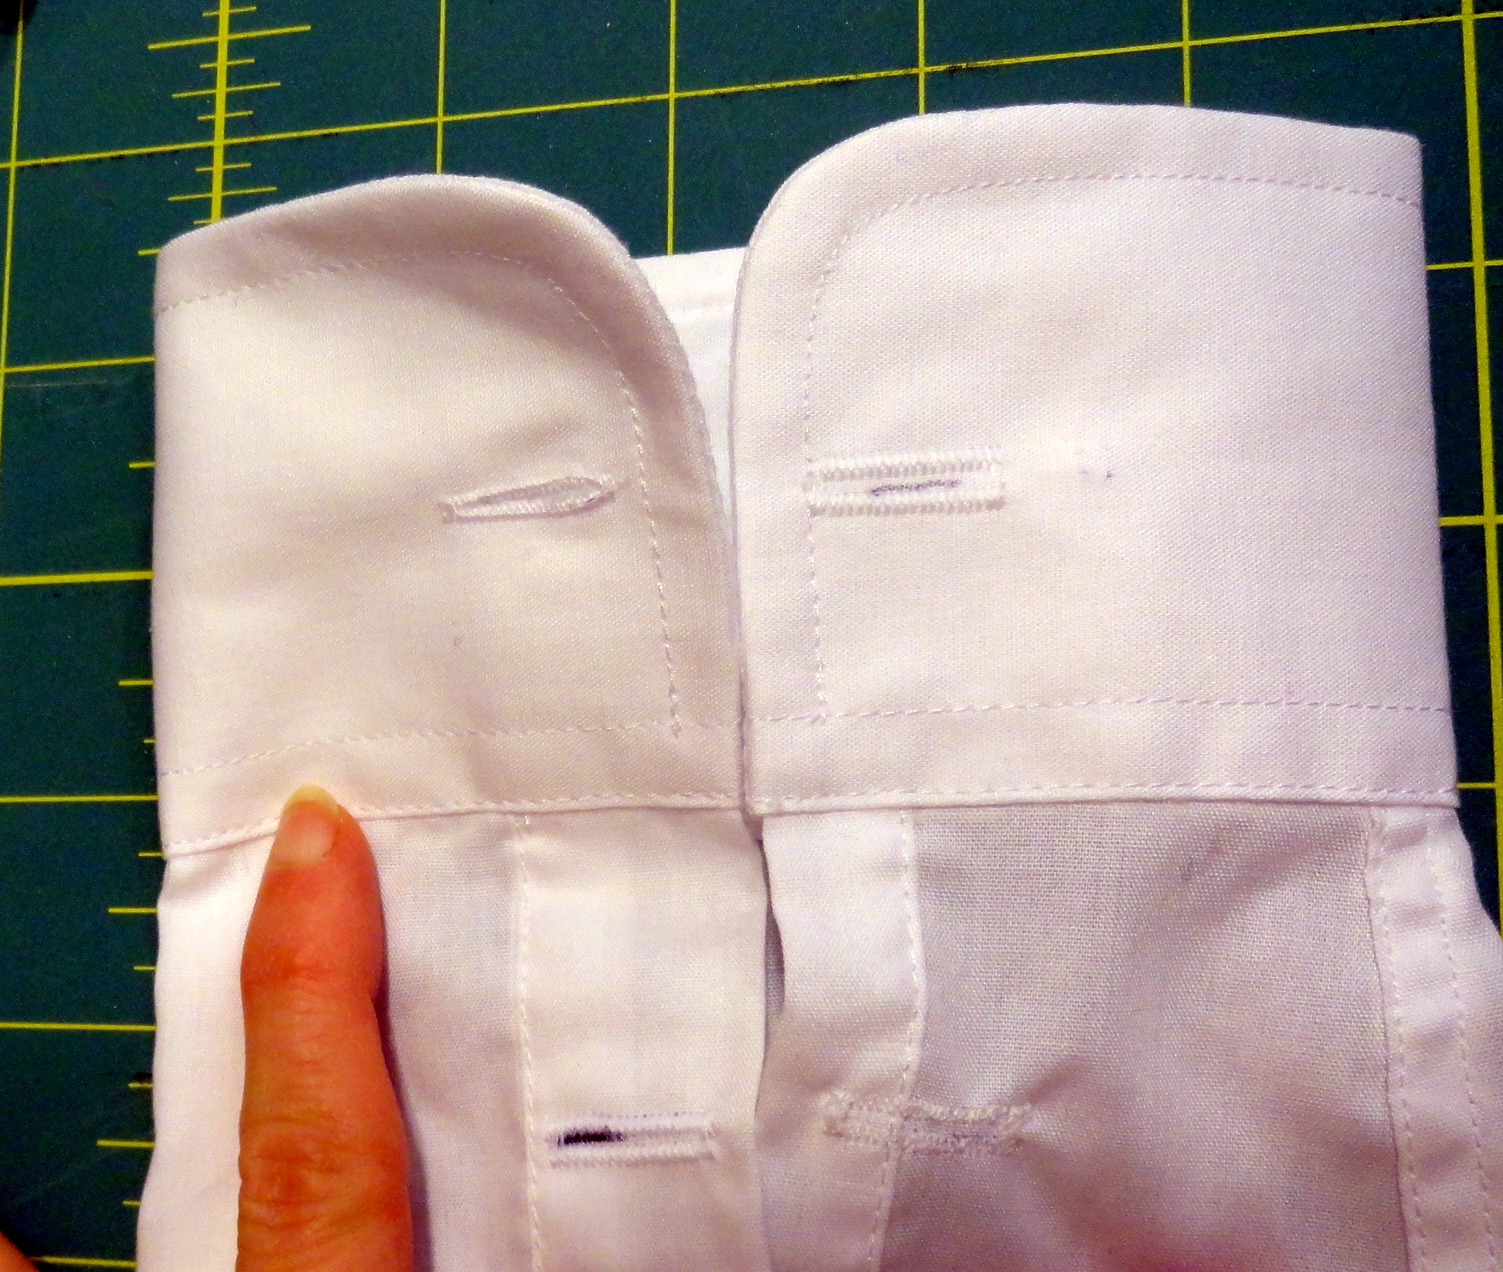
You know it's a standard dress shirt because of these two buttons on the cuff.
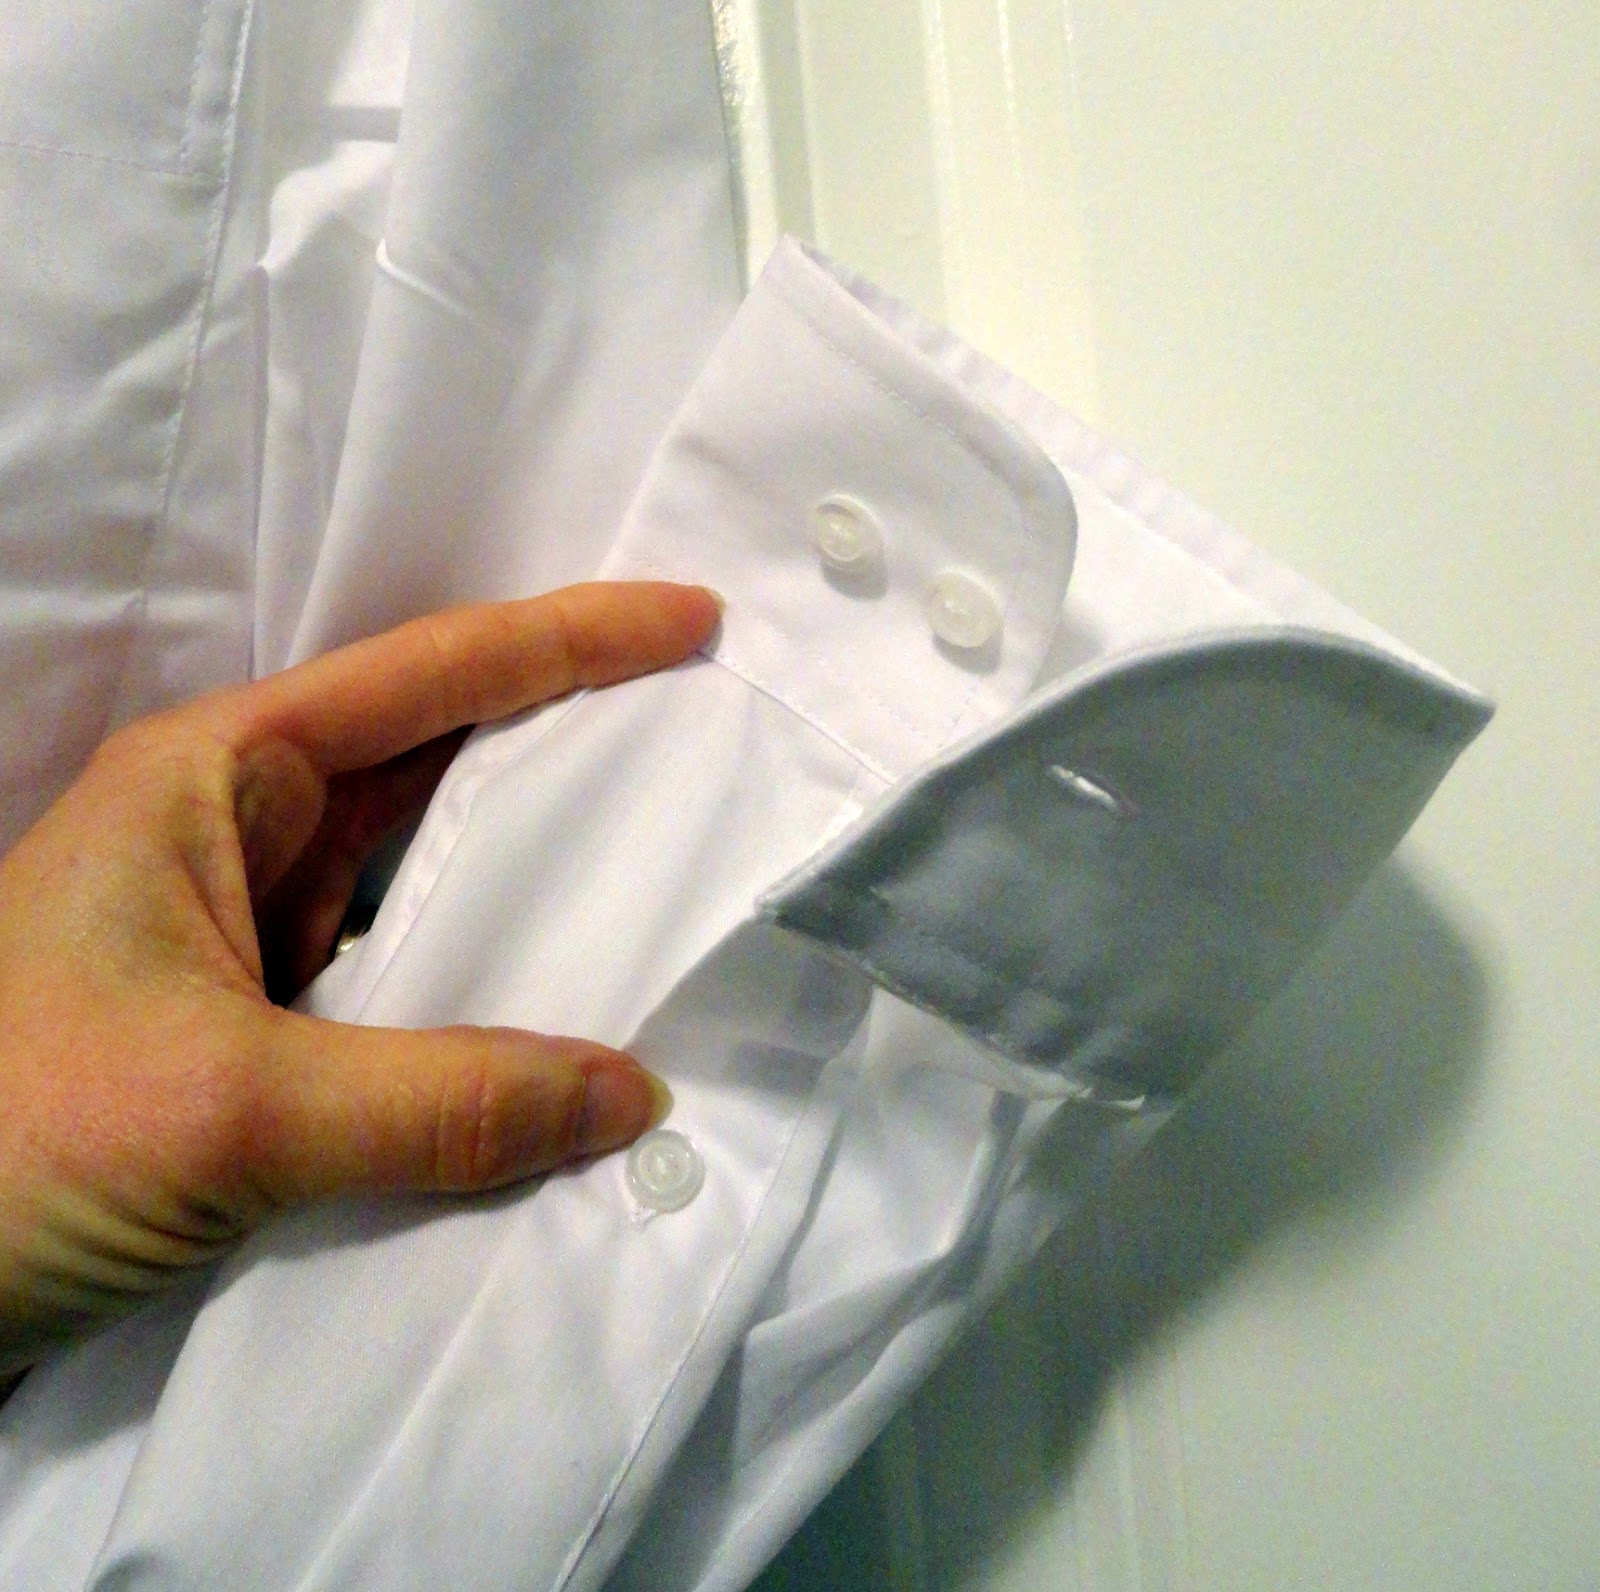
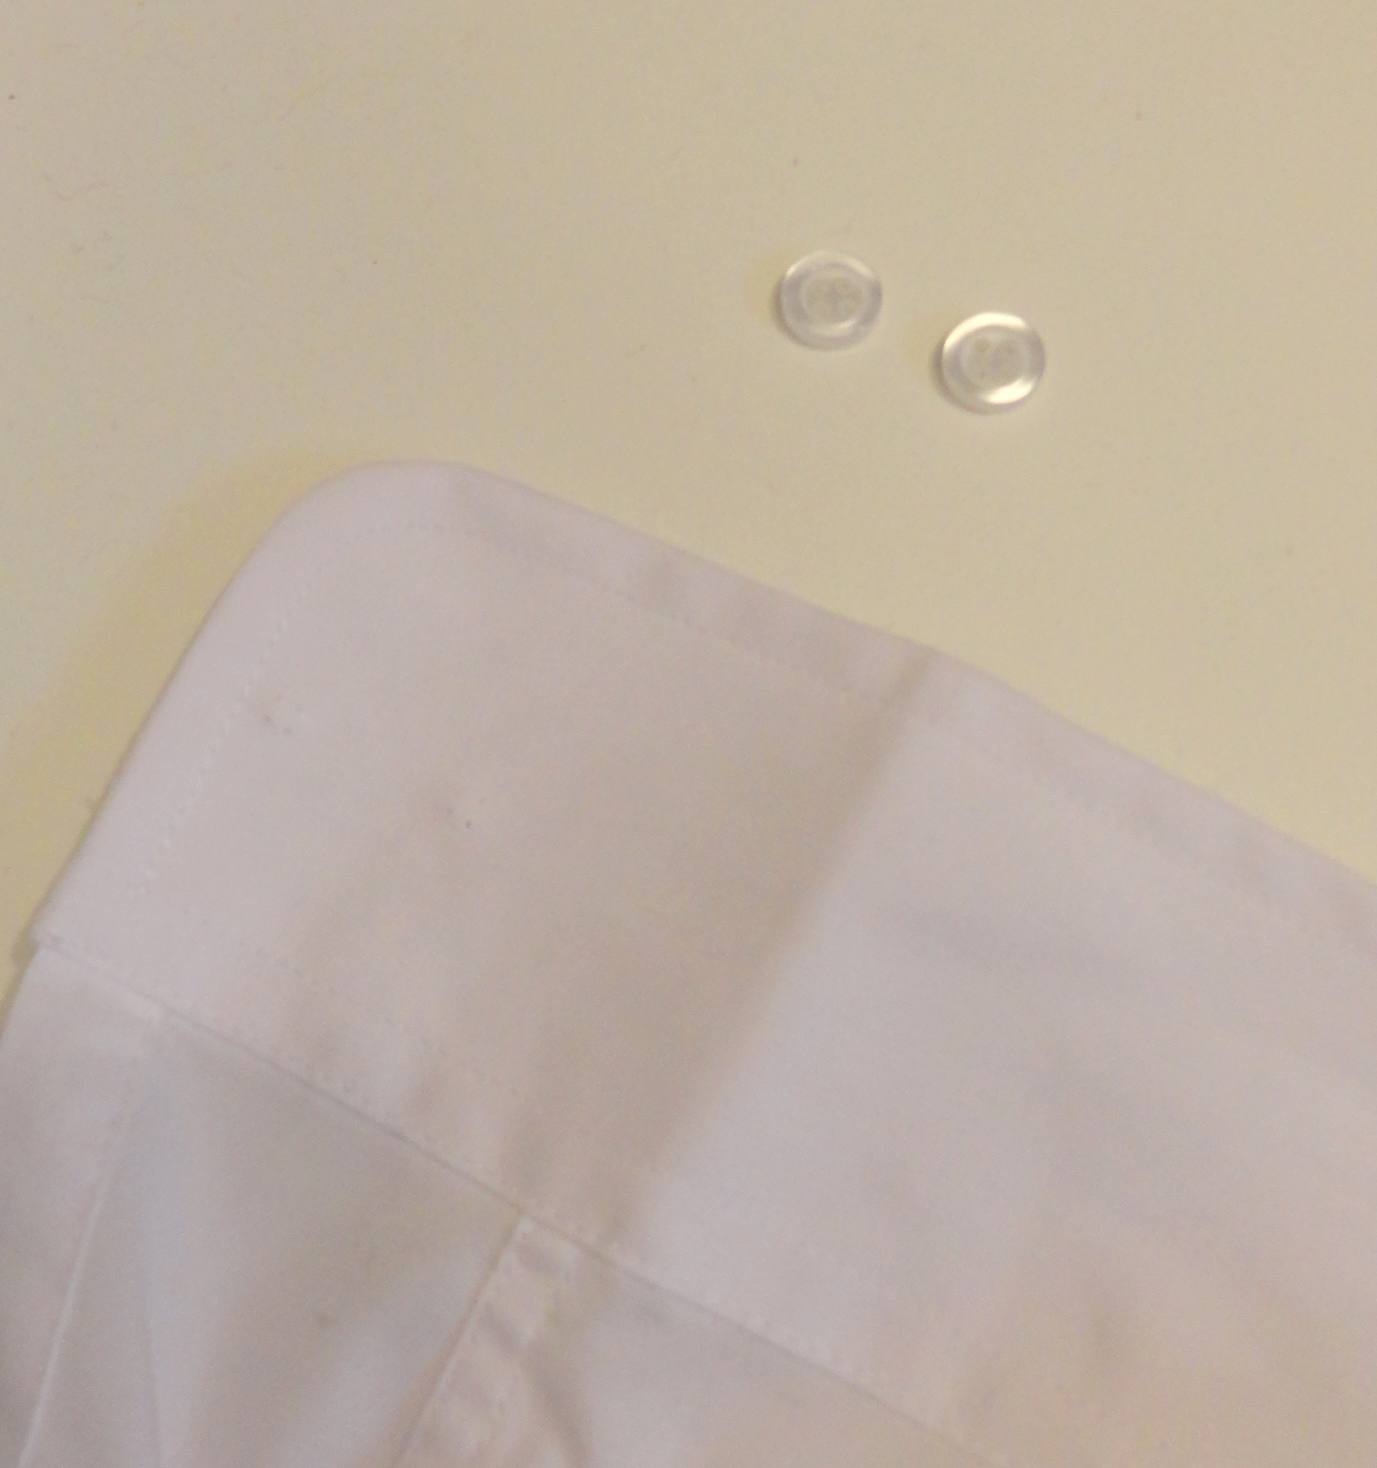
You want to remove the buttons.
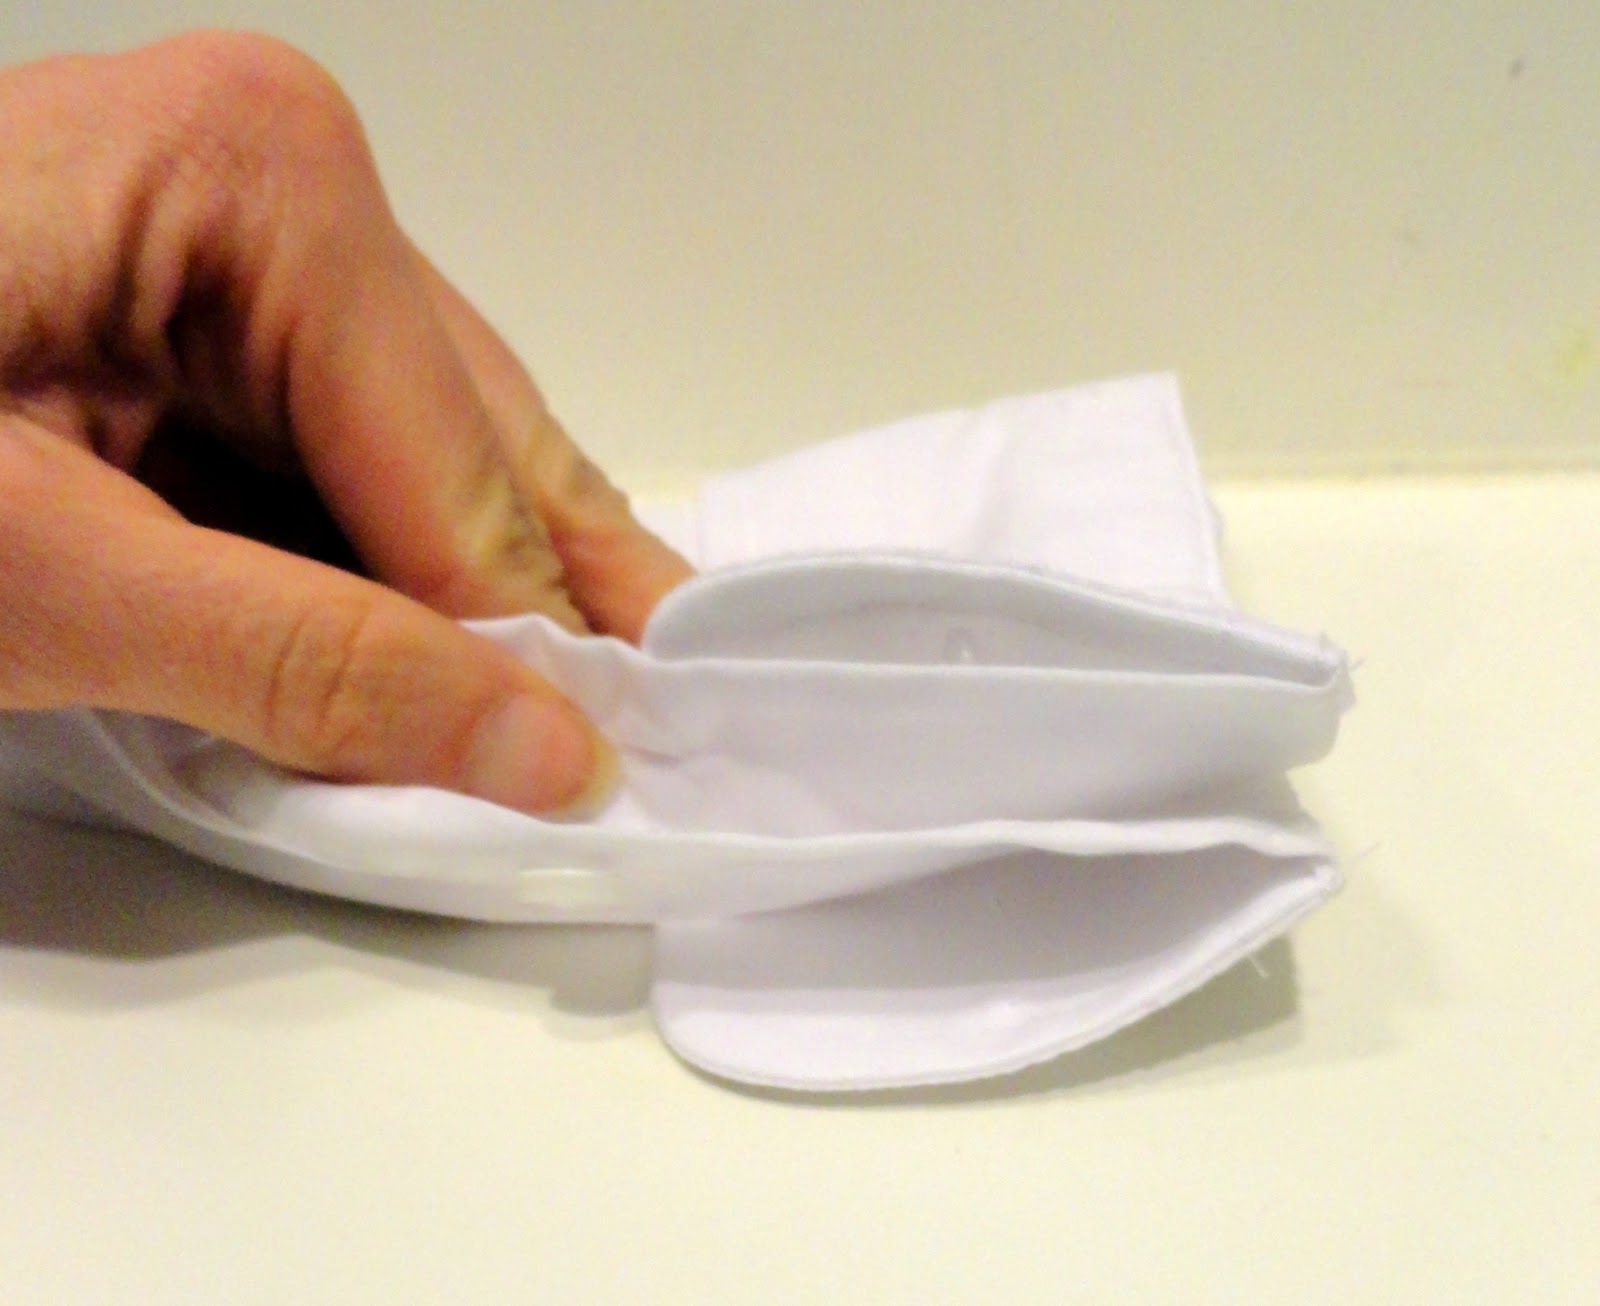
Now fold back your cuff and you will have four layers.
Your cufflink will go through all four layers of your shirt, however, as it is now, there is only one button hole.
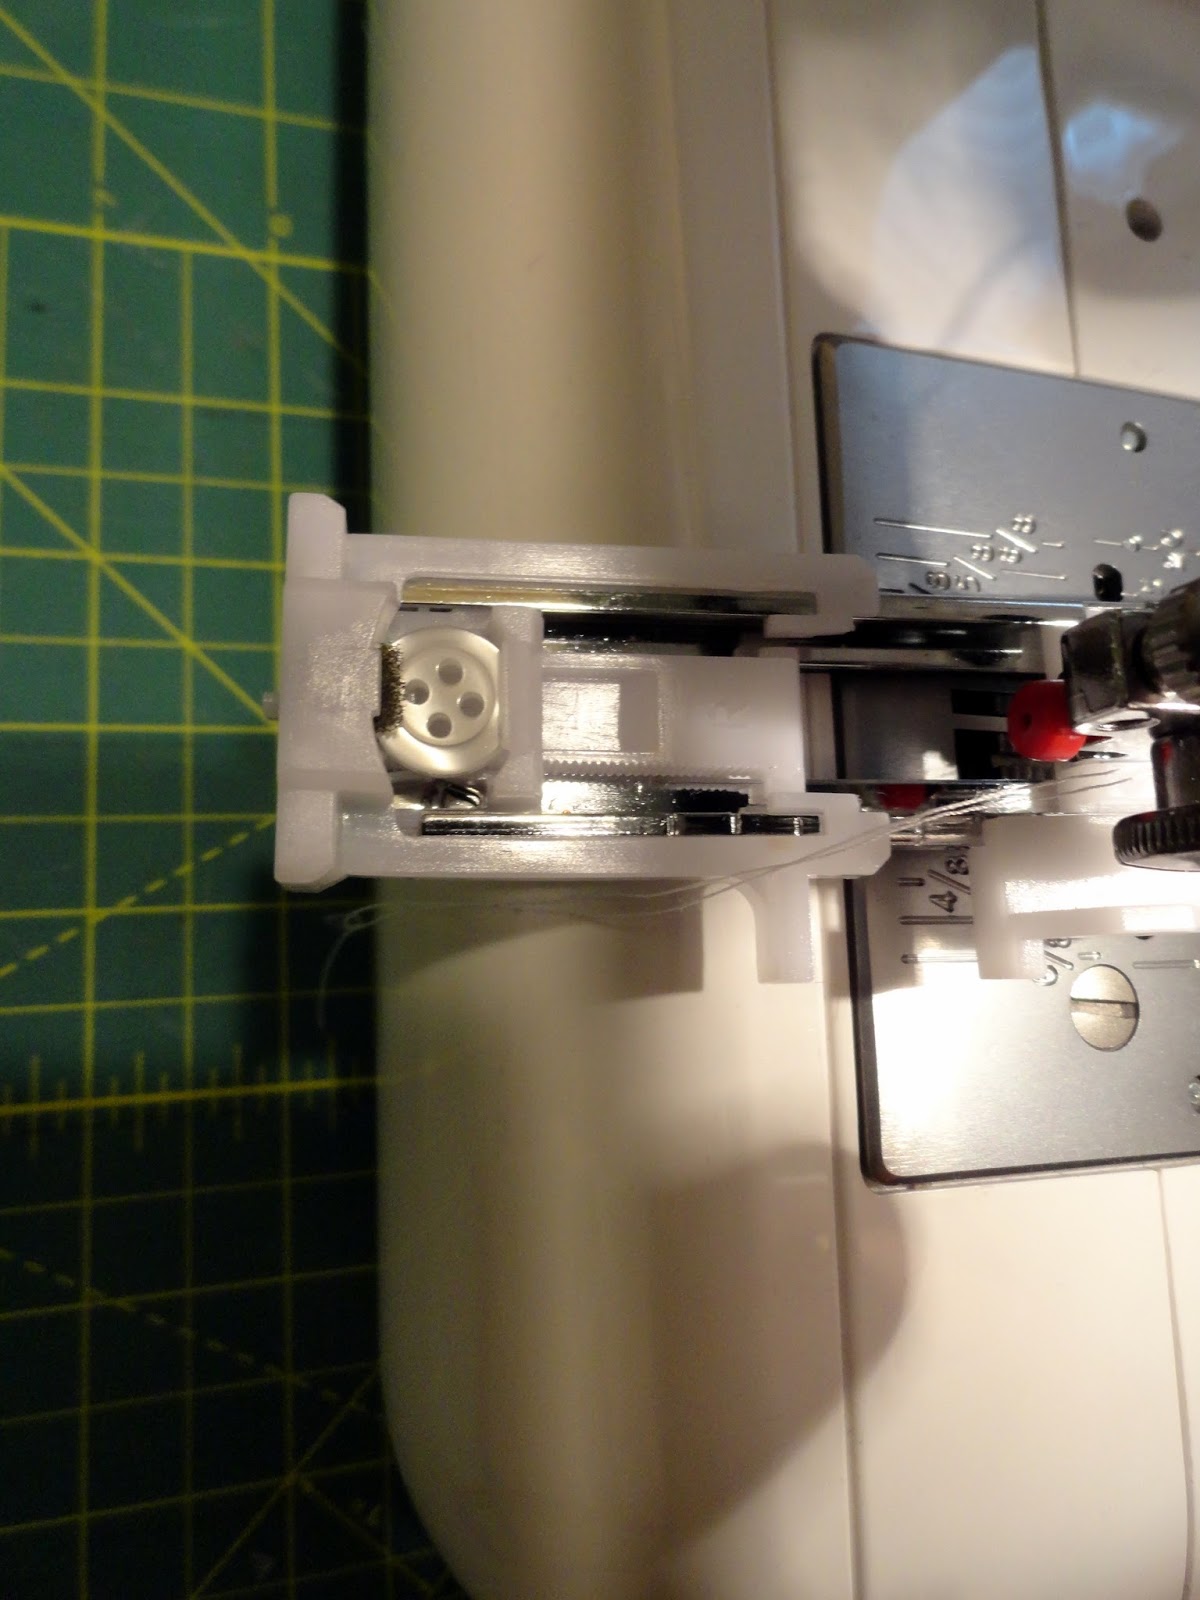
I used the button that I removed and put on my button hole foot on my sewing machine.
This feature on my Janome machine is amazing!
I don't remember button holes being so easy!
If you don't make button holes often, you may want to practice on a scrap piece of fabric.
Mark through your button hole where you will need to make your new button hole.
You will need to make this mark on all three layers that you will be creating a new cuff link hole.
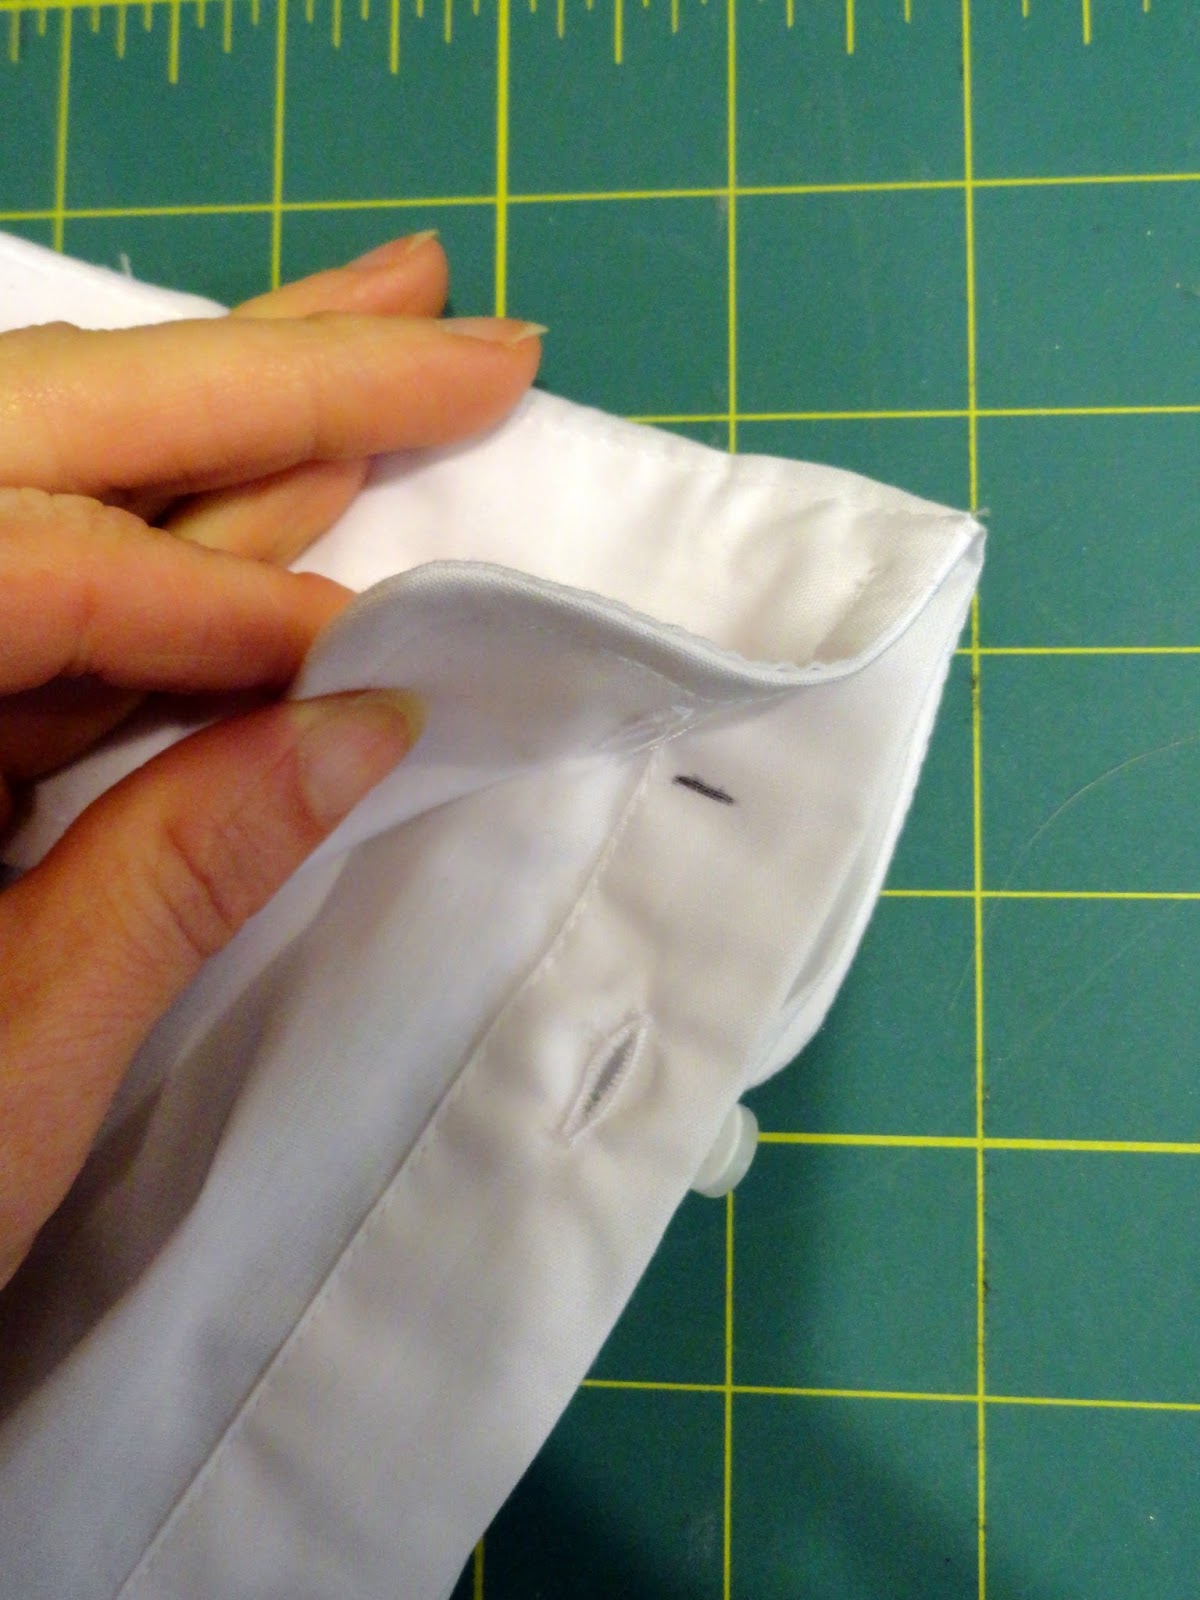
This is a picture of four button holes
{see the two below the cuff}
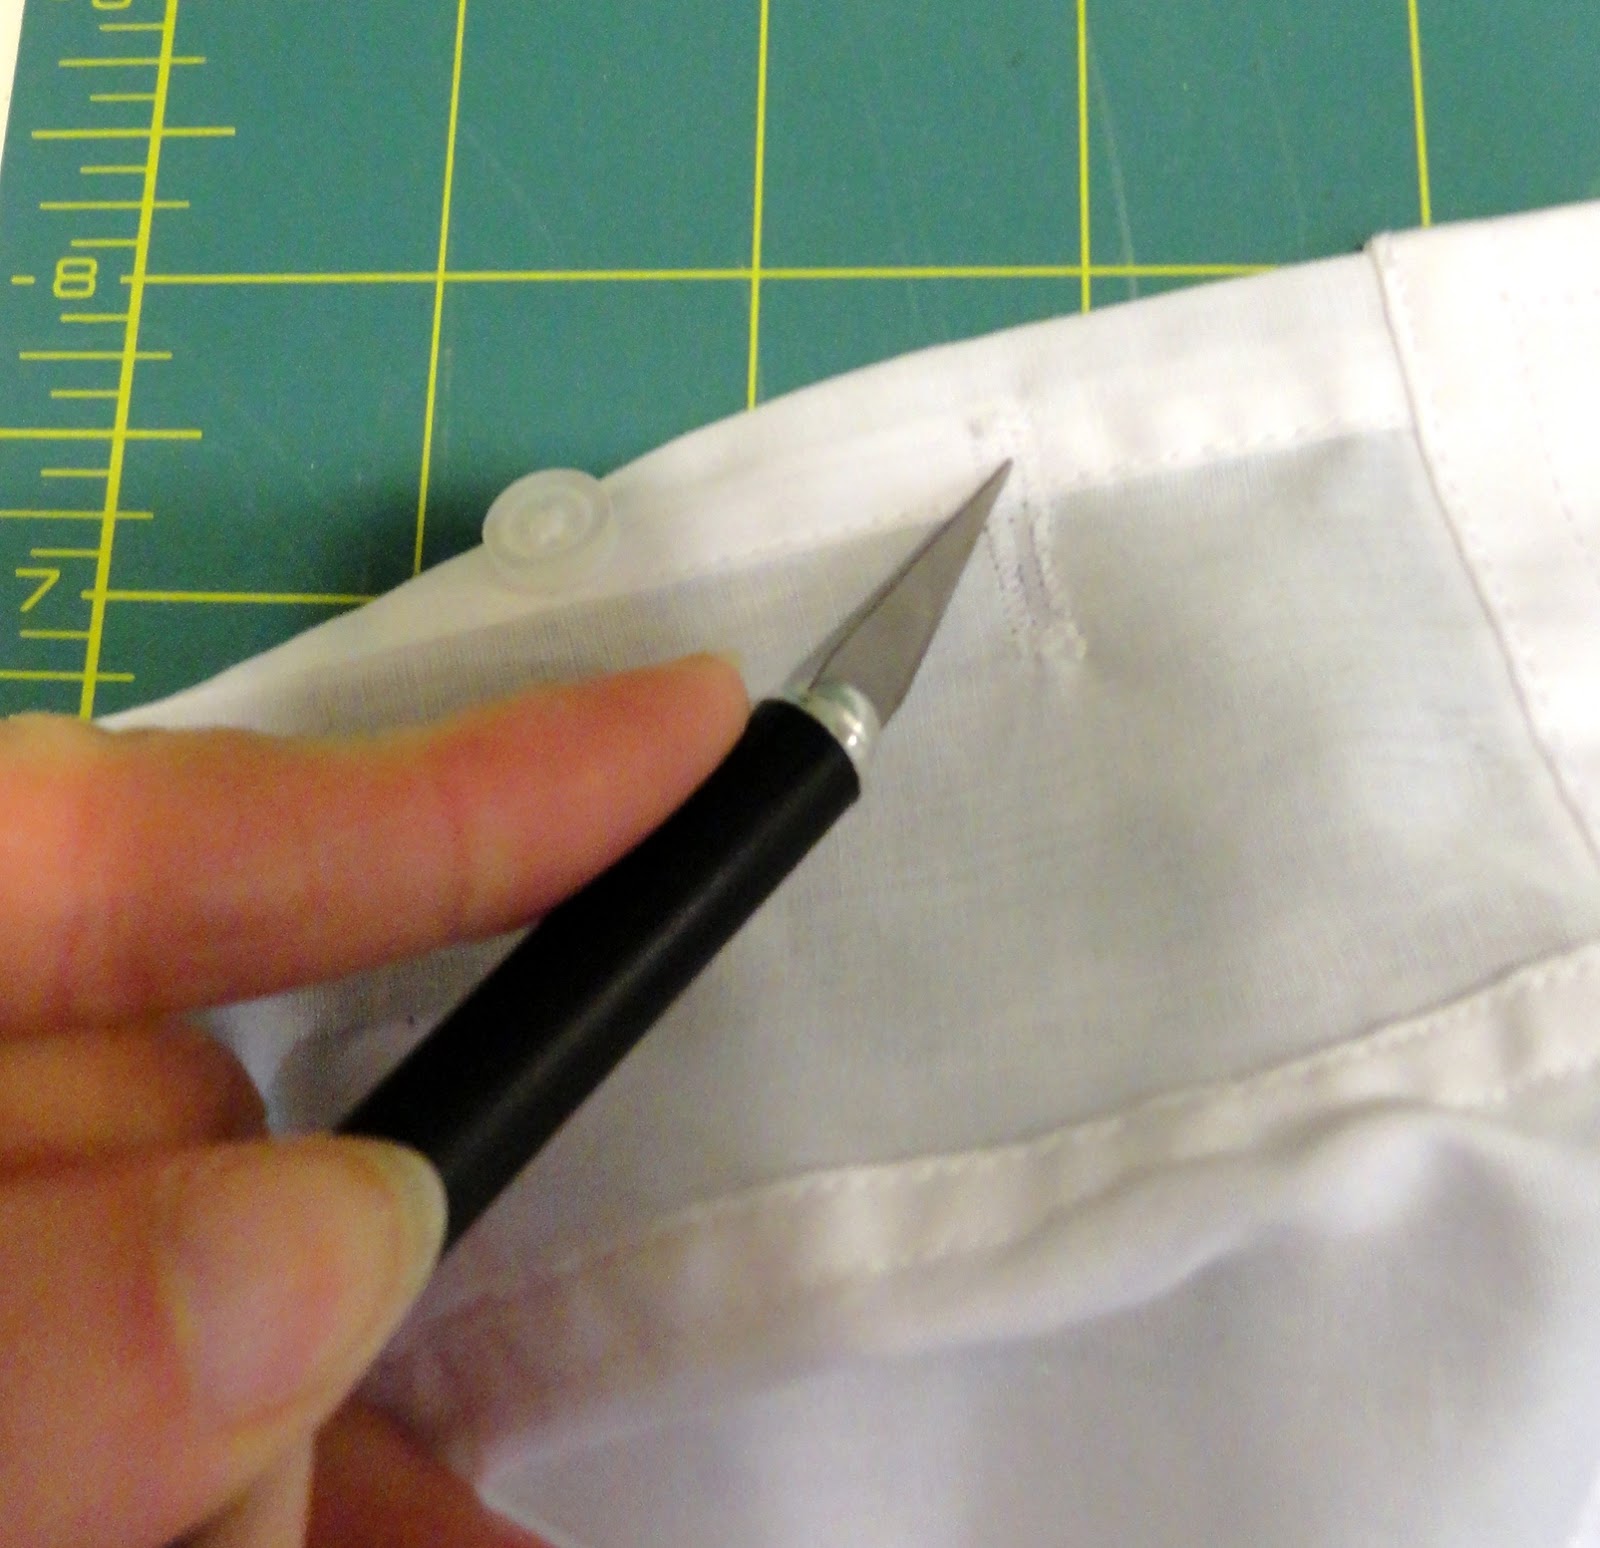
Use an xacto knife and cut open your button hole.
Fold back your cuff and insert your cufflink through all four layers.
That's it!
It took me about 5 minutes to do on each side.

Wednesday, March 12, 2014
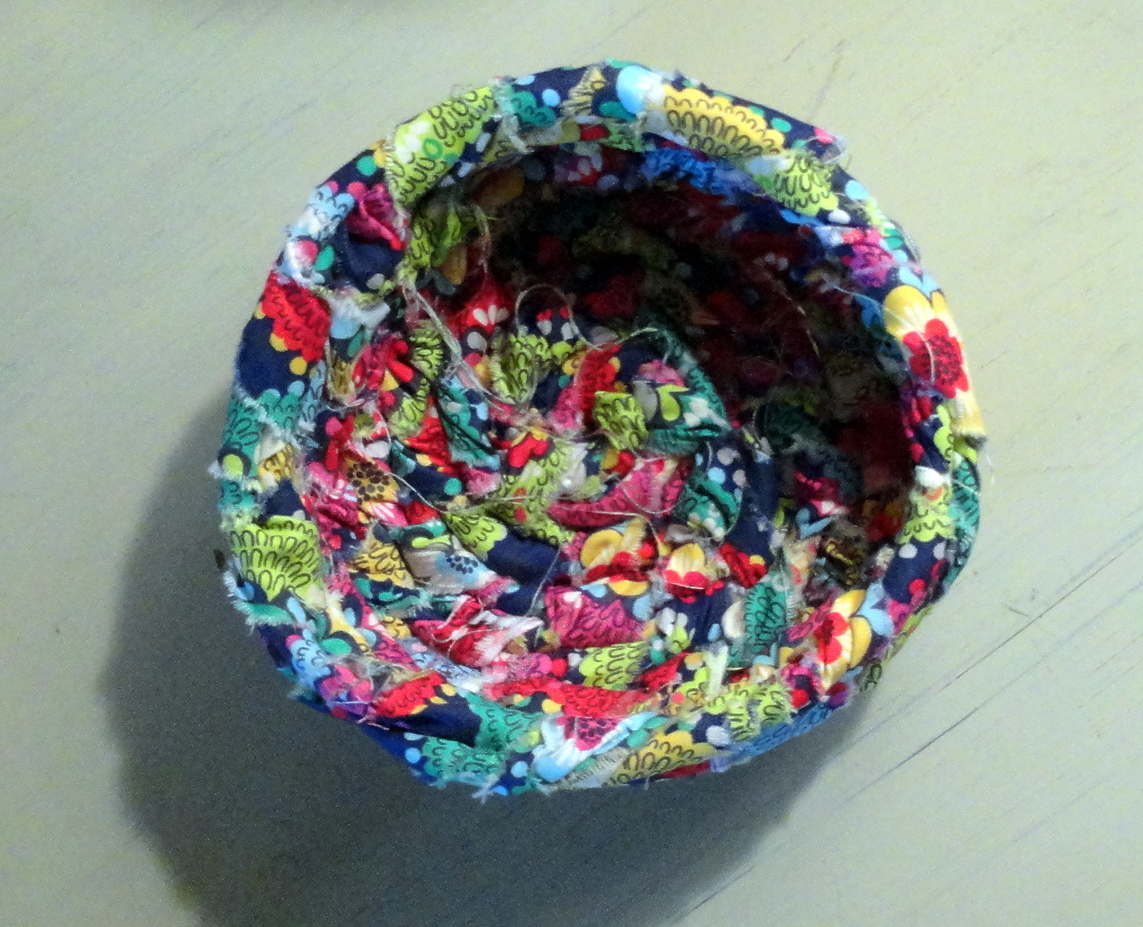
Woven clothesline scrap fabric basket tutorial
I took a lot of art classes when I was a kid.
Last week when I was shopping at the hardware store for rope,
I saw clothesline and was reminded of these woven fabric scrap baskets
I used to make when I was my daughter's age.
It was a skill I learned in a 7th grade art class {thank you Mrs. Dylan!}
and I wanted to pass that skill on to my daughter,
and now I pass it on to you.

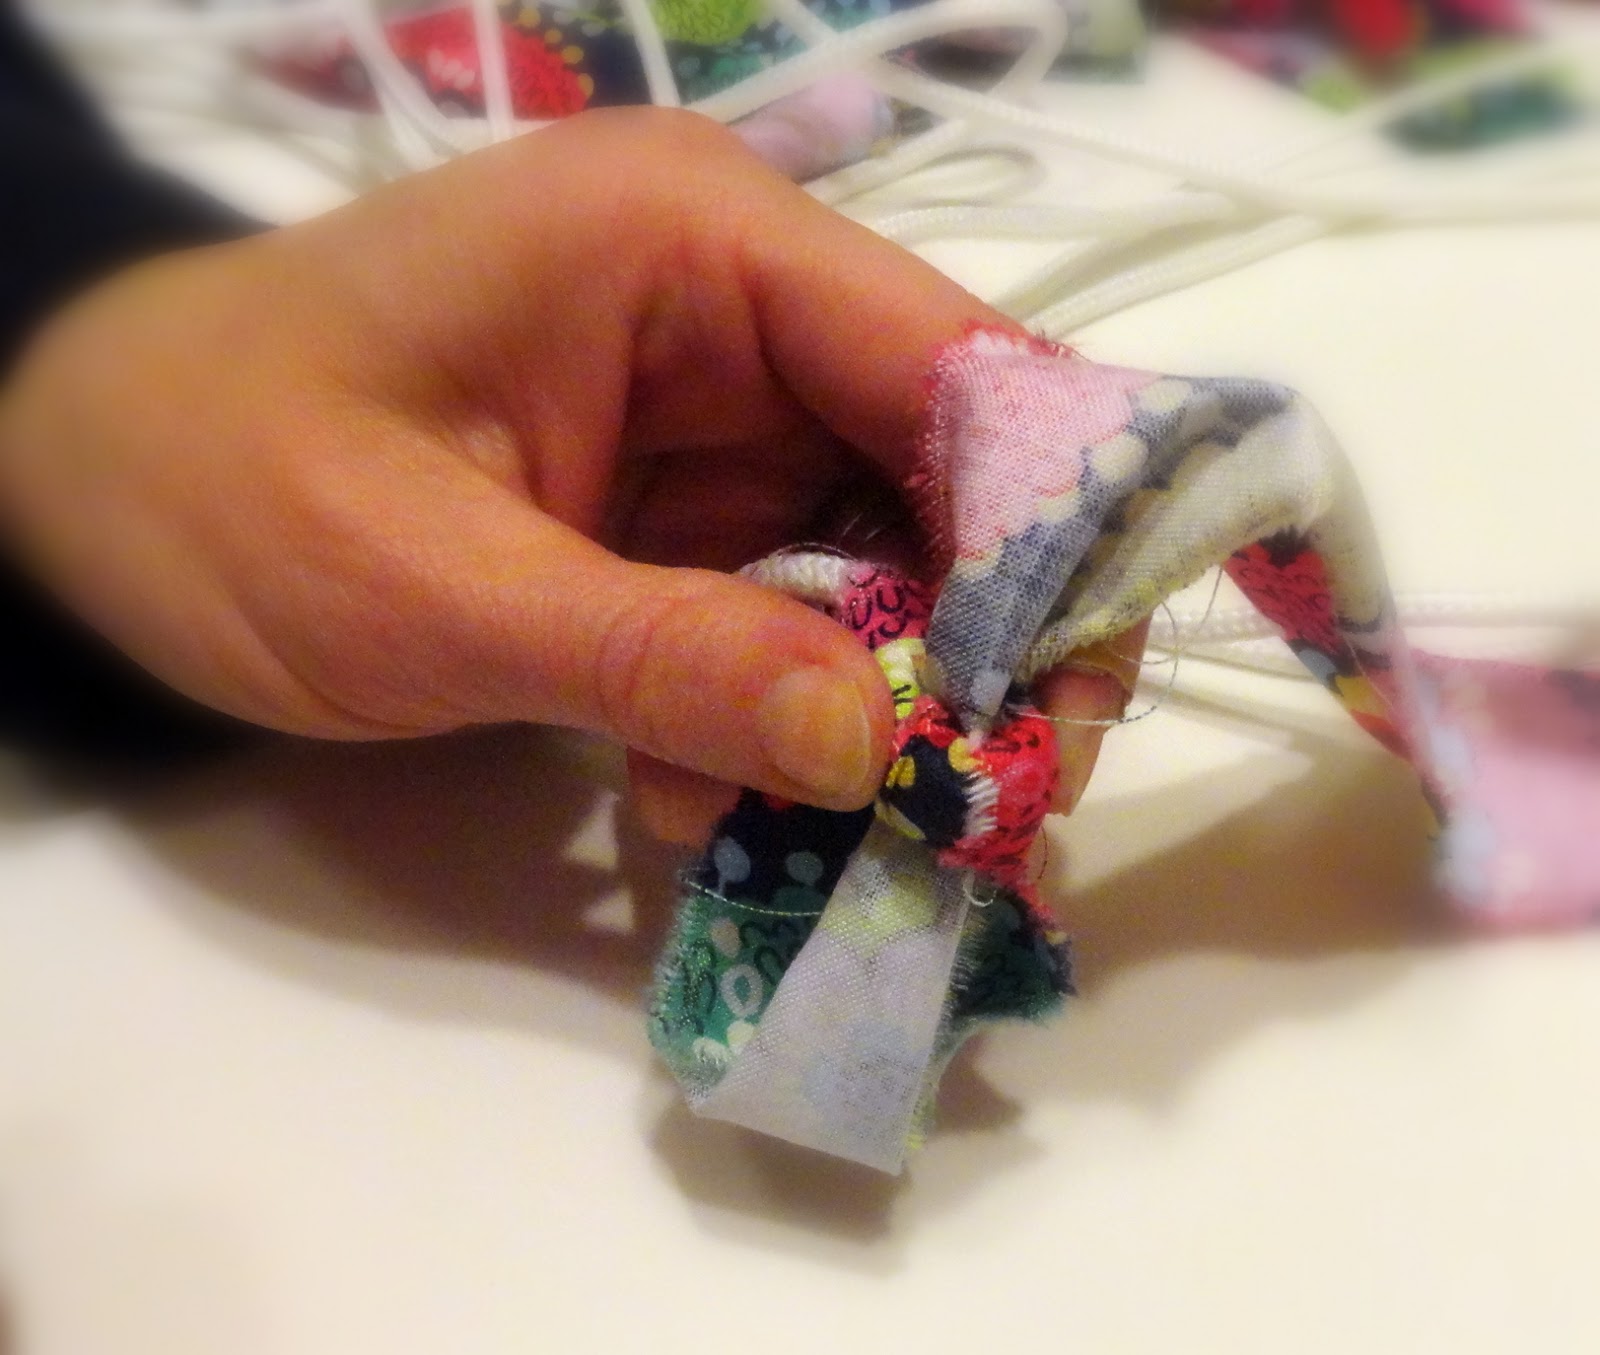
Start by taking your fabric
{you can use multiple fabrics but will end up needing about a half a yard}
and make a cut line every inch and a half.
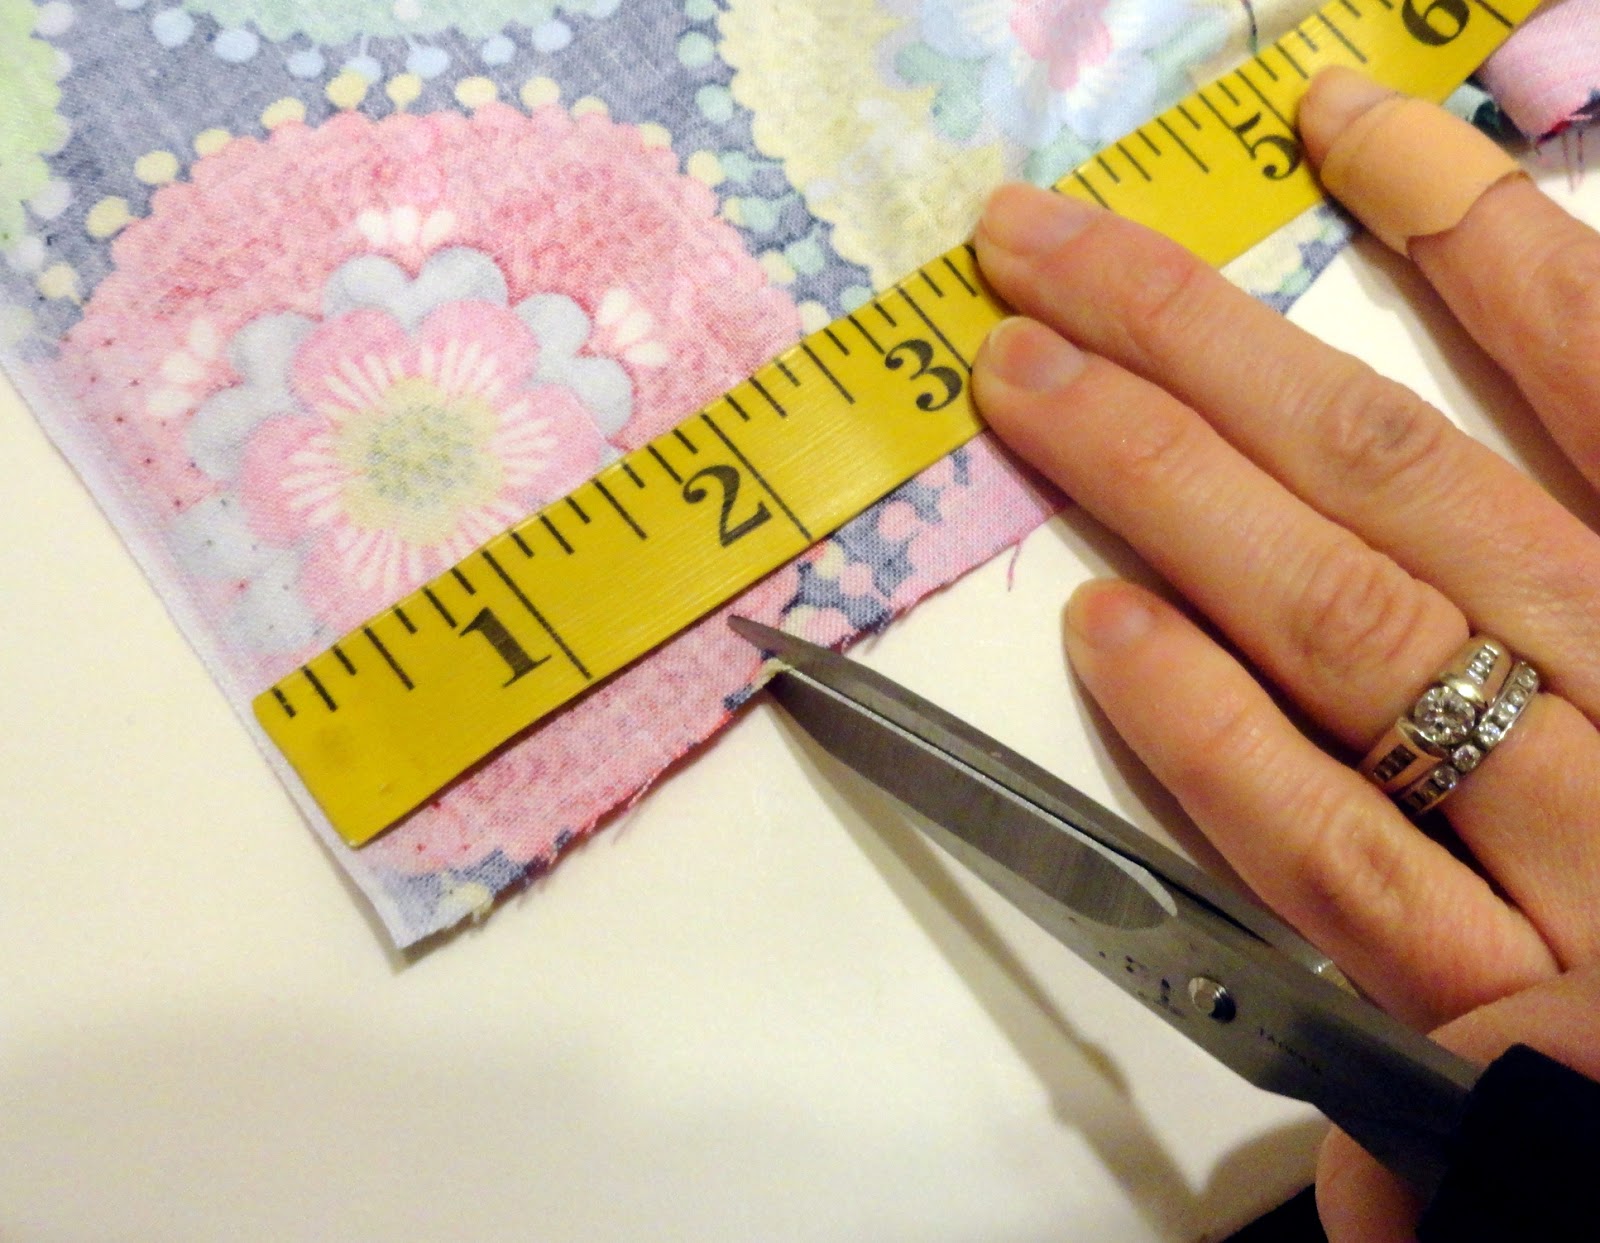
I love using cotton because I can use that small cut line I just made
and rip it giving me cool frayed edges on my fabric to work with.

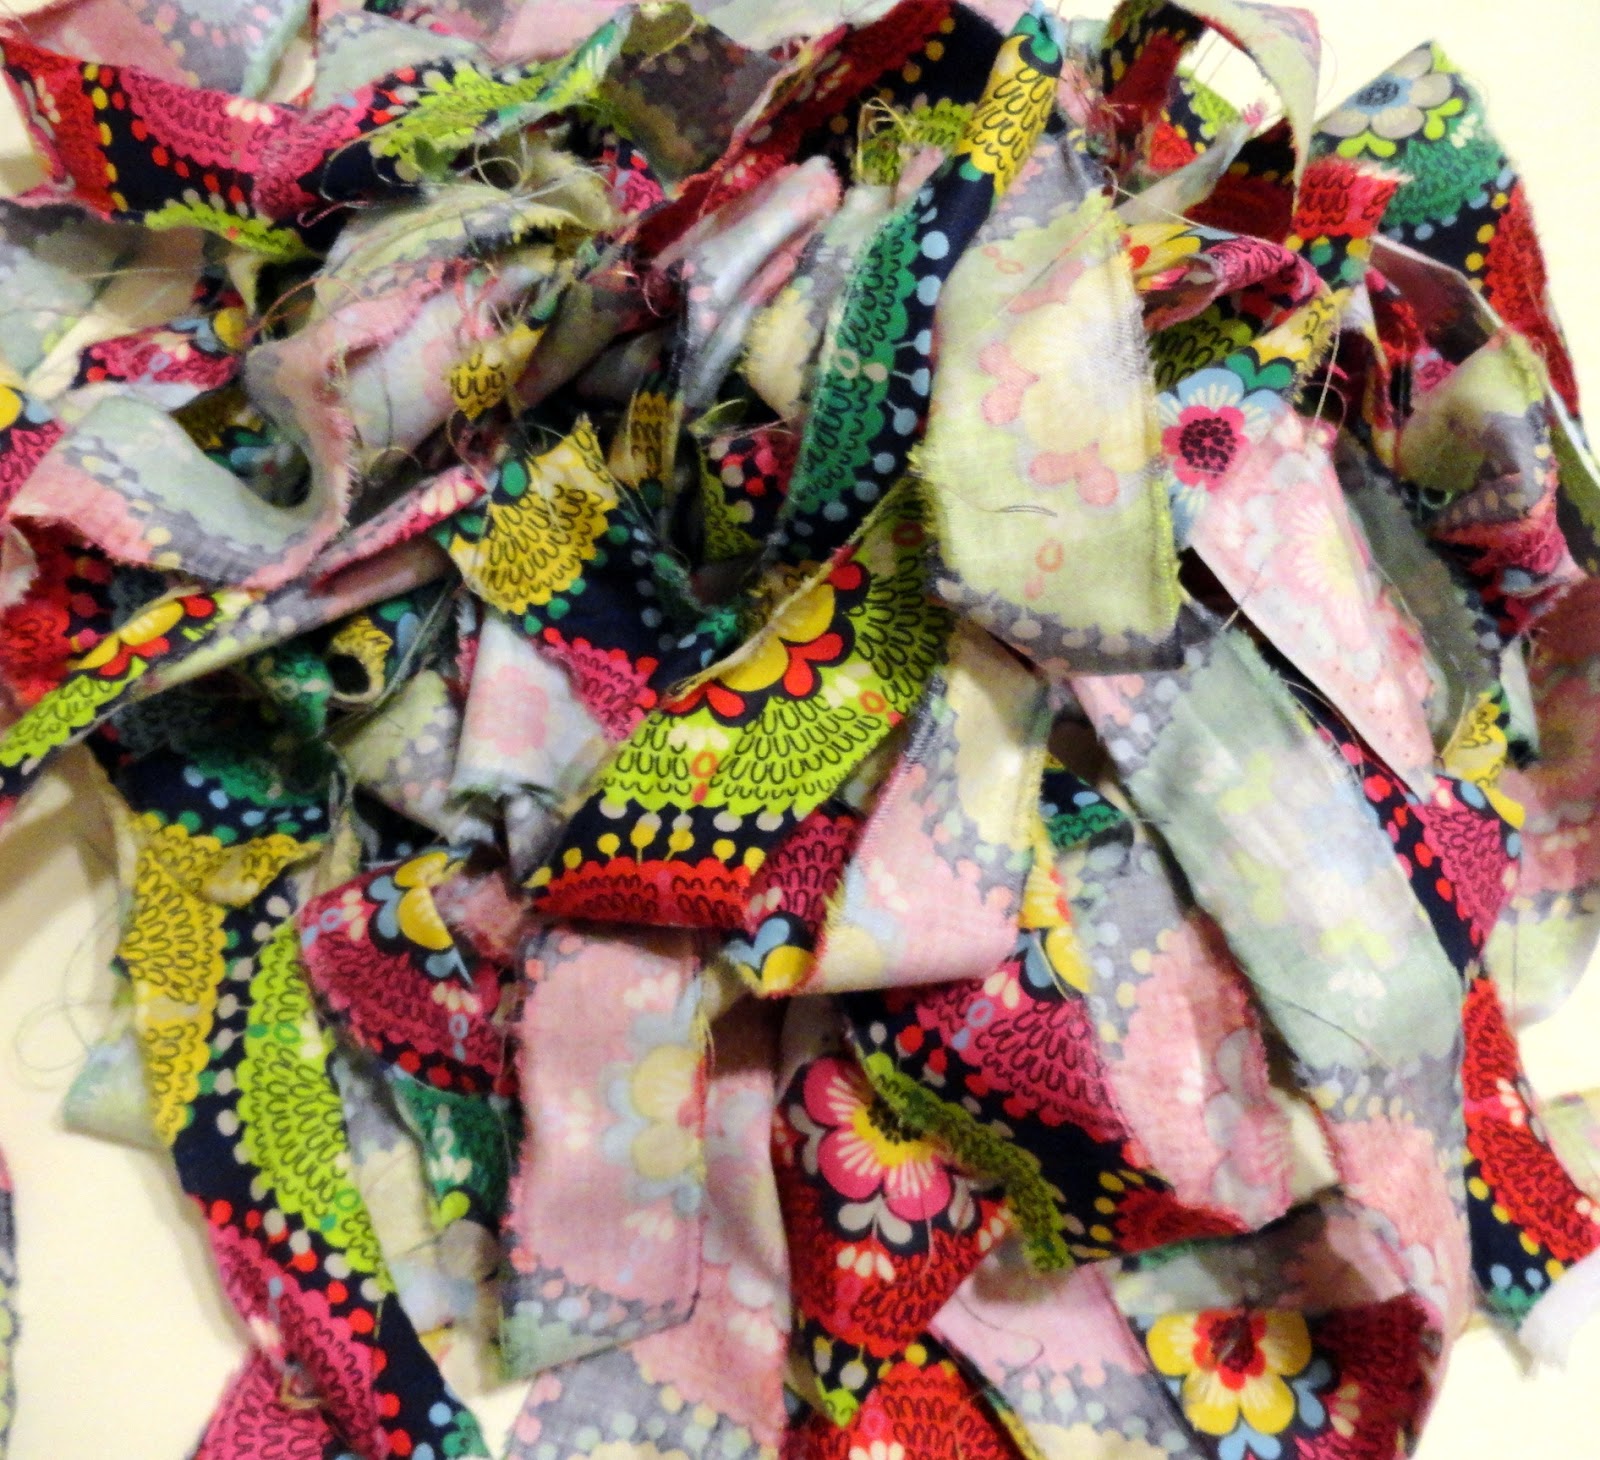
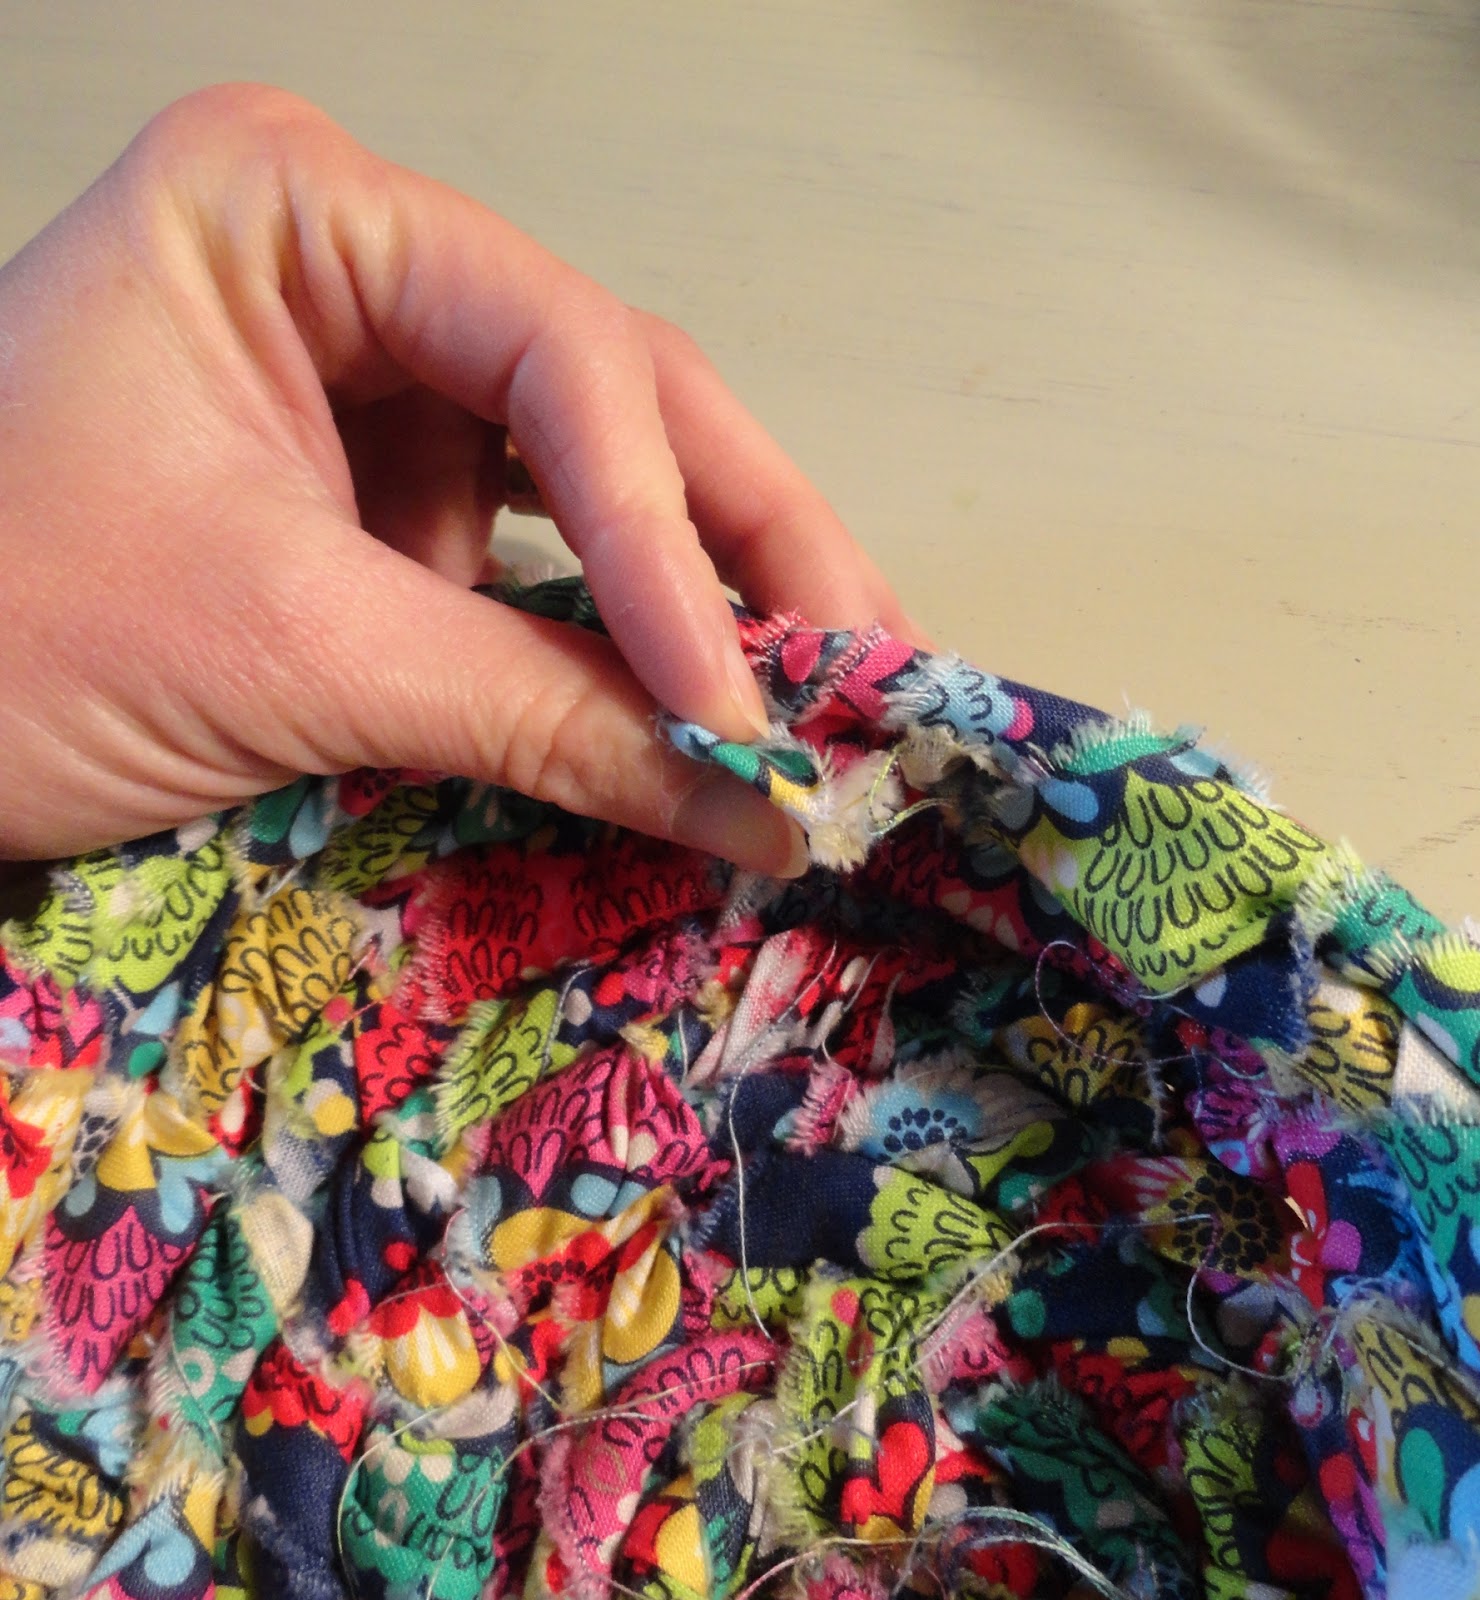
This is my pile of scrap fabric I have to work with.
You can use a needle at the end of your fabric {or not}.
If you use a needle, you need to use a large eyed needle to fit your fabric through.
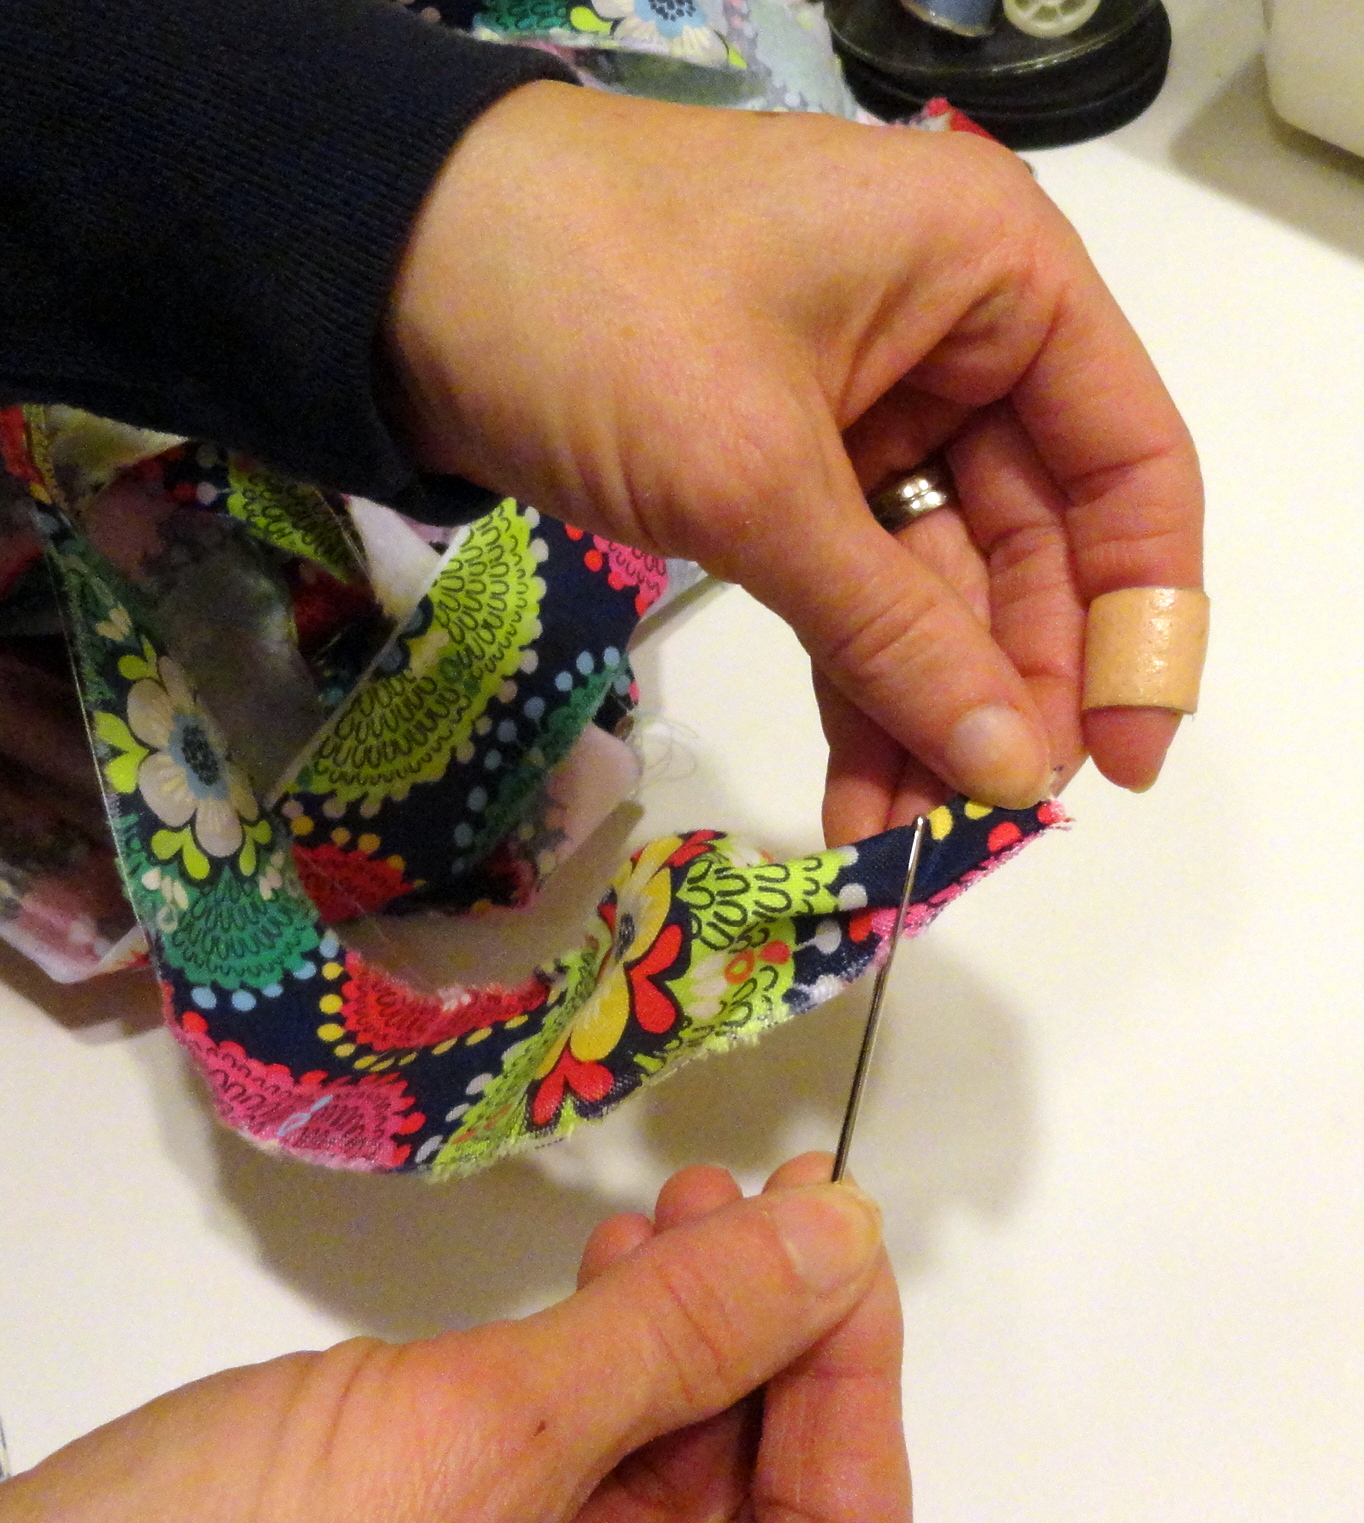
Start at the end of your clothesline.
Mine was already burnt to keep it from fraying.
Leave about a half an inch of fabric at the top and around your clothesline.
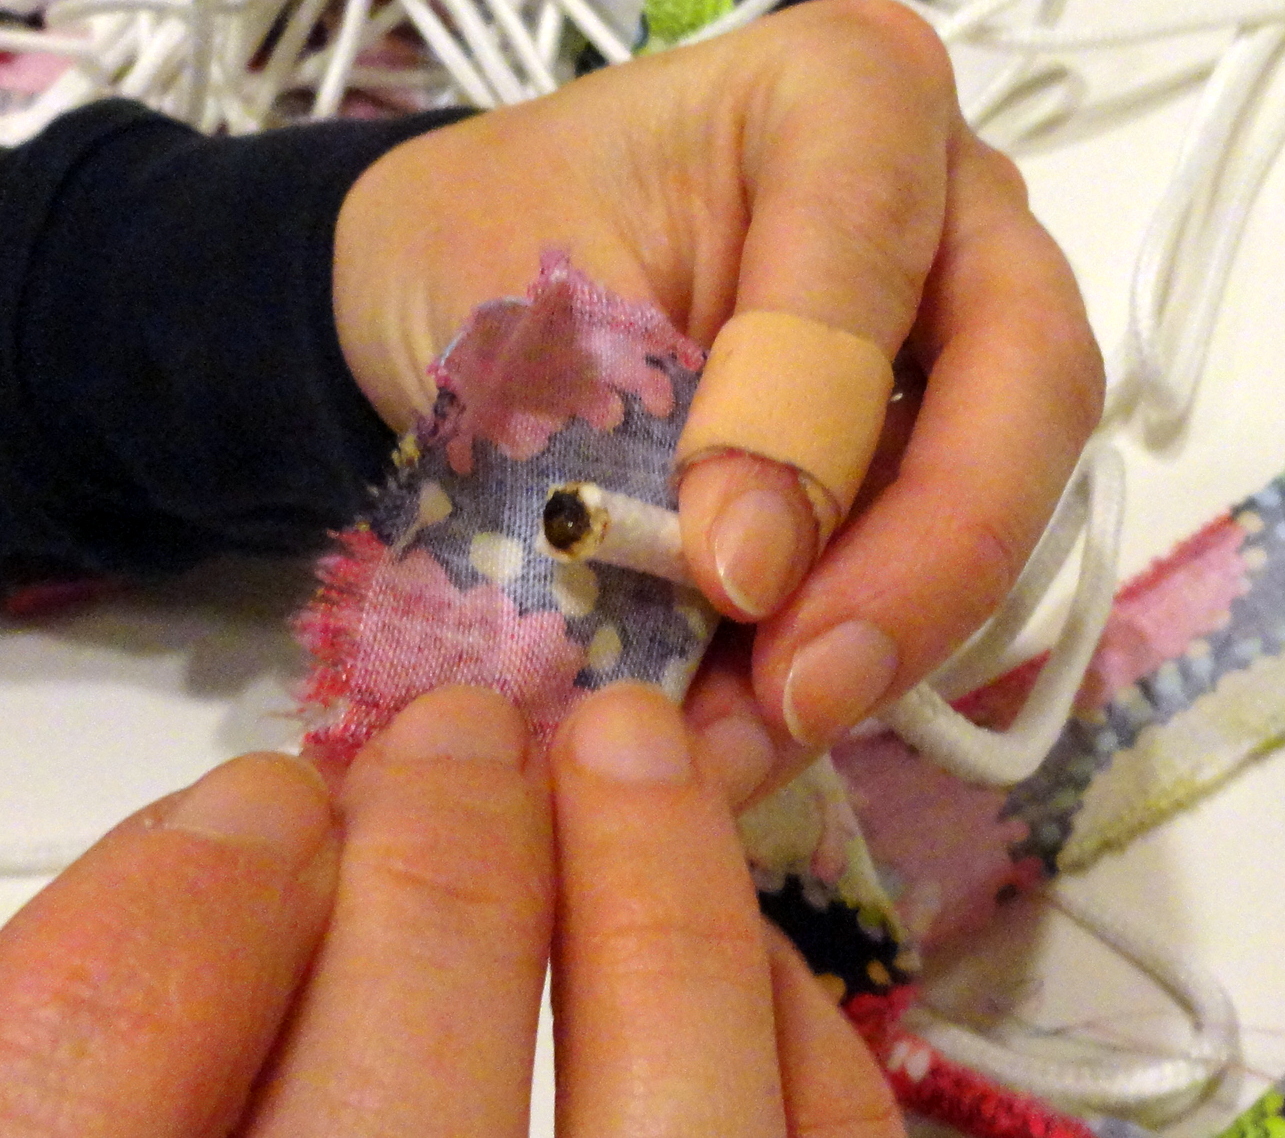
Fold down the top of the fabric and fold in the sides.
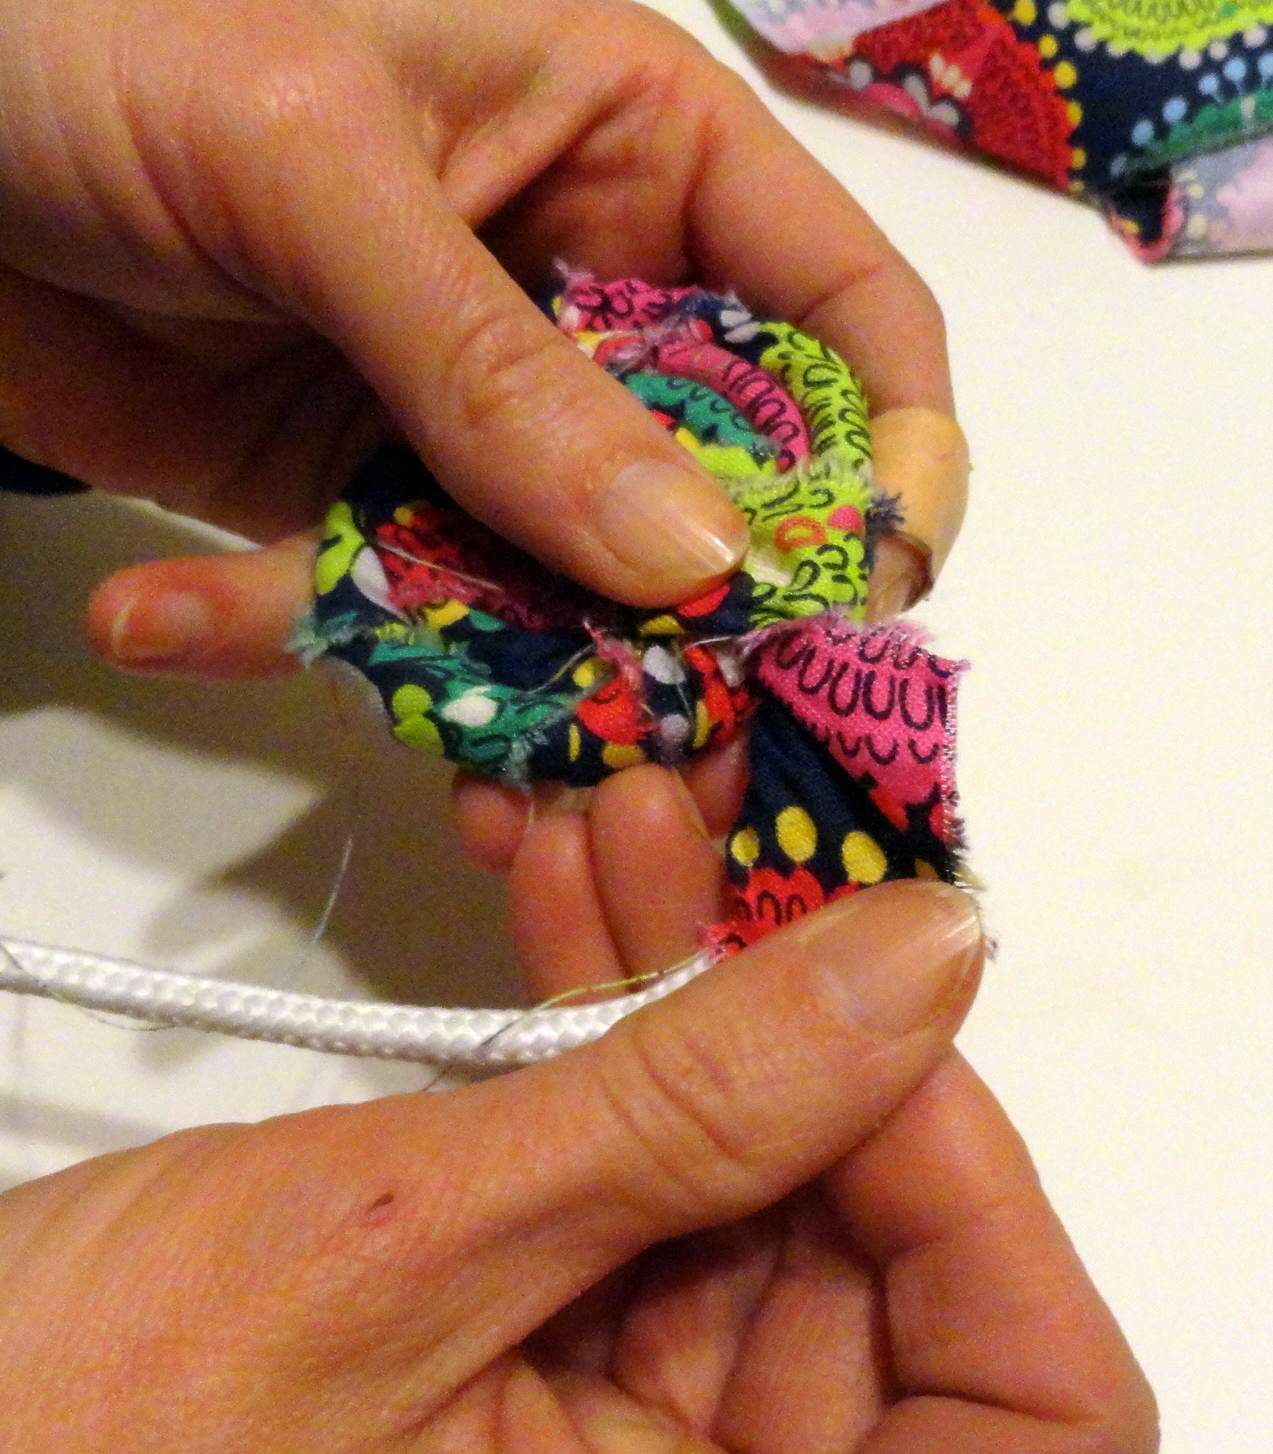
Then you will begin coiling and wrapping the fabric around the clothesline.
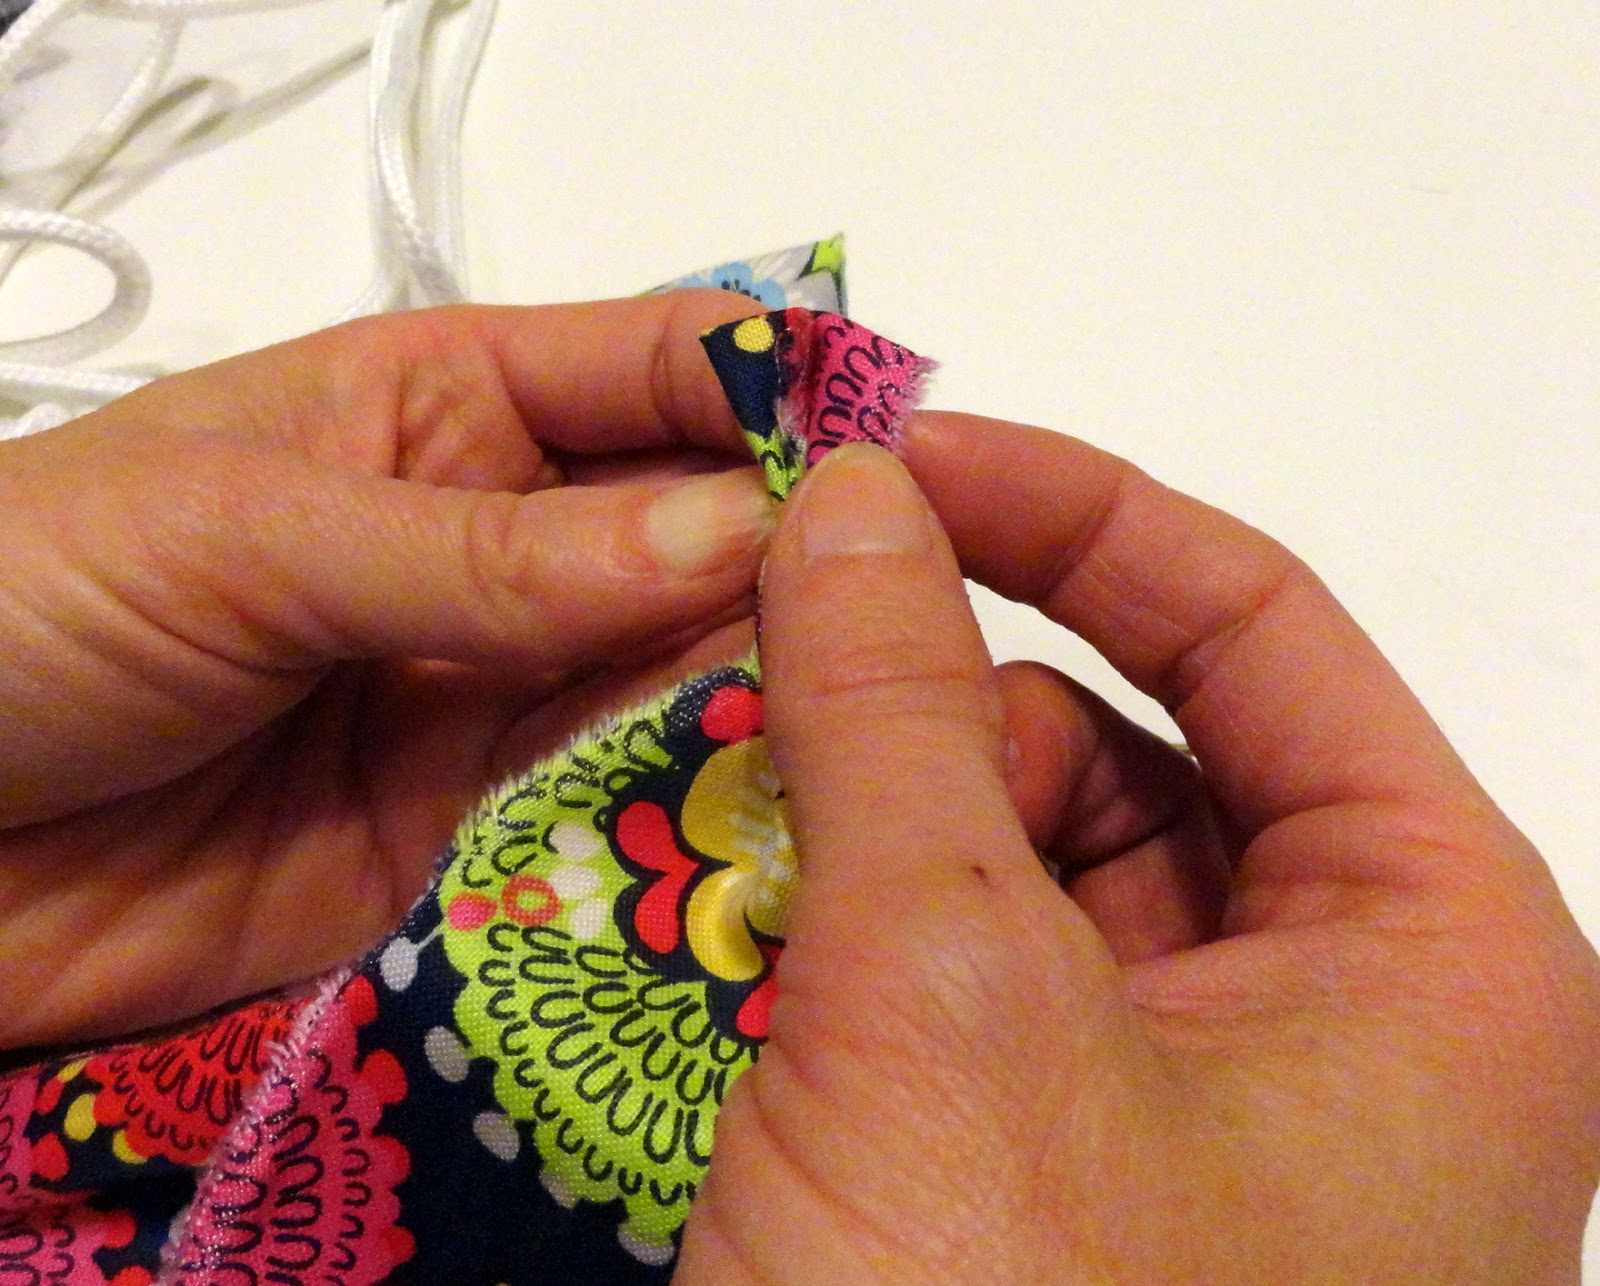
Once you have about six inches of fabric wrapped around the clothesline,
you will start to coil your clothesline.
Take your fabric end and pull it up through the center or your clothesline fold.
Your base will look like this
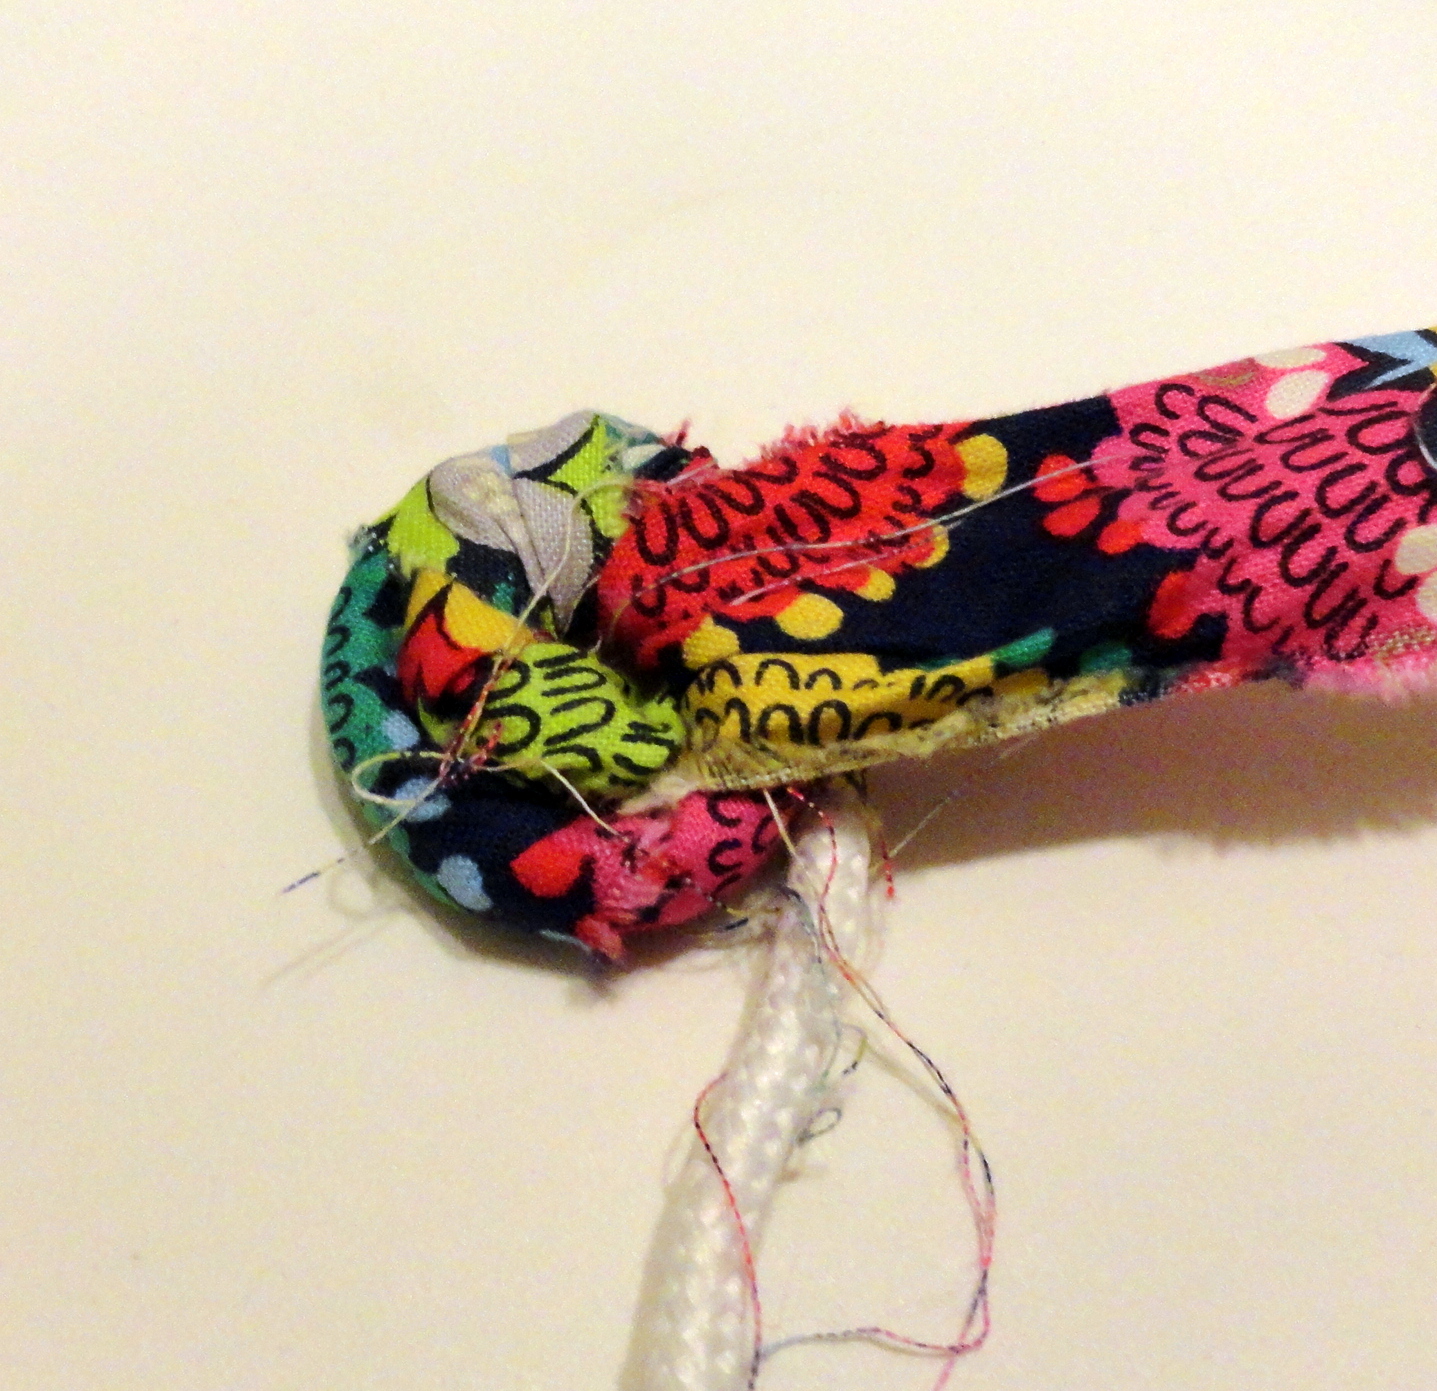
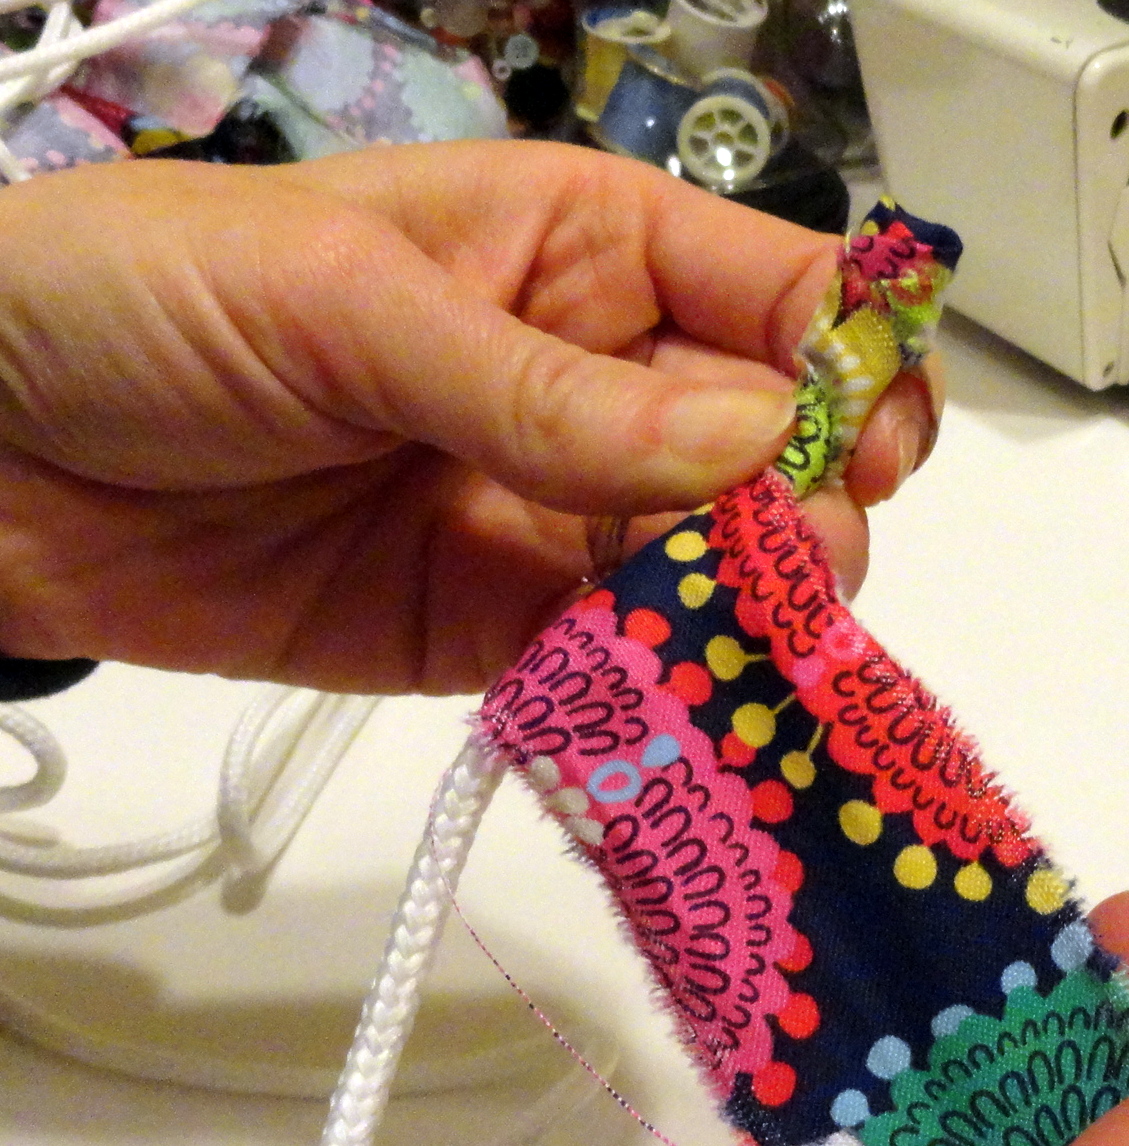
Continue to wrap your clothesline.
After every four-six wraps, you will tuck your fabric through the coil just below.
Pull your fabric up and tug it in place to make a secure loop.
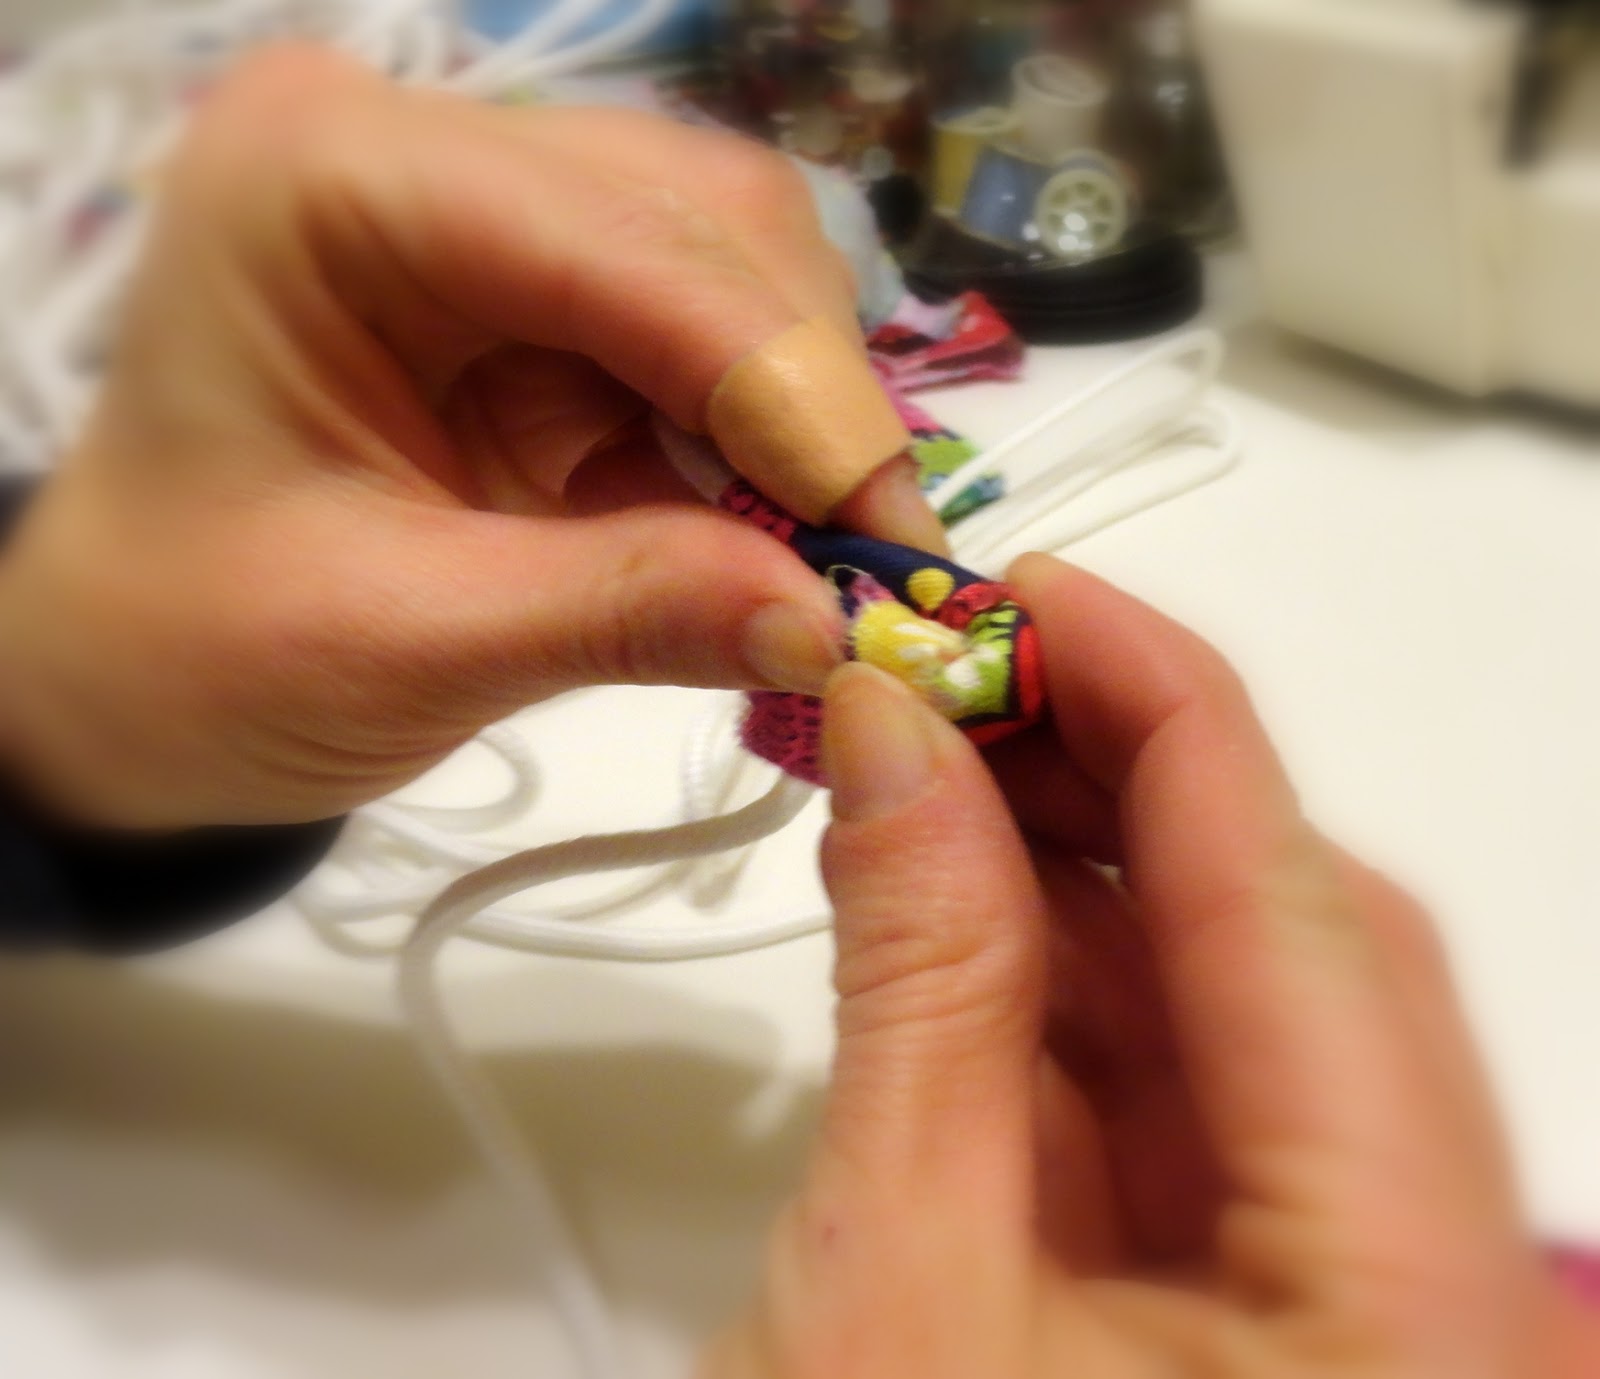
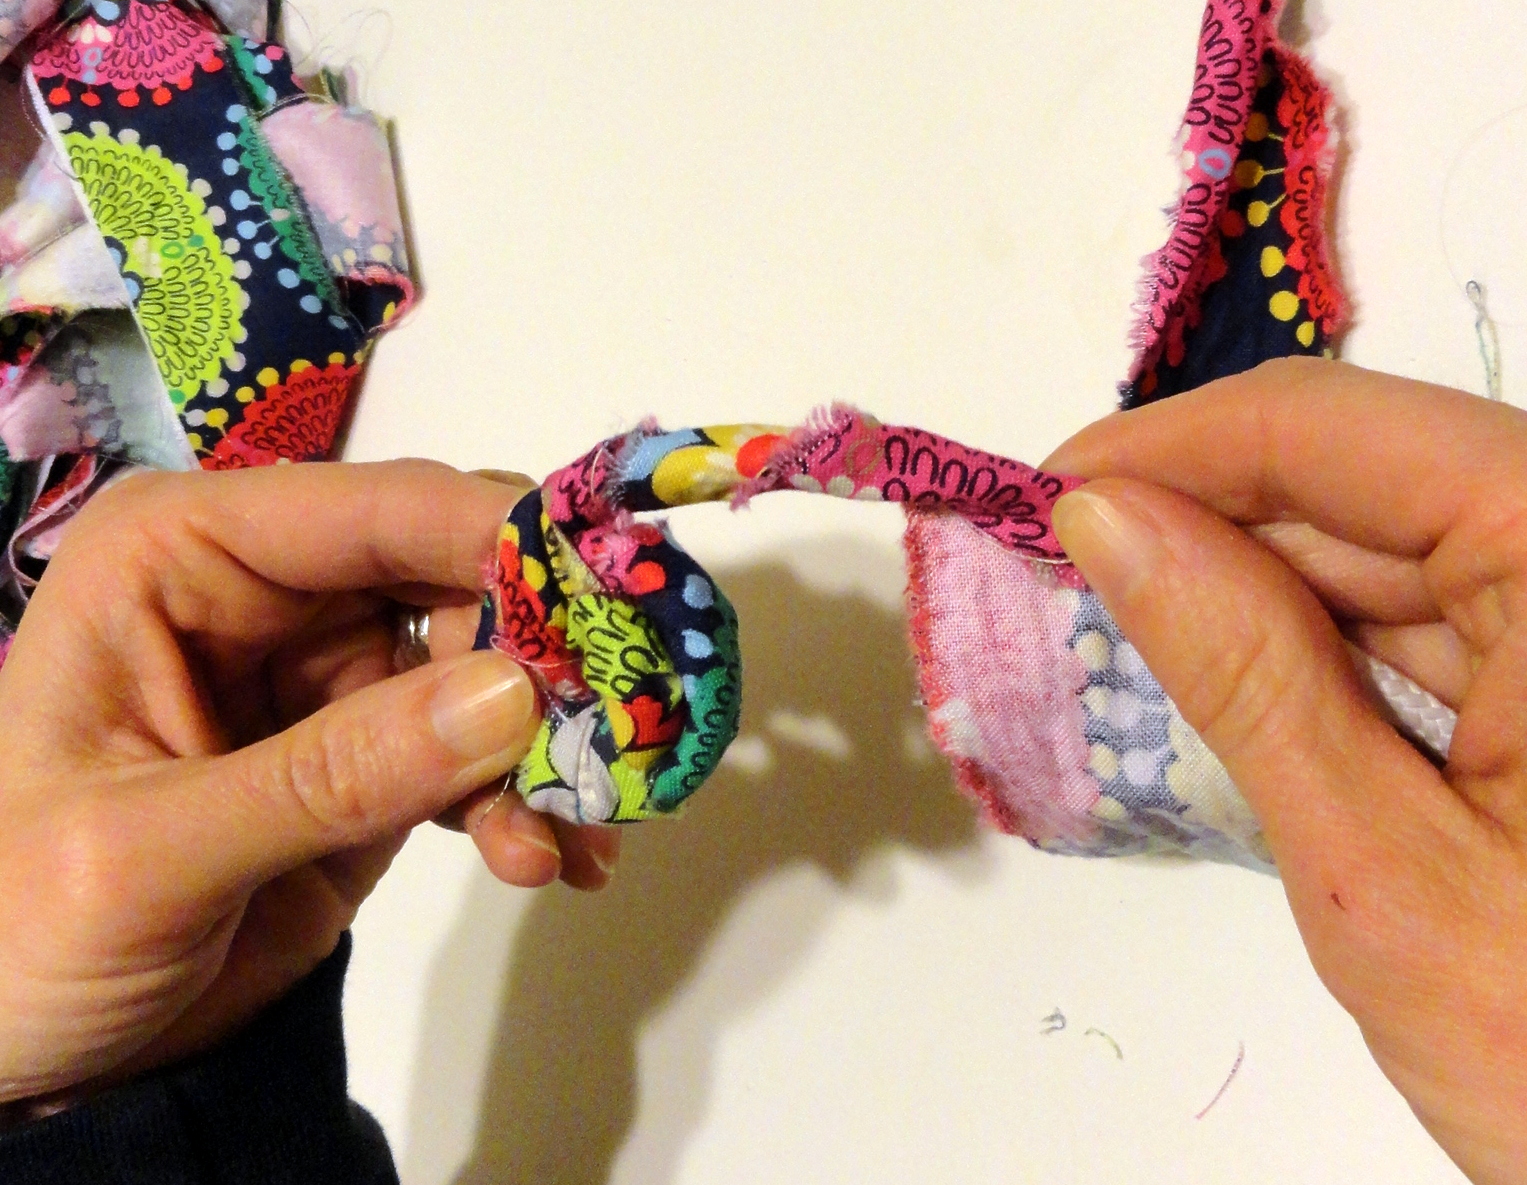
Once you get to the end of your fabric,
continue wrapping around your clothesline.
Place a new piece of fabric over top of your fabric end and start wrapping.
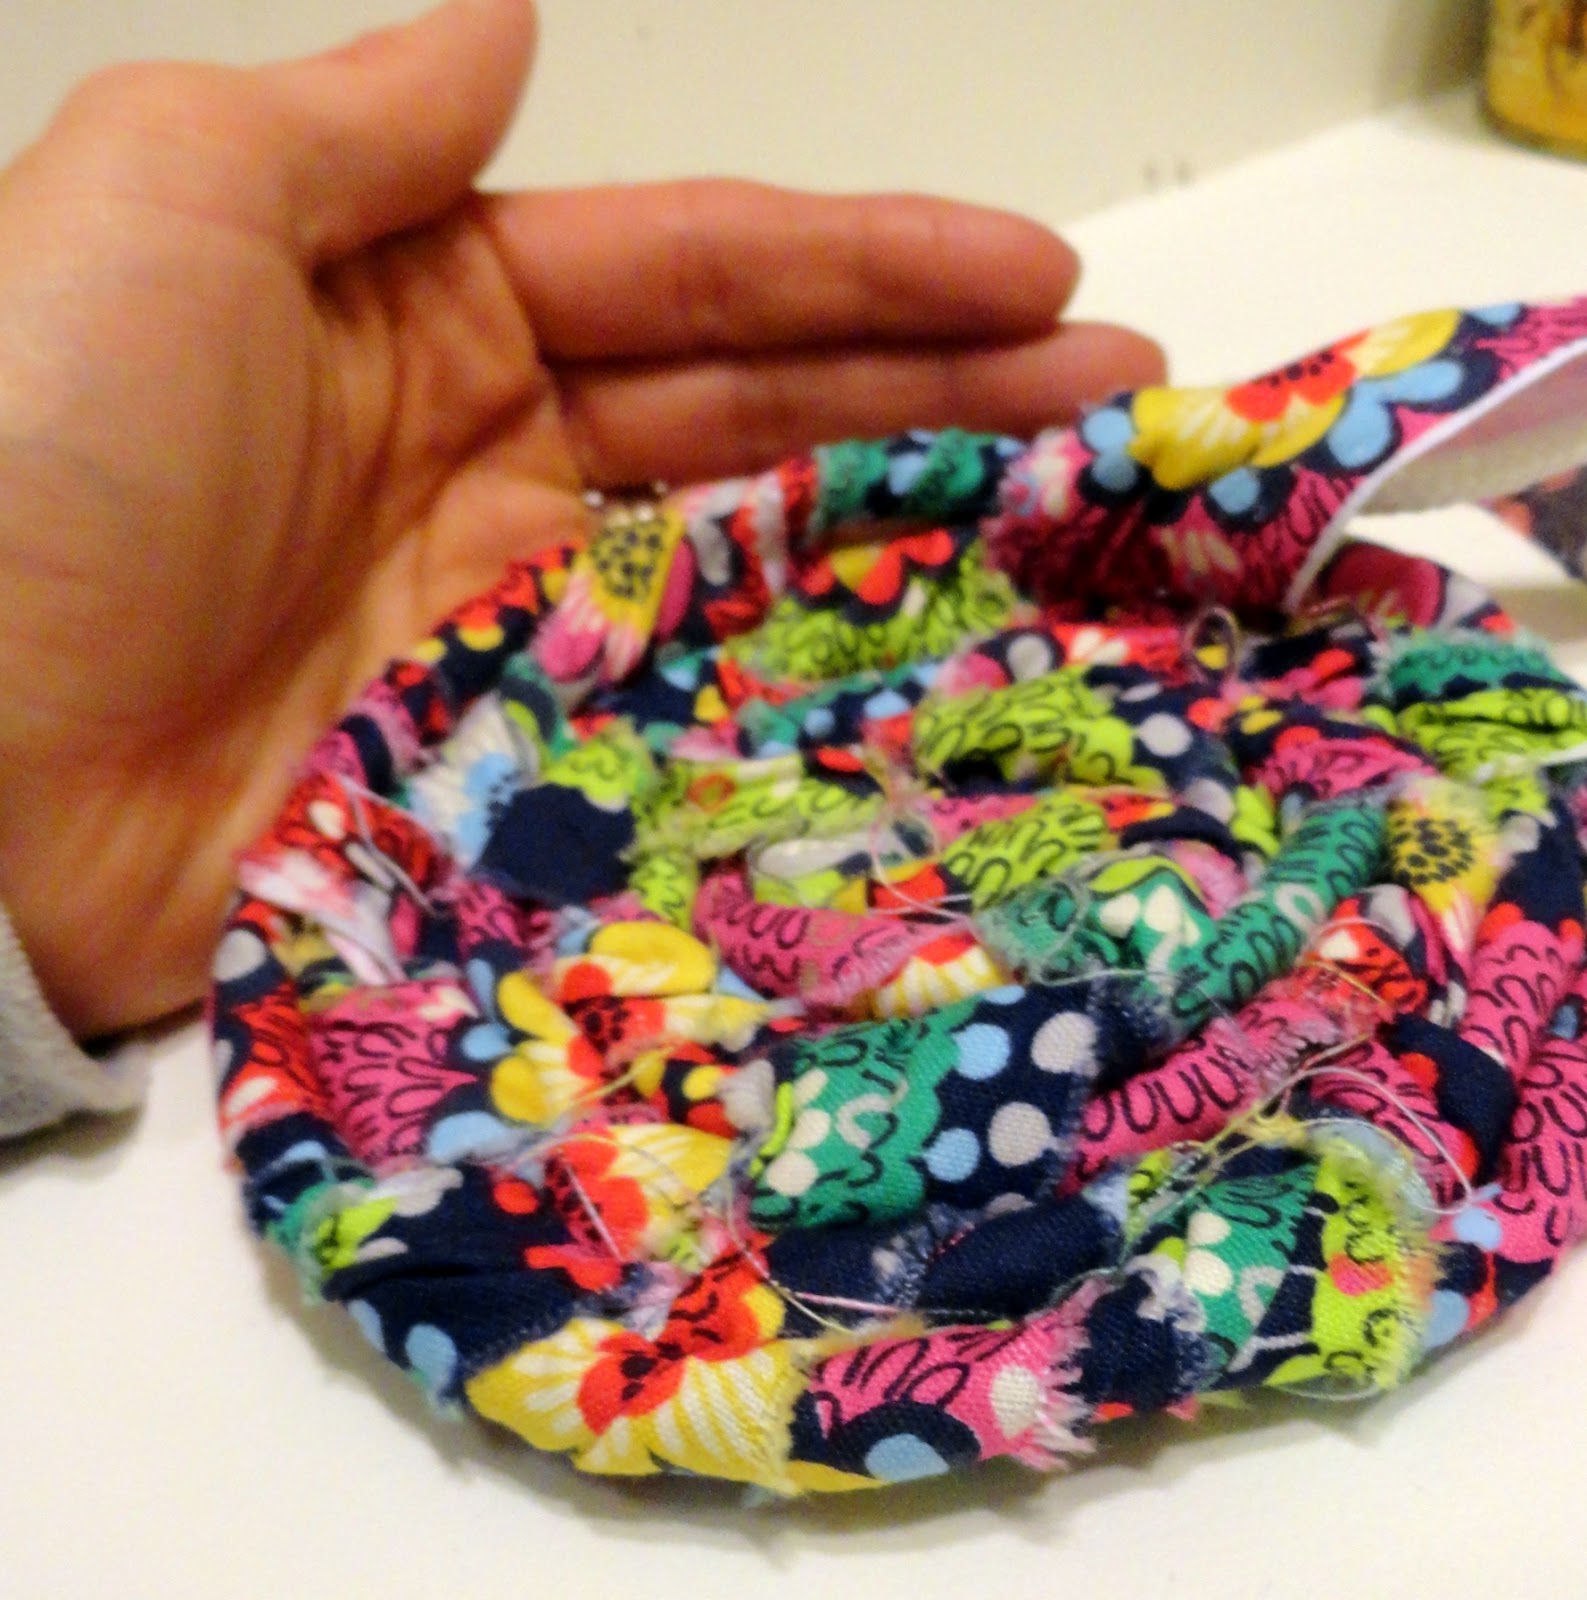
Once your base gets big enough,
{it's your discretion}
start working your clothesline up the coil base by tugging it a little harder on each pull through the fabric
and shaping it as you go.

You will start with a gradual coil and work your way up.
Continue wrapping and coiling and pulling your fabric through
until you have the basket the size that you want.
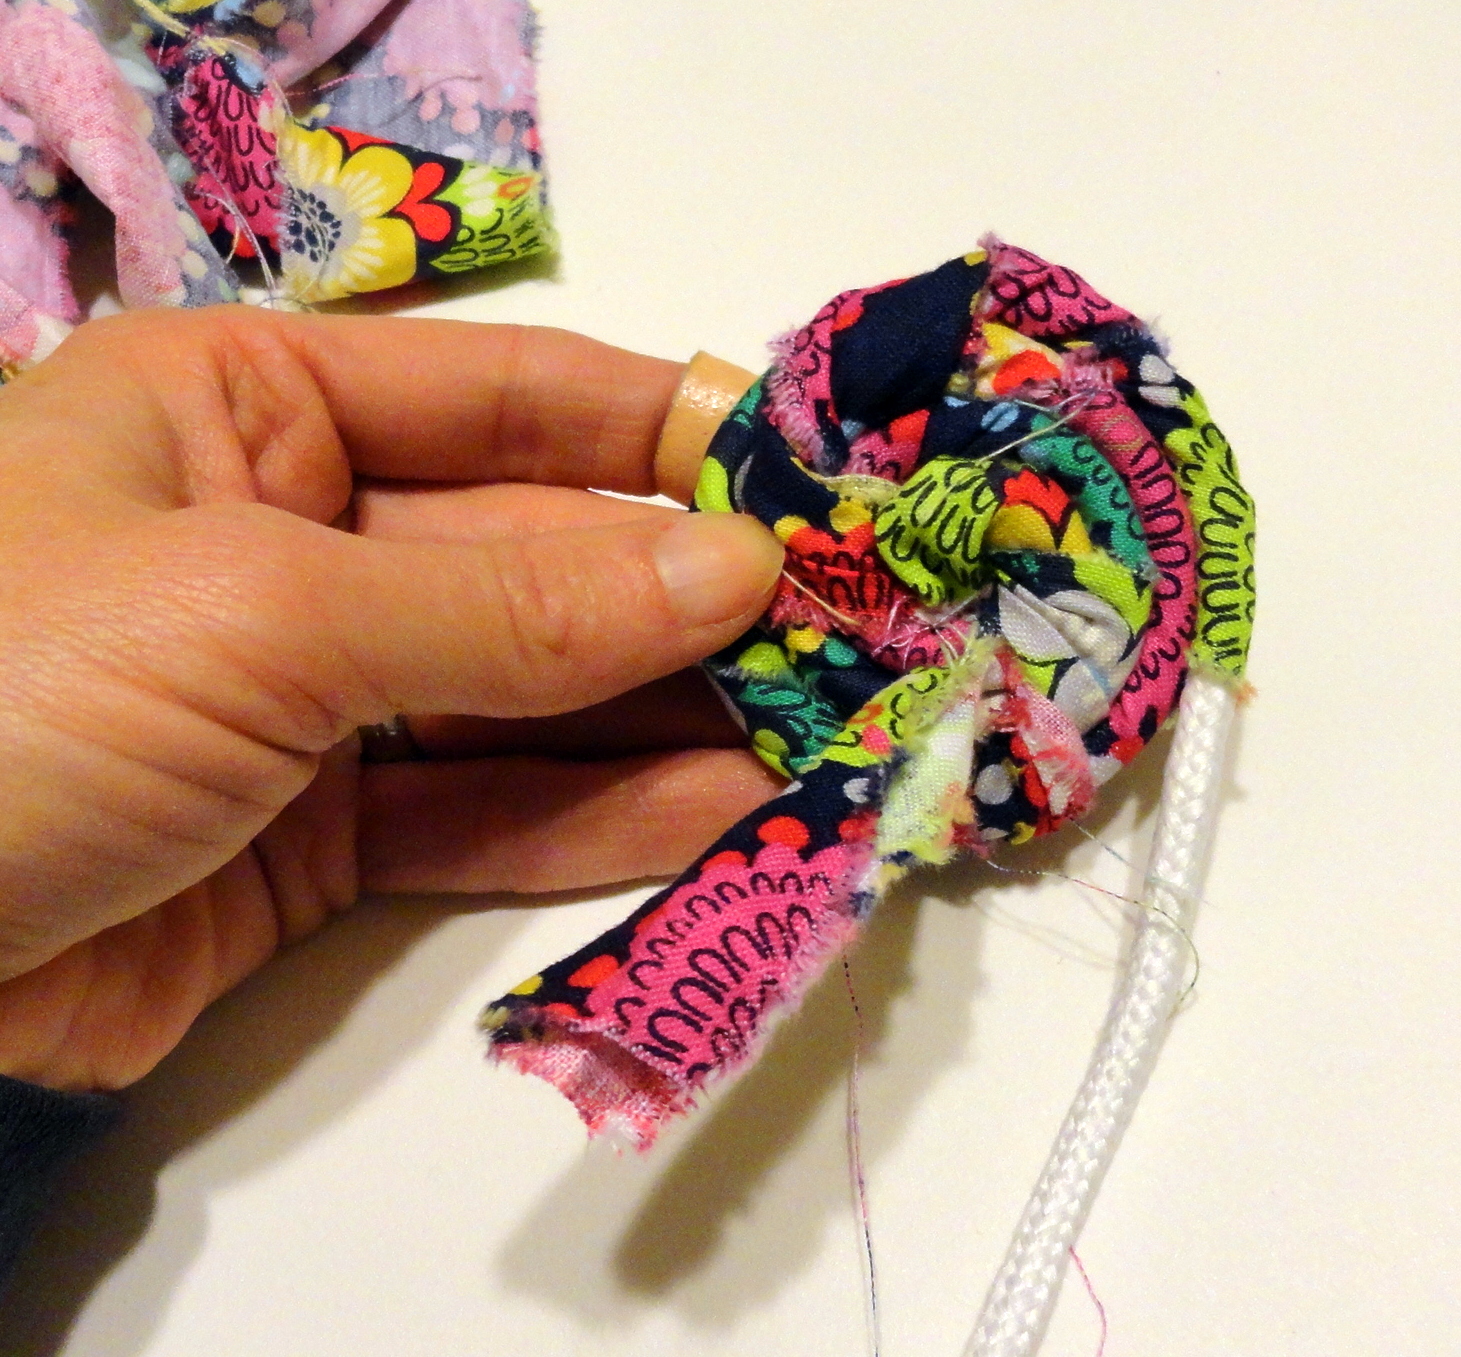
Once the basket is as large as you would like, finish the current piece of fabric that you are working on.
Cut the end of your clothesline.
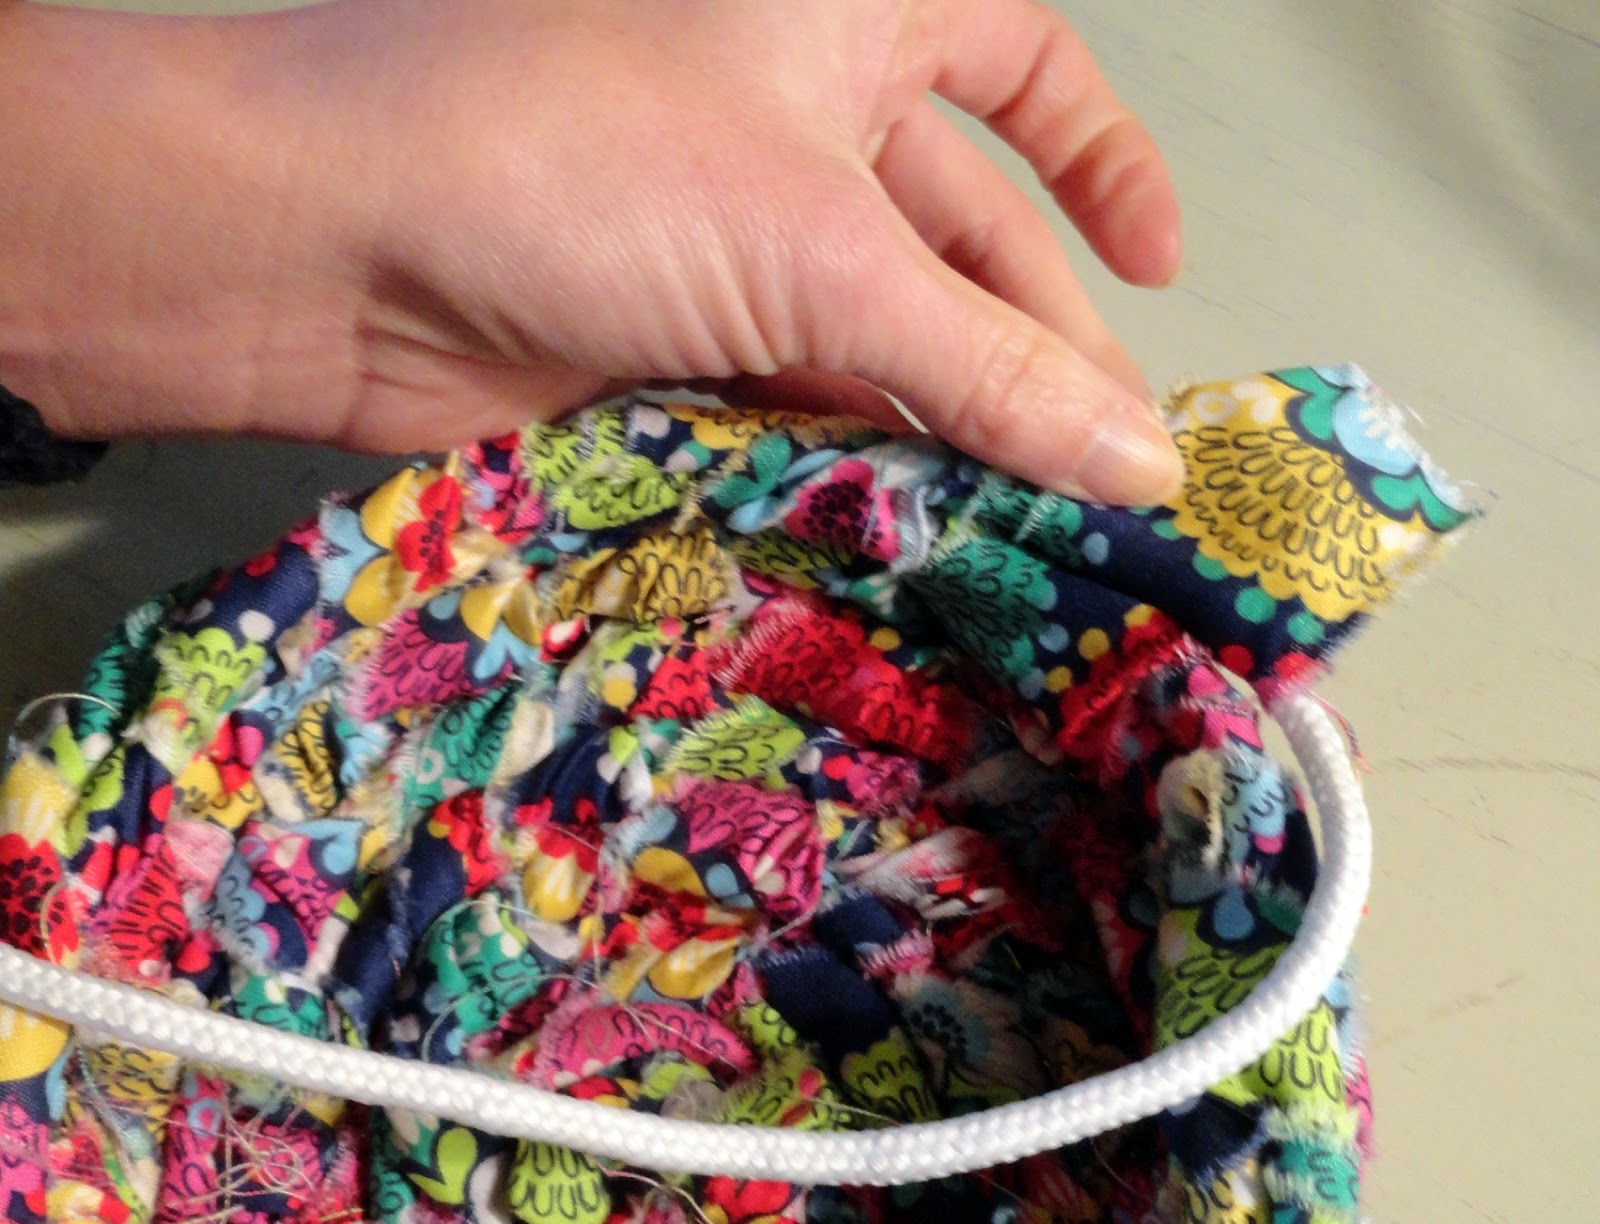
Tuck your fabric wrapped clothesline end in the coil underneath your finished end.
You won't be rough with your basket and you don't have a handle, so there is no need to secure it any more than with a tuck. It will stay in place.
Promise.
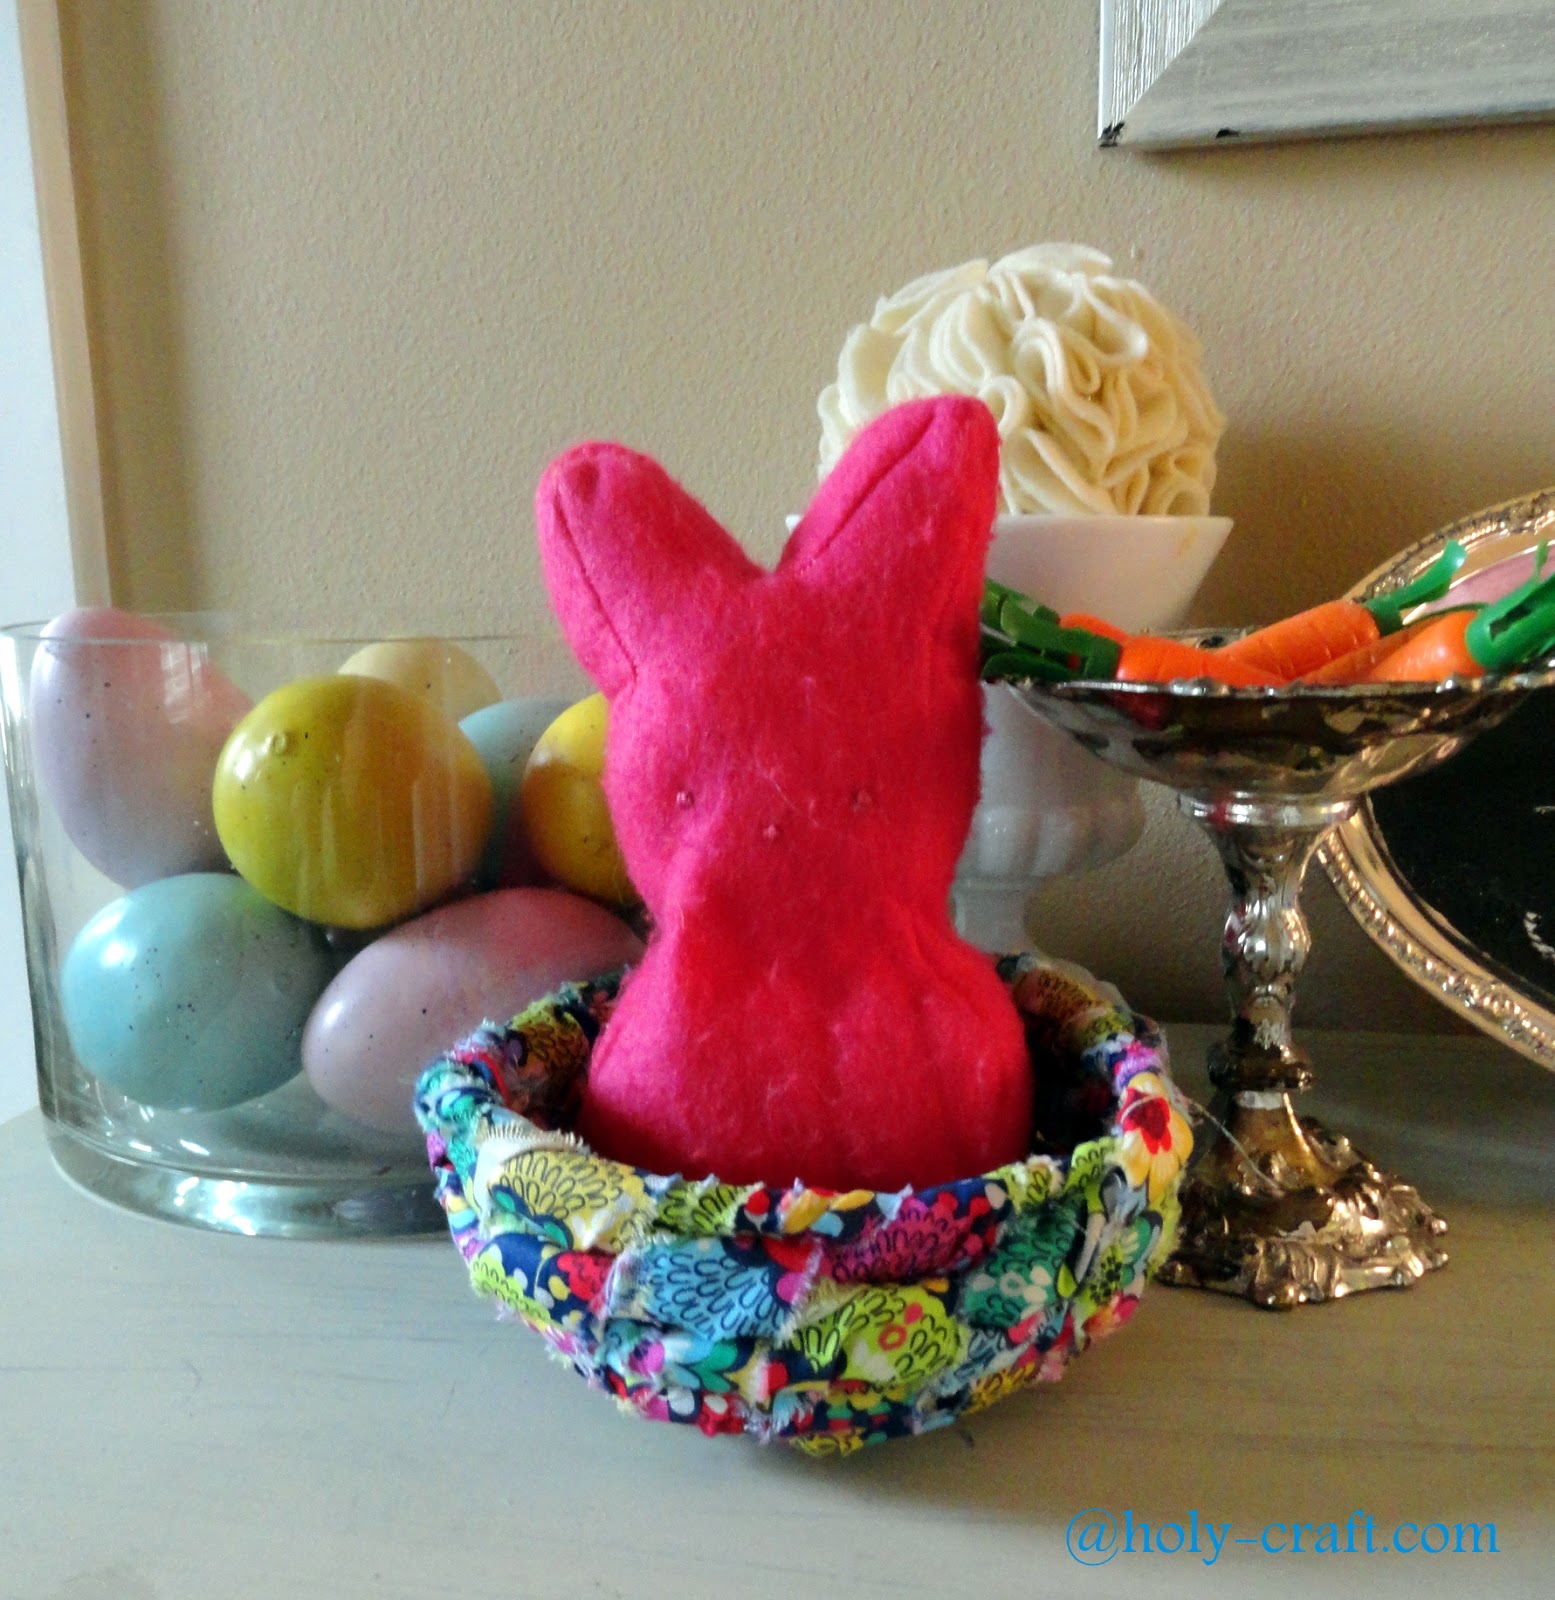
That is your finished basket!
My 11 year old daughter made this one,
I just stopped her along the way to take pictures.
These baskets are tons of fun to make and are quite easy for all skill and age levels.
Friday, March 7, 2014
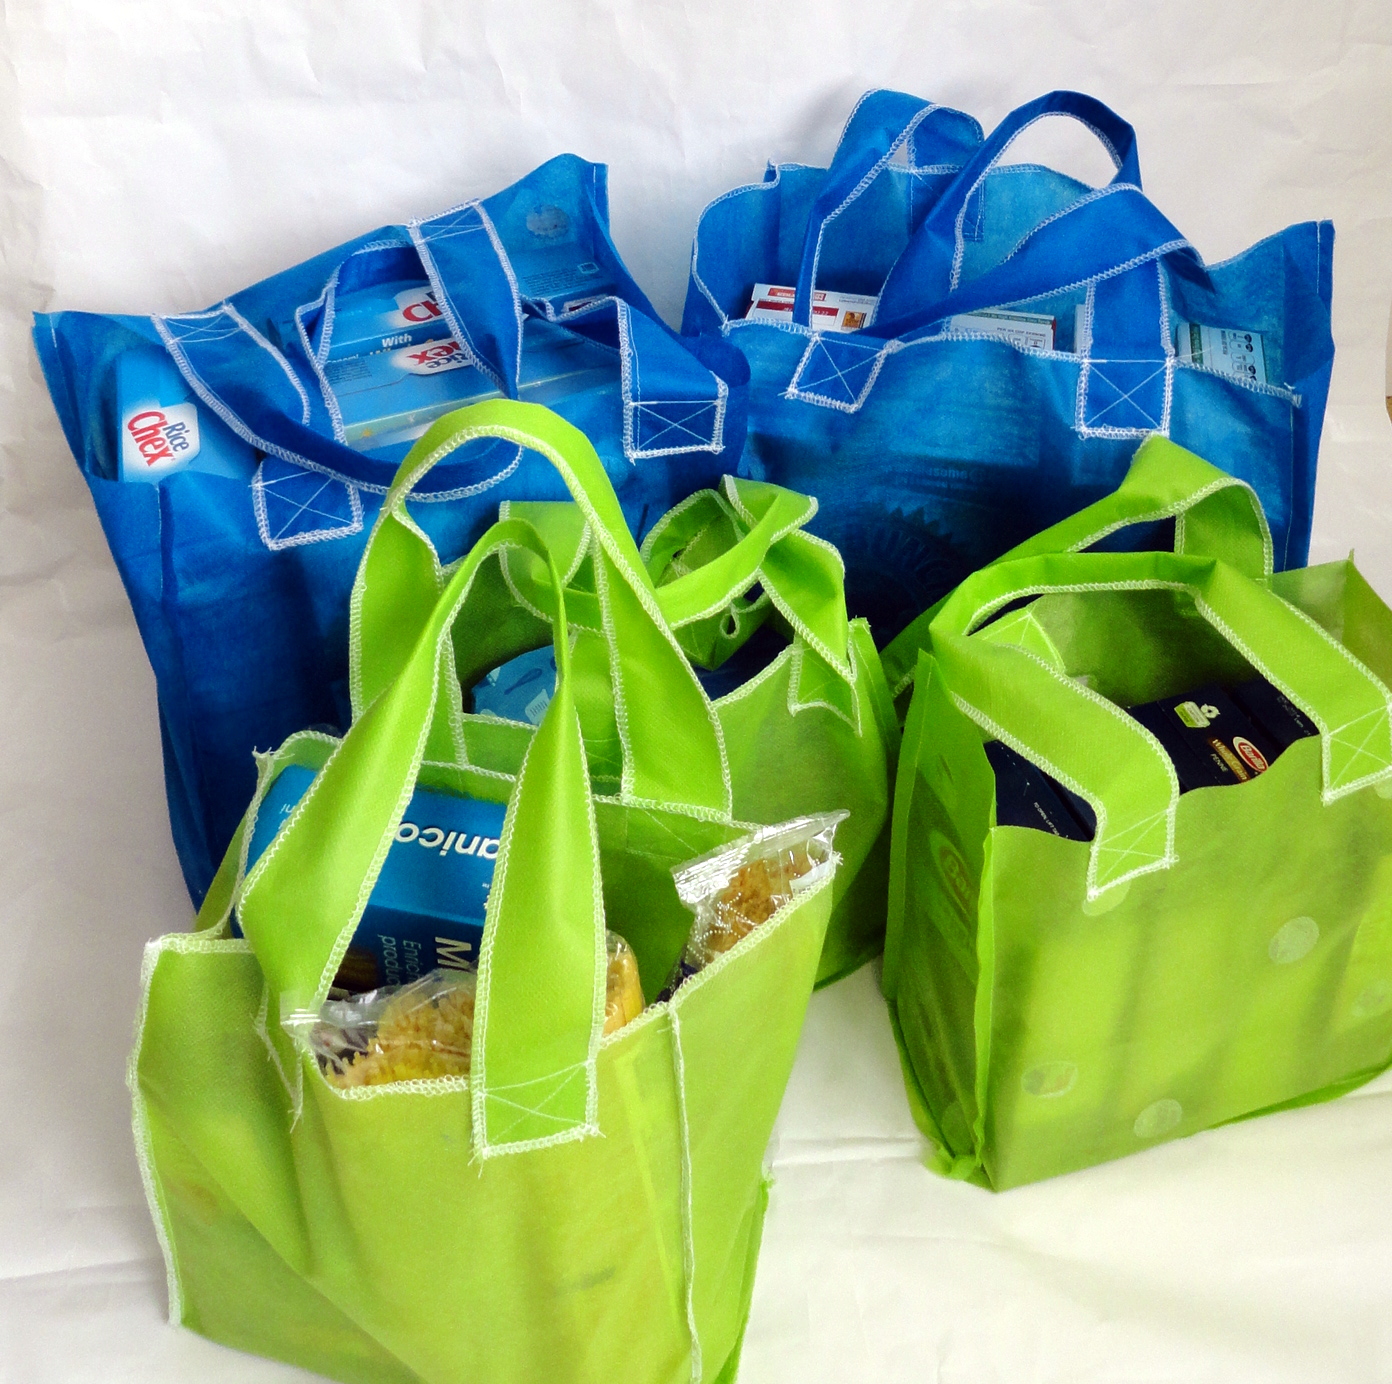
Reusable grocery bag tutorial
In our state, plastic bags are slowly being outlawed.
Reusable grocery bags are the solution that our state sees to help solve the environmental problem that is plastic bags.
As a family of five, we can never have enough reusable grocery bags for the grocery store.
Today, I'm going to show you how you can make your own reusable grocery bags for your next grocery trip.
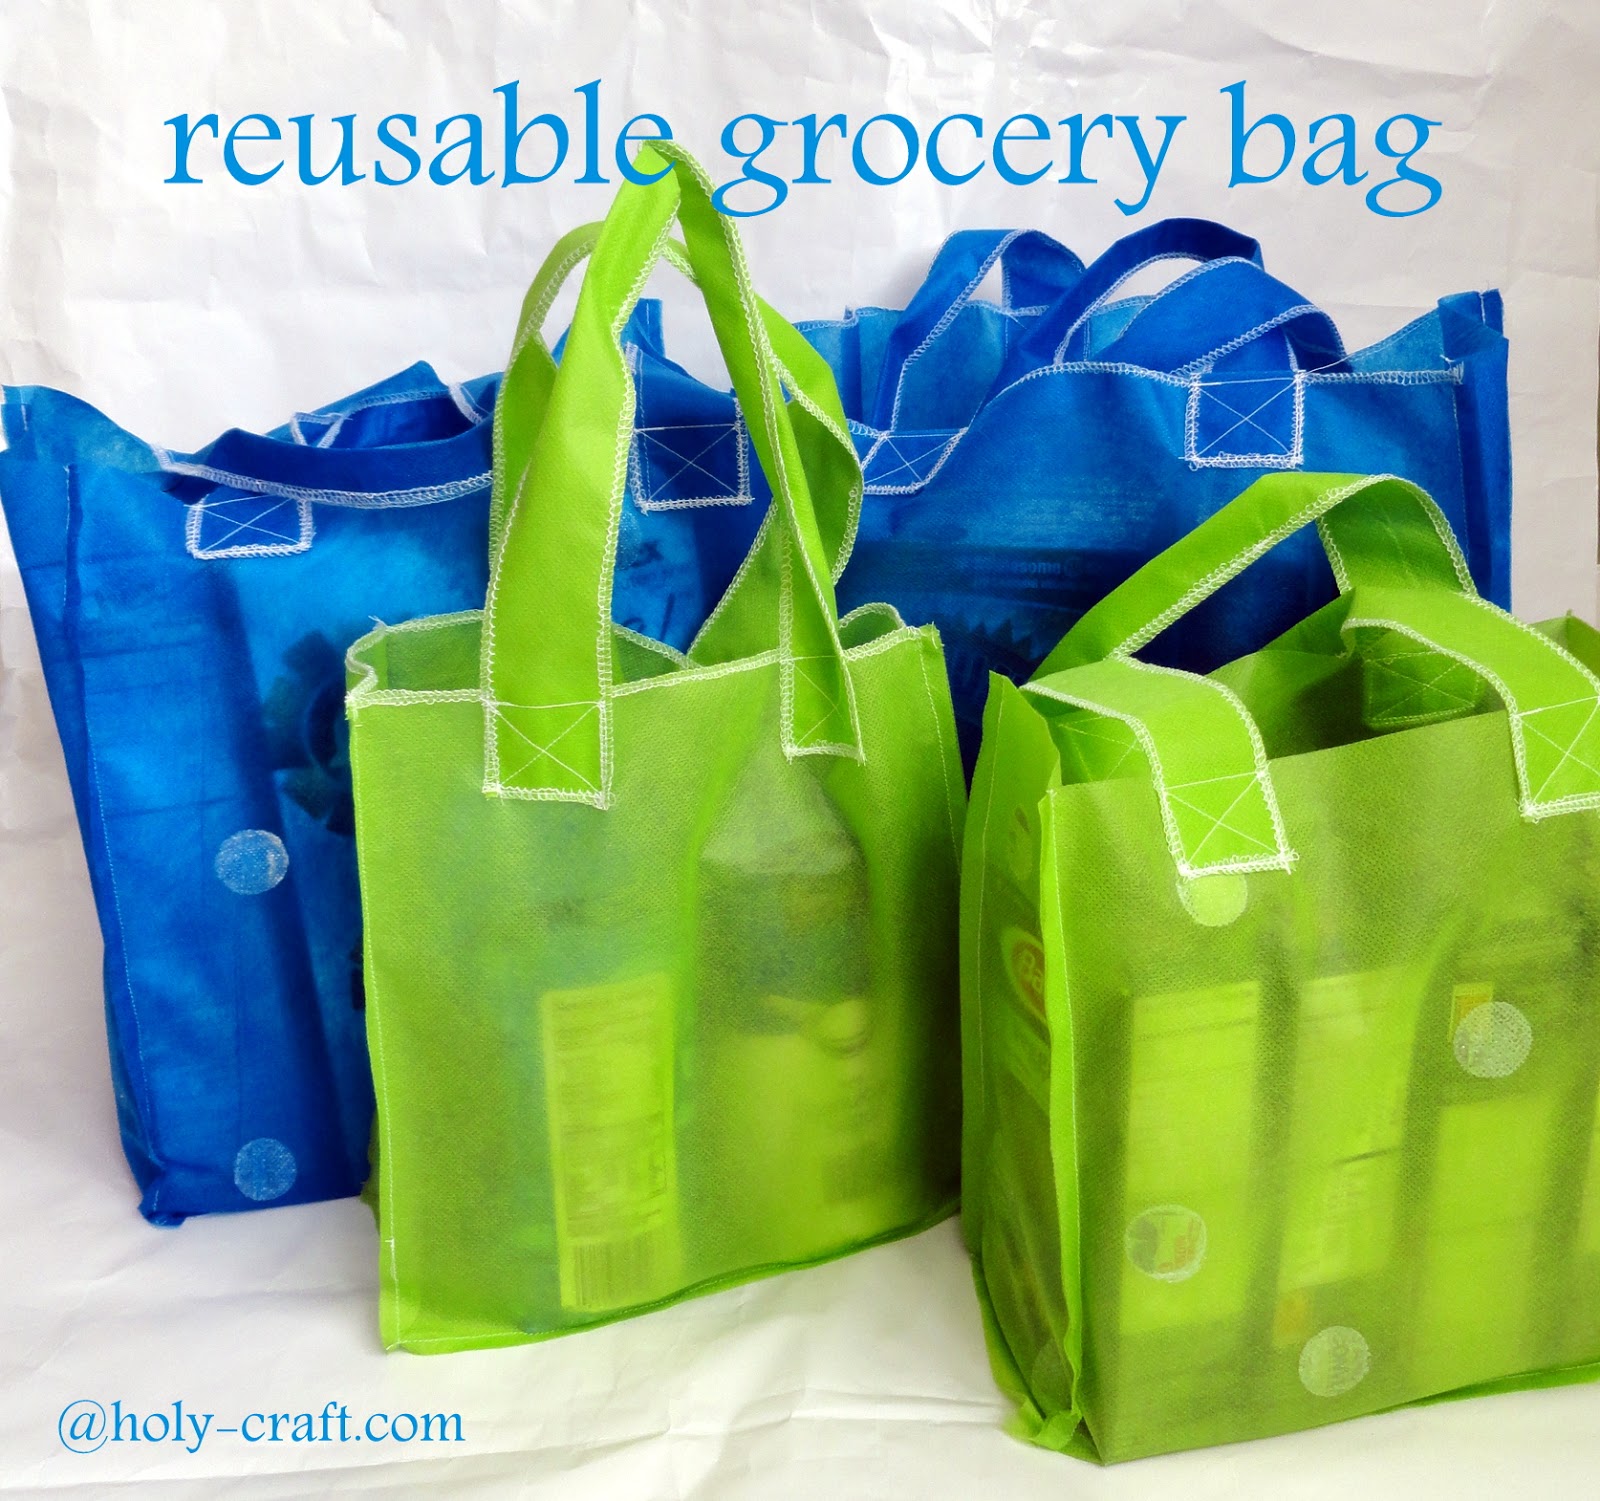
Or, if you have enough reusable bags already, you can never have enough gift sacks in your gift closet.
This bag has many uses!
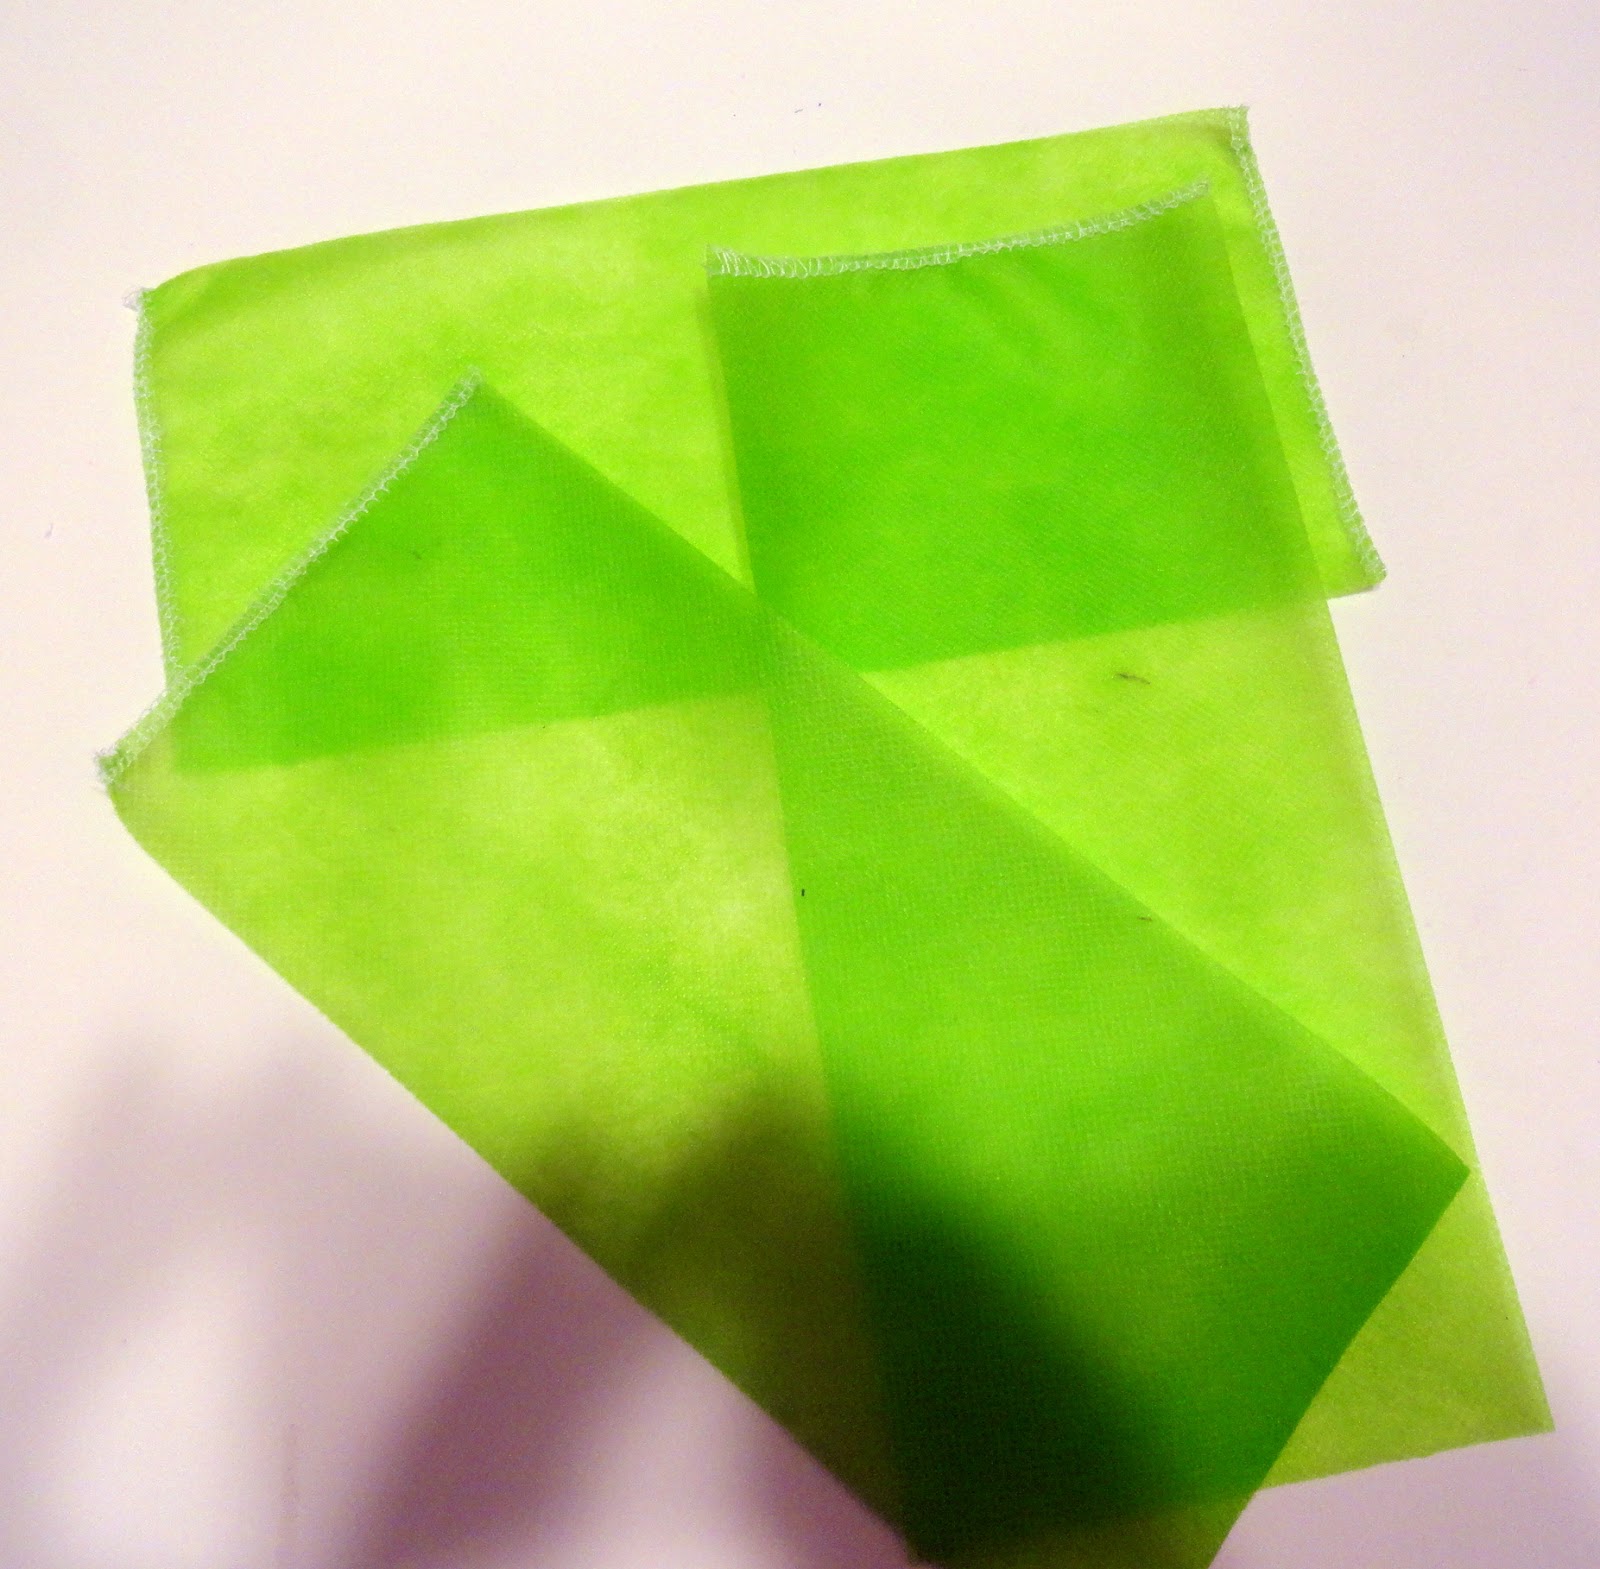
I started with a few rolls of smart fab
Smart fab is a smart alternative to paper and cloth.
It's a non woven fabric that you can easily cut, fold, glue, sew and staple.
Best part, it doesn't fray and it's recyclable!
There are many uses for smart fab.
You can check out this site for more uses.
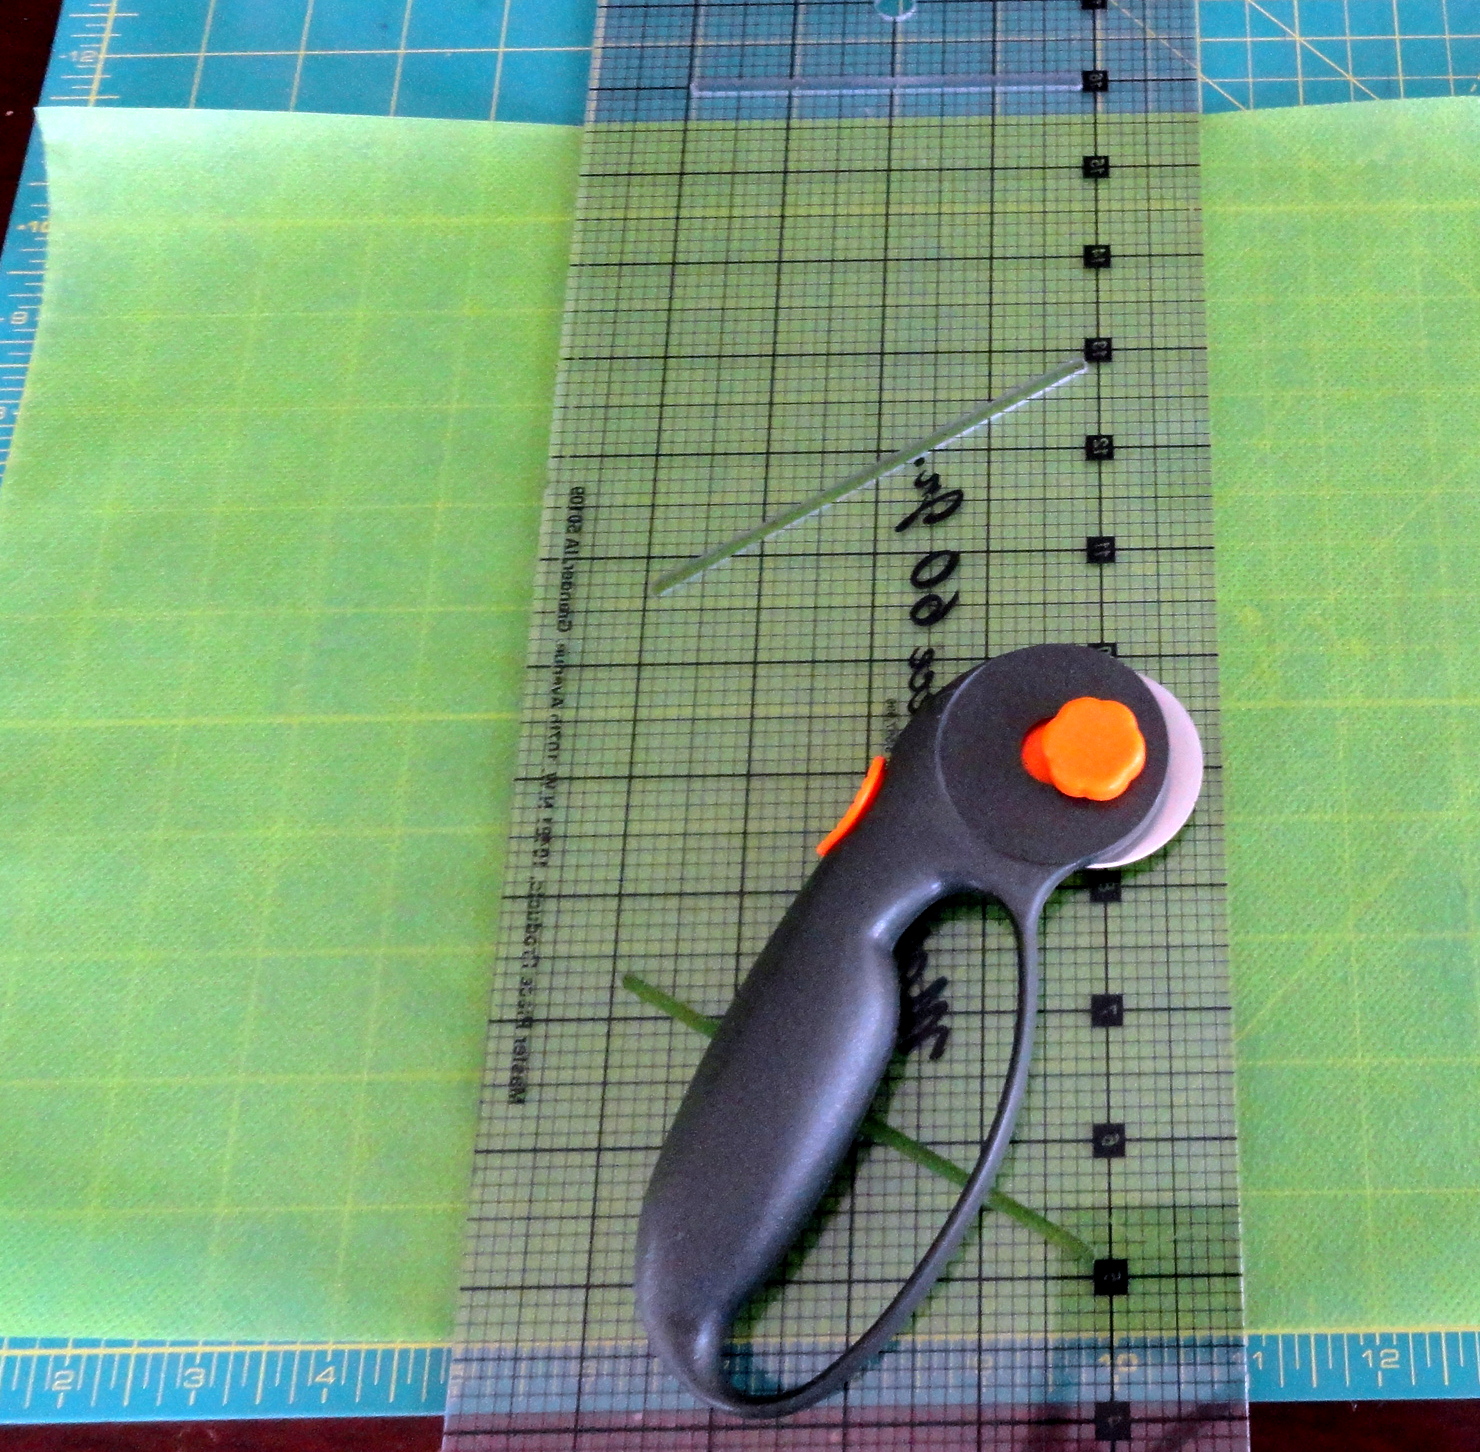
The smart fab fabric is really easy to cut, but of course,
you can always use any cotton fabric that you have on hand too.
I made two bag sizes.
The first I cut 2 pieces of the main body fabric 11x11
3 pieces {that will be your sides and bottom} 11x5
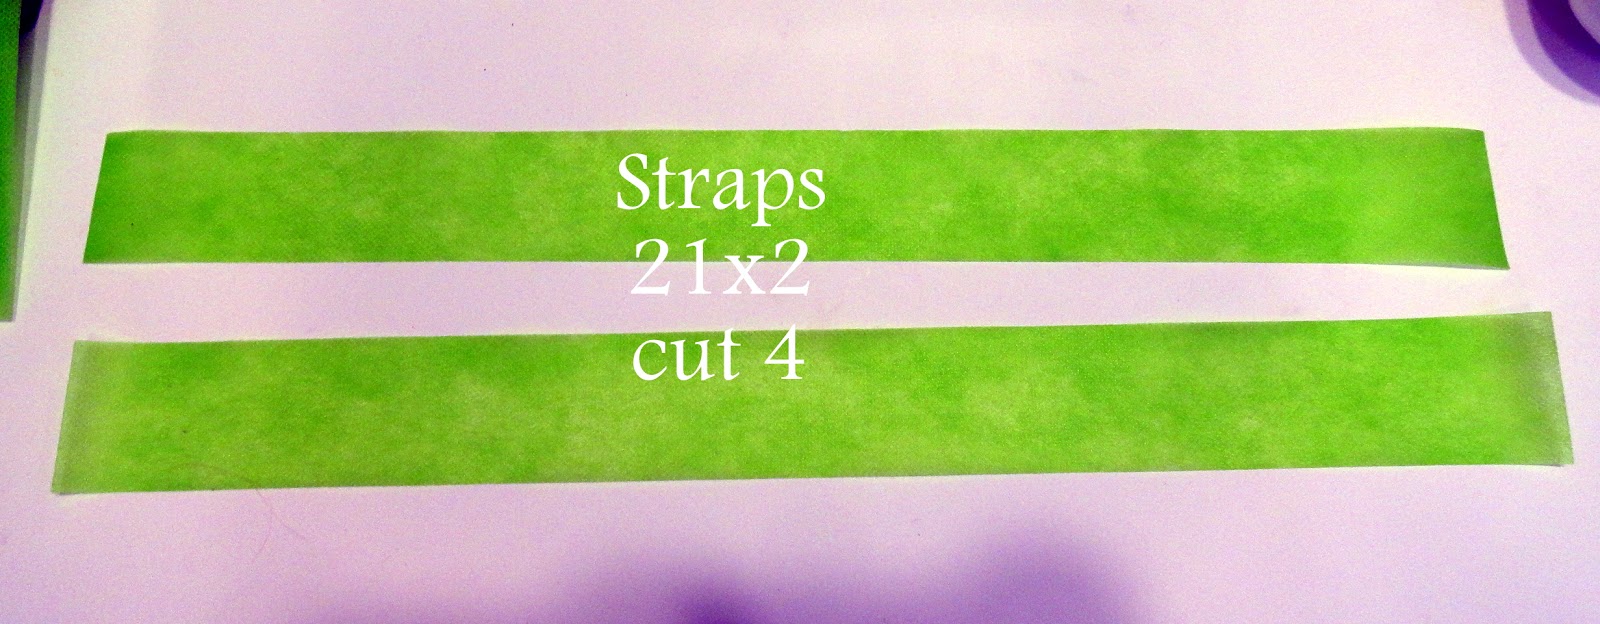
and 4 straps {you will double them up} at 21x2
The second {and larger} bag
main body 15x15 {cut 2}
sides and bottom 15x8 {cut 3}
straps 24x2 {cut 4}
This tutorial will be for the smaller bag.
Just substitute any measurements if you are making the larger bag.
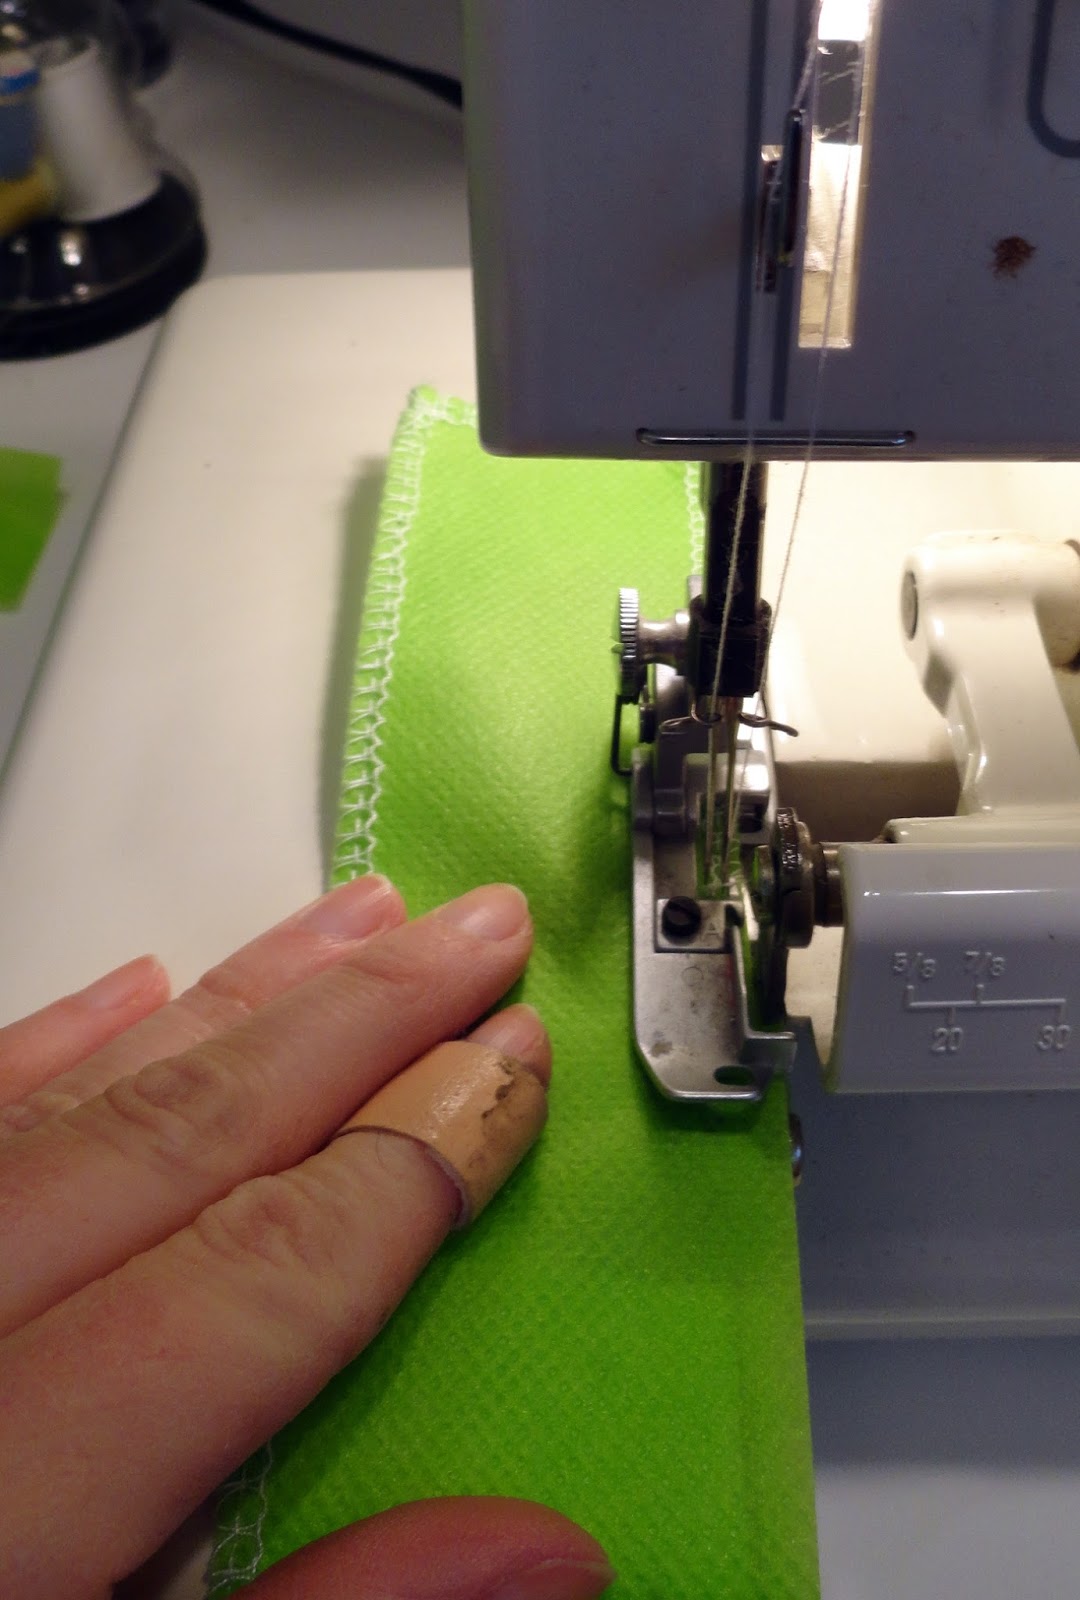
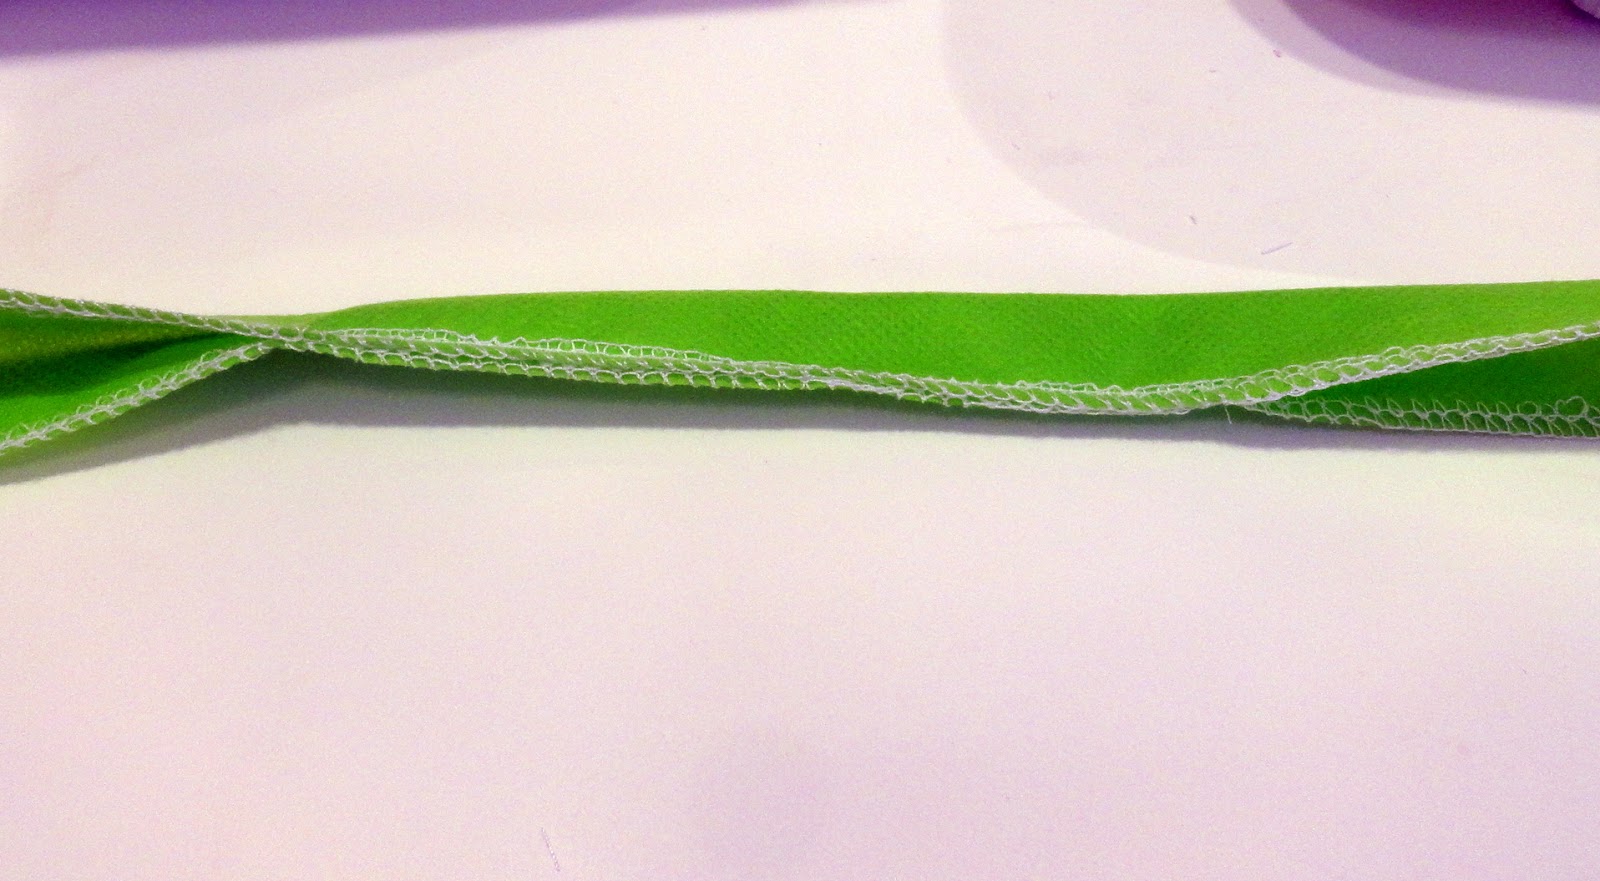
Because you want the straps to be strong, you will be cutting four straps and will be doubling the straps to increase their strength.
Place two straps on top of each other and serge them together.
If you do not have a serger, you can use a zig zag stitch.
To reinforce the straps even more, pin 5-6 inches in the center of your strap and sew them together at the opening.
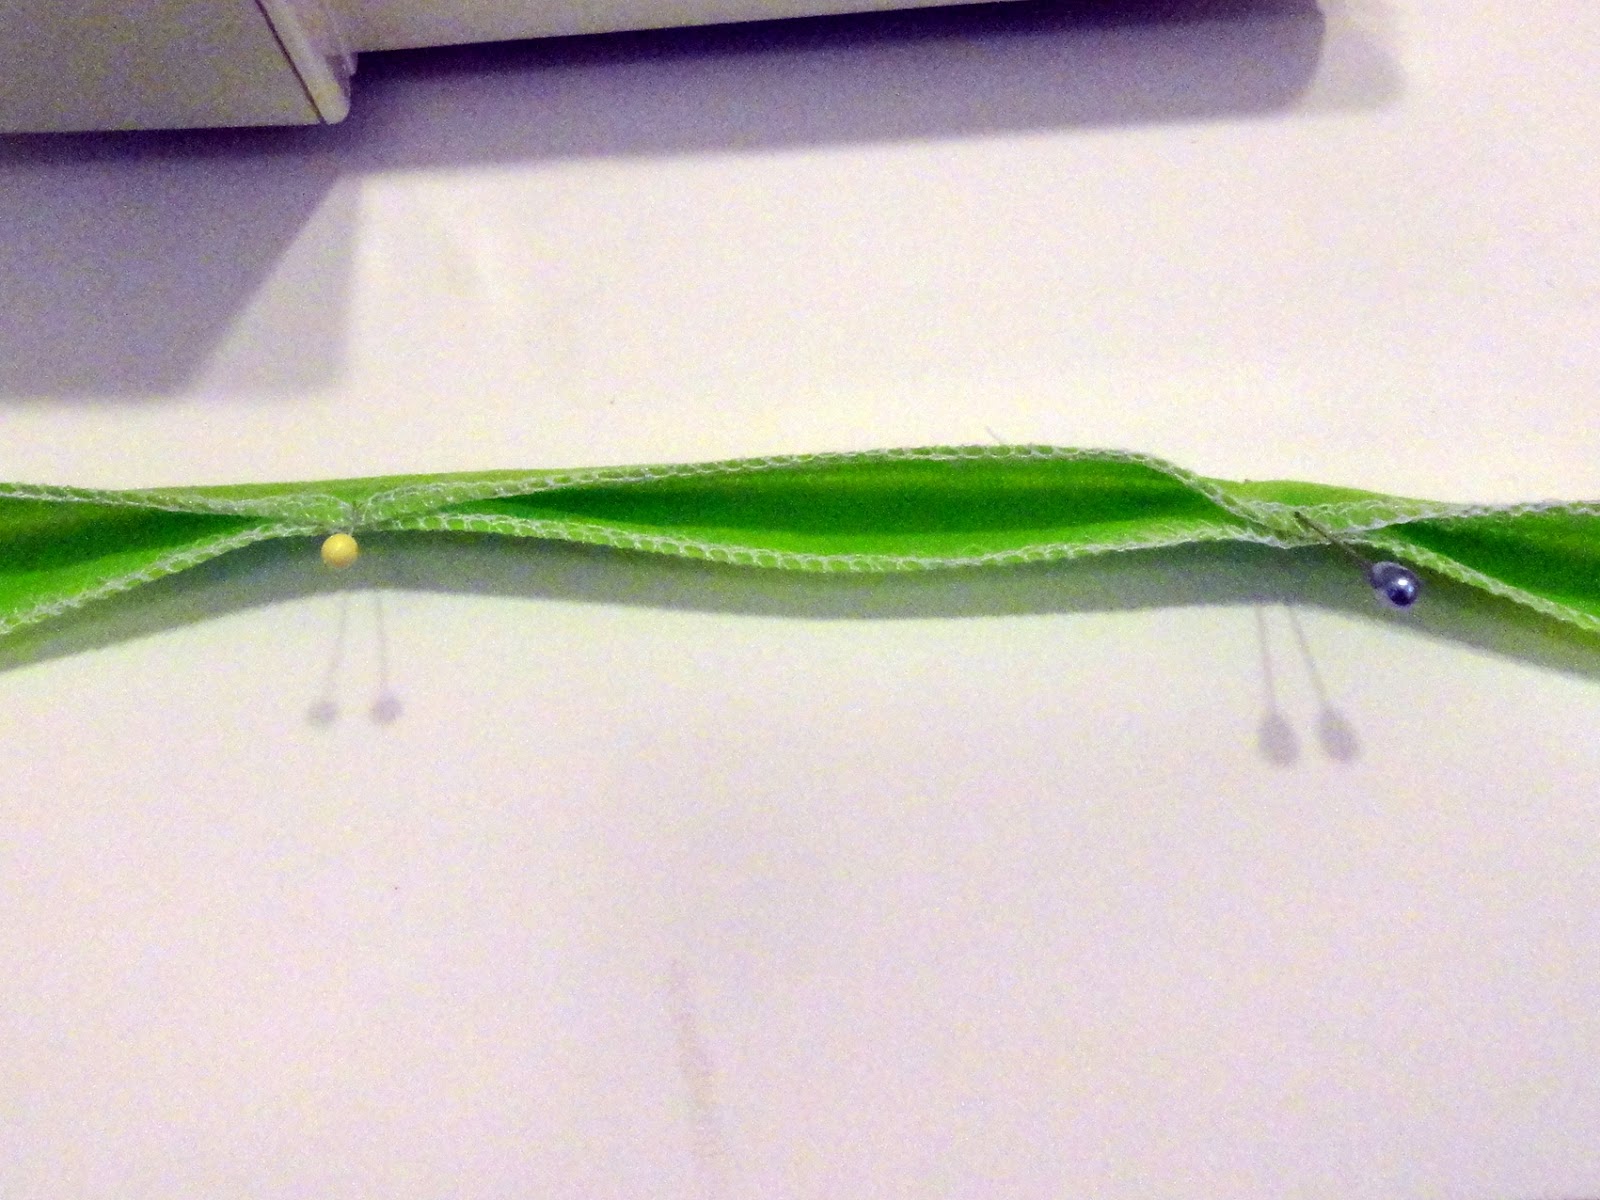
Your straps will end up looking like this in the center.
Not one to leave things plain,
I wanted to add polka dots to the plain fabric before I sewed them together.
I used a pouncer and dimensional fabric paint.
Dip your pouncer in your paint and carefully press them down on your fabric.
You really only need to paint your side, bottom and front and back pieces.
While you wait for those to dry, you can sew your plain bags together.
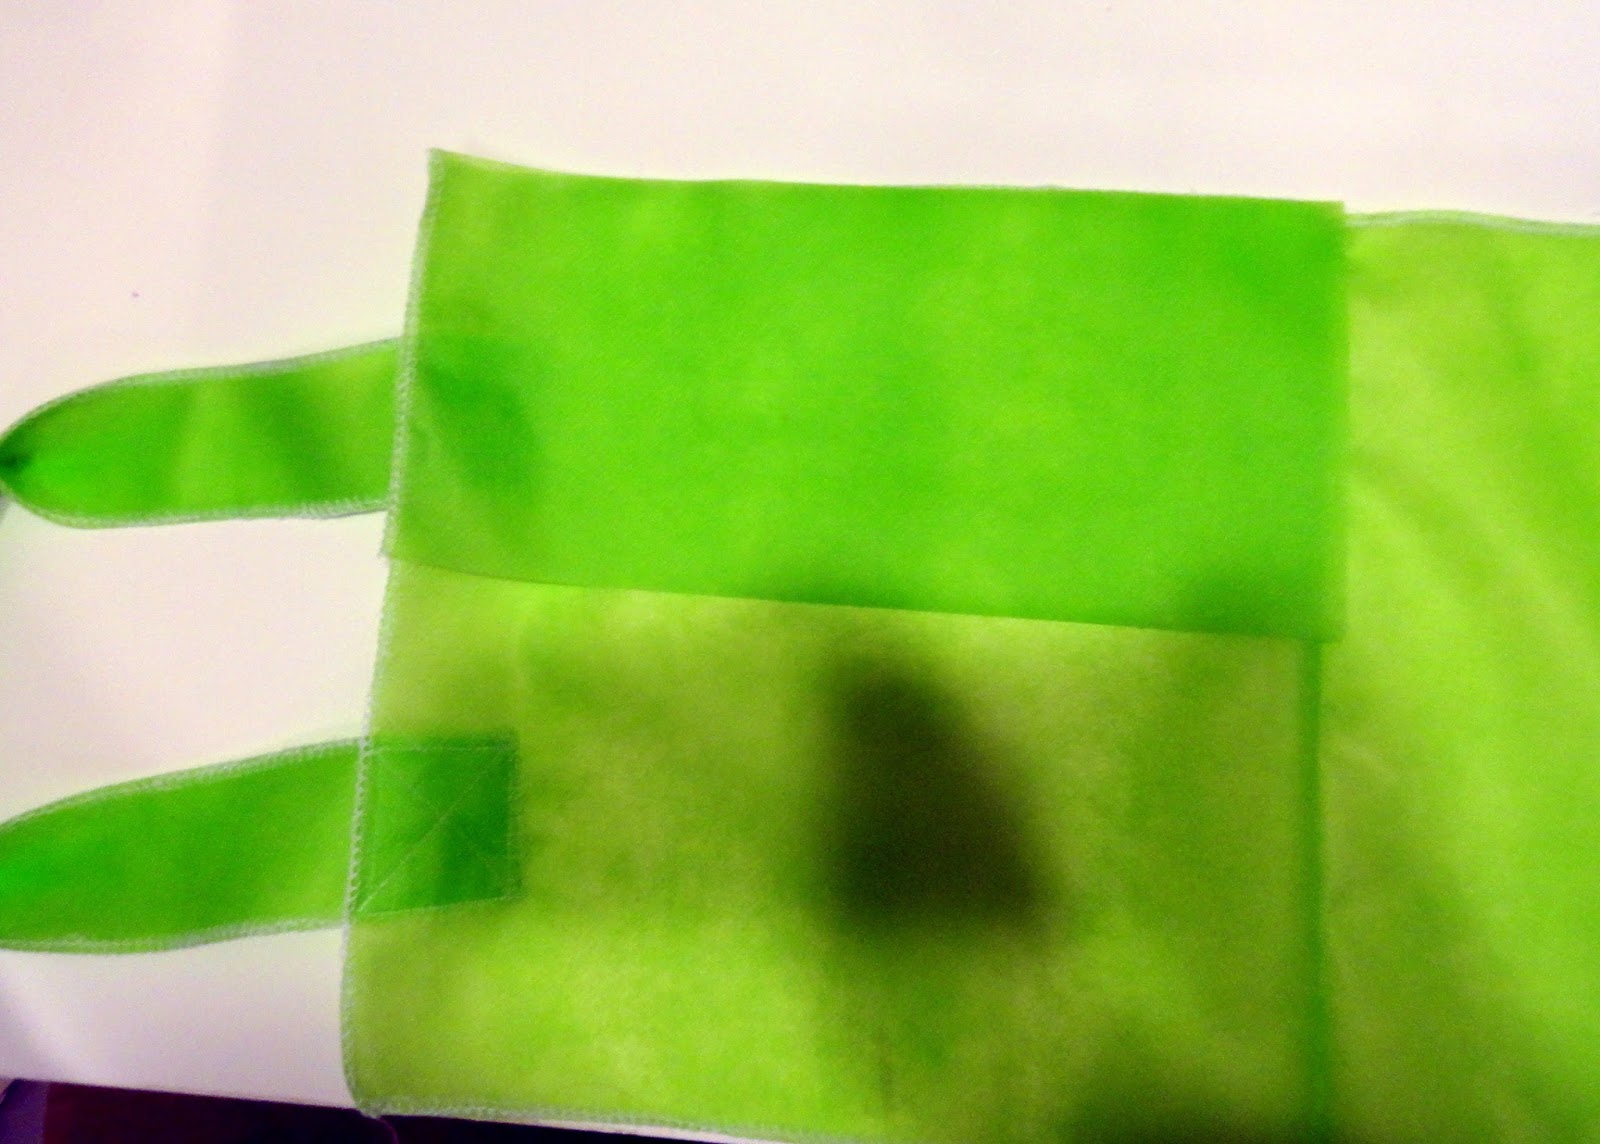
Take your sewn straps and pin one on each side of your large bag piece.
I eyeballed it, but if you are picky, you can use your ruler to measure how far apart your straps are.
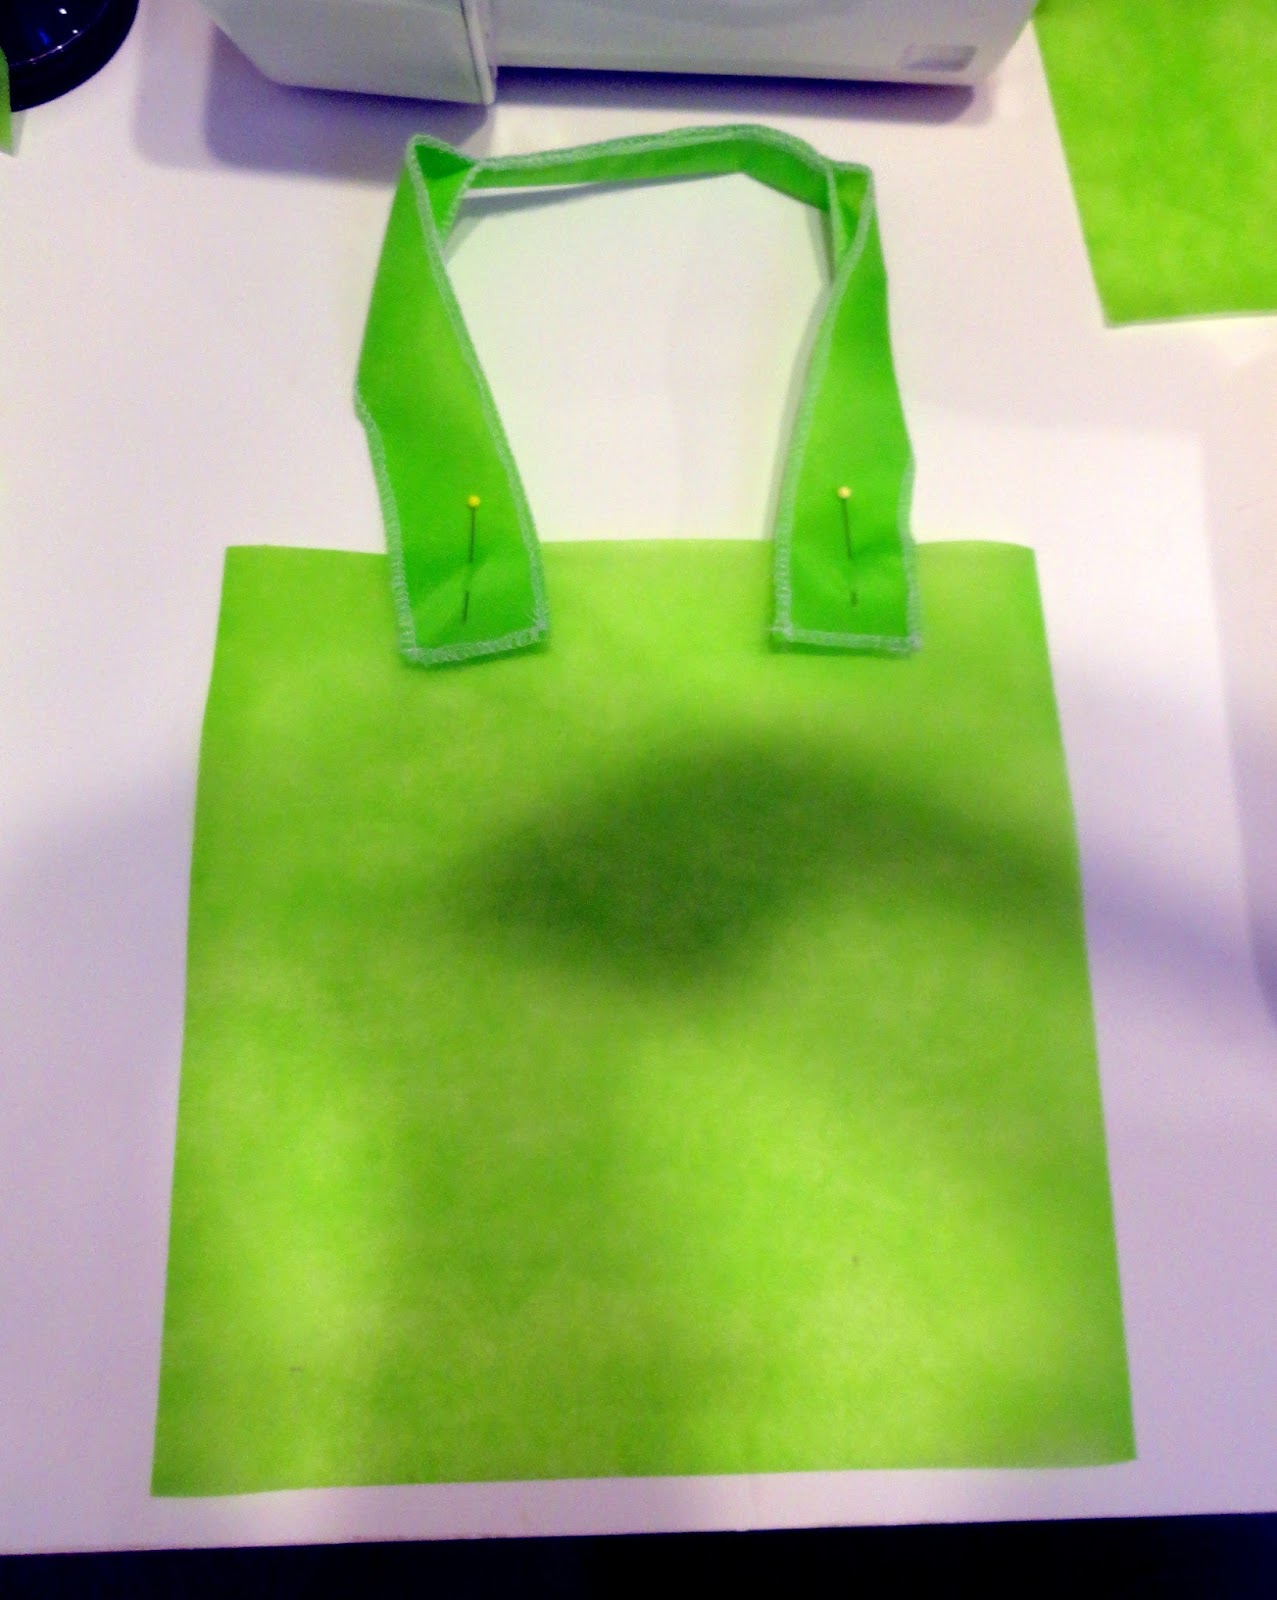
I sewed the straps down on the bag in an "x" pattern.
This helps to strengthen your straps.
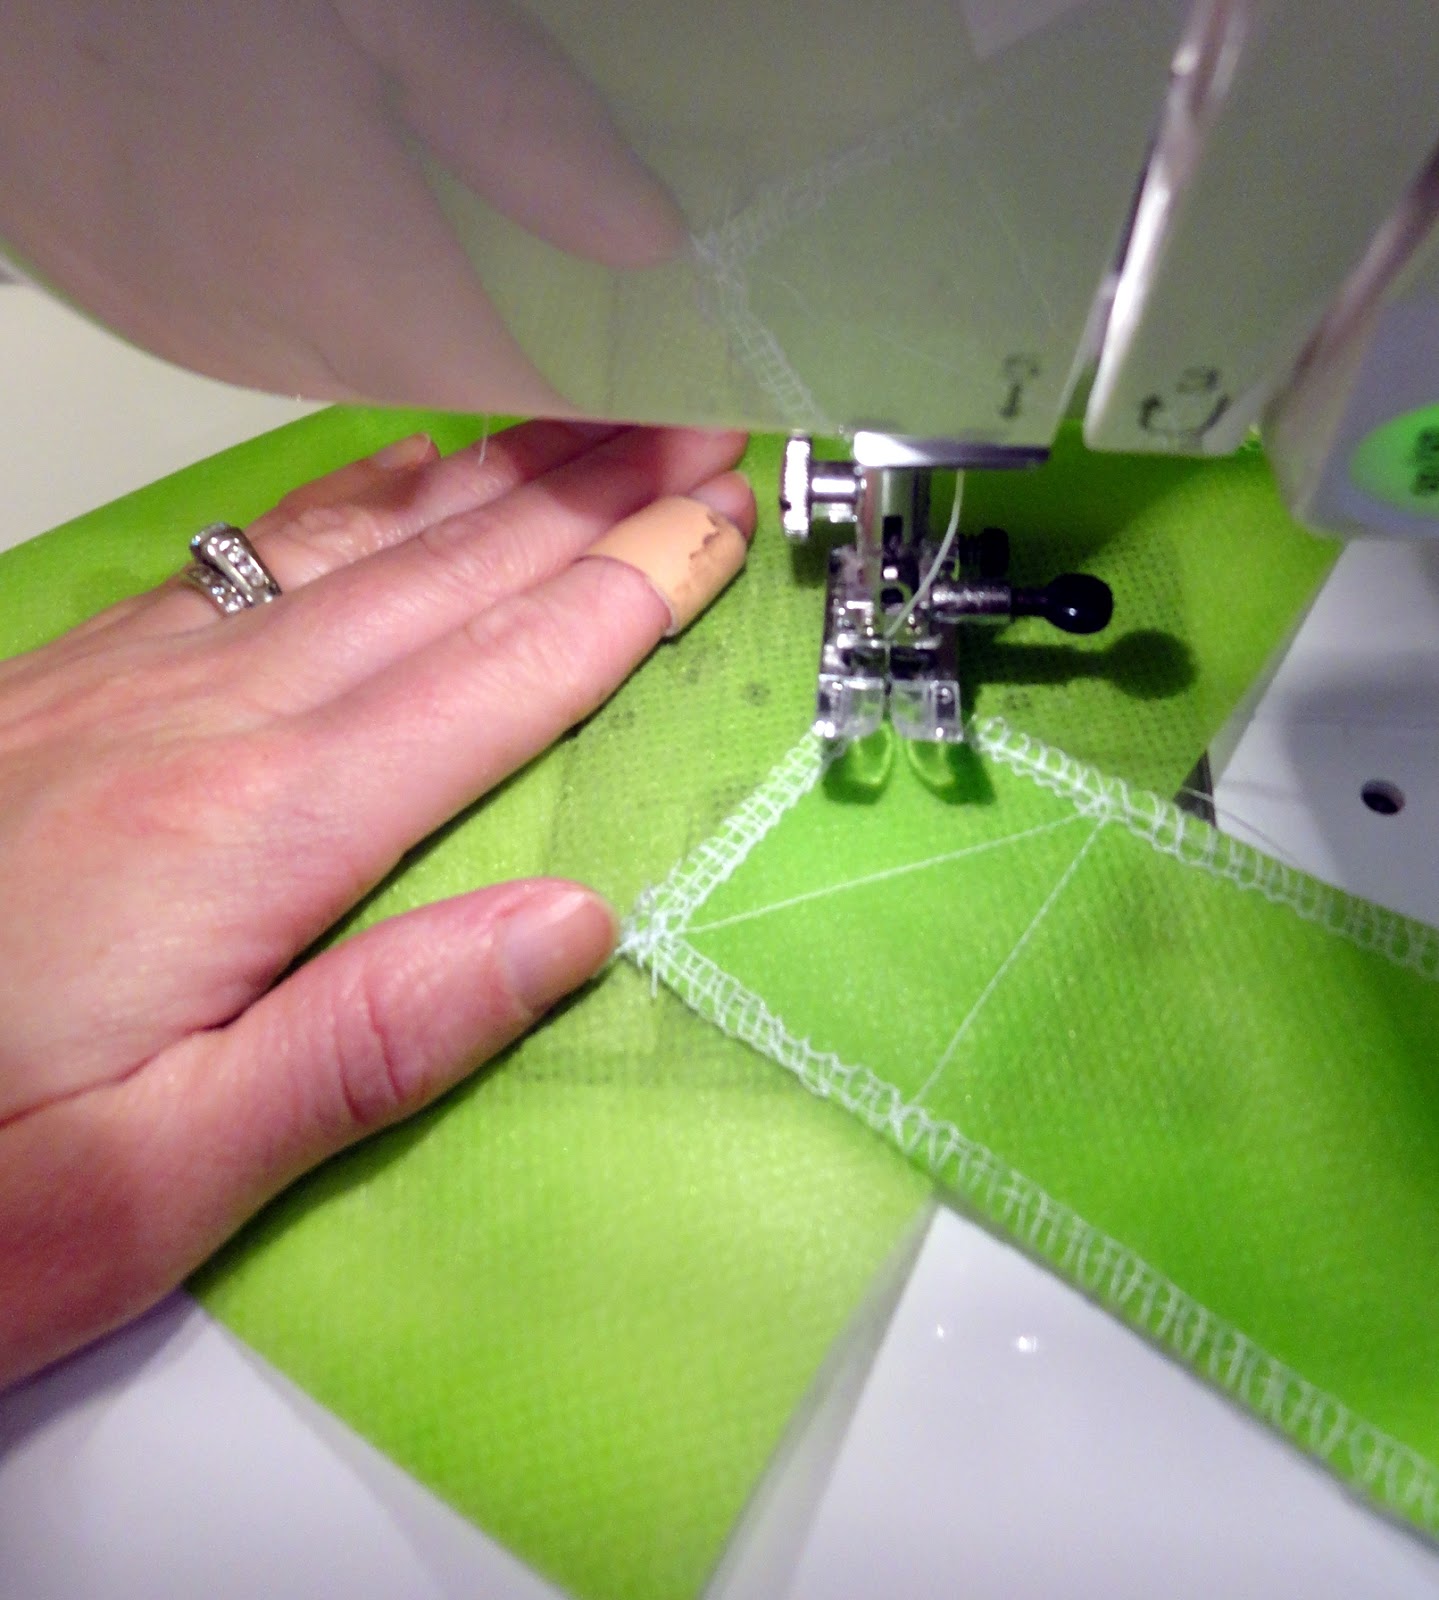
At this point, you should have two pieces with your straps sewn down on top.
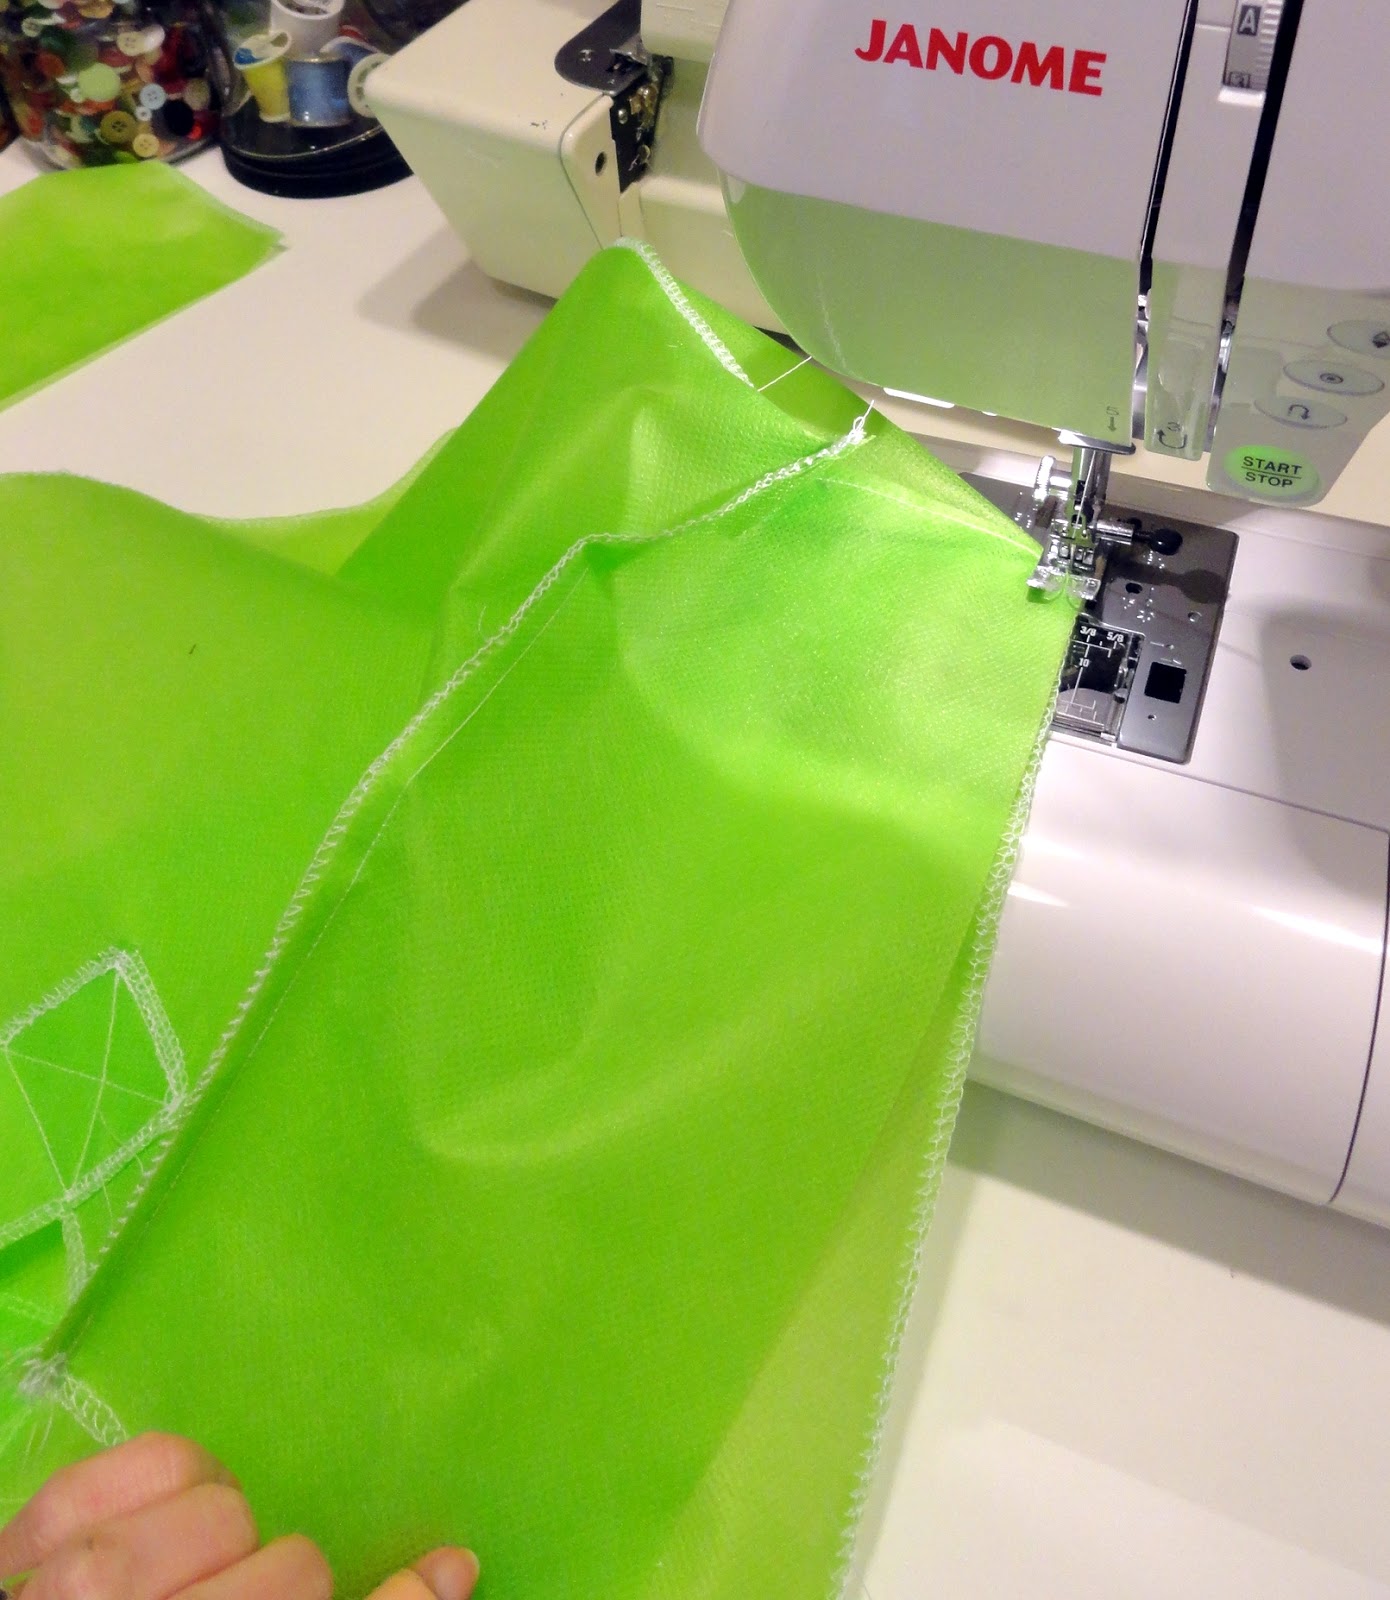
I like to serge the edges of the sides and bottom.
Again, you can zig zag stitch or leave it alone since this material doesn't fray.
Take your bottom piece and sew at the bottom of your two large pieces.
I like the seam on the outside so I stitch them wrong sides together if you can even distinguish which side the wrong side is!
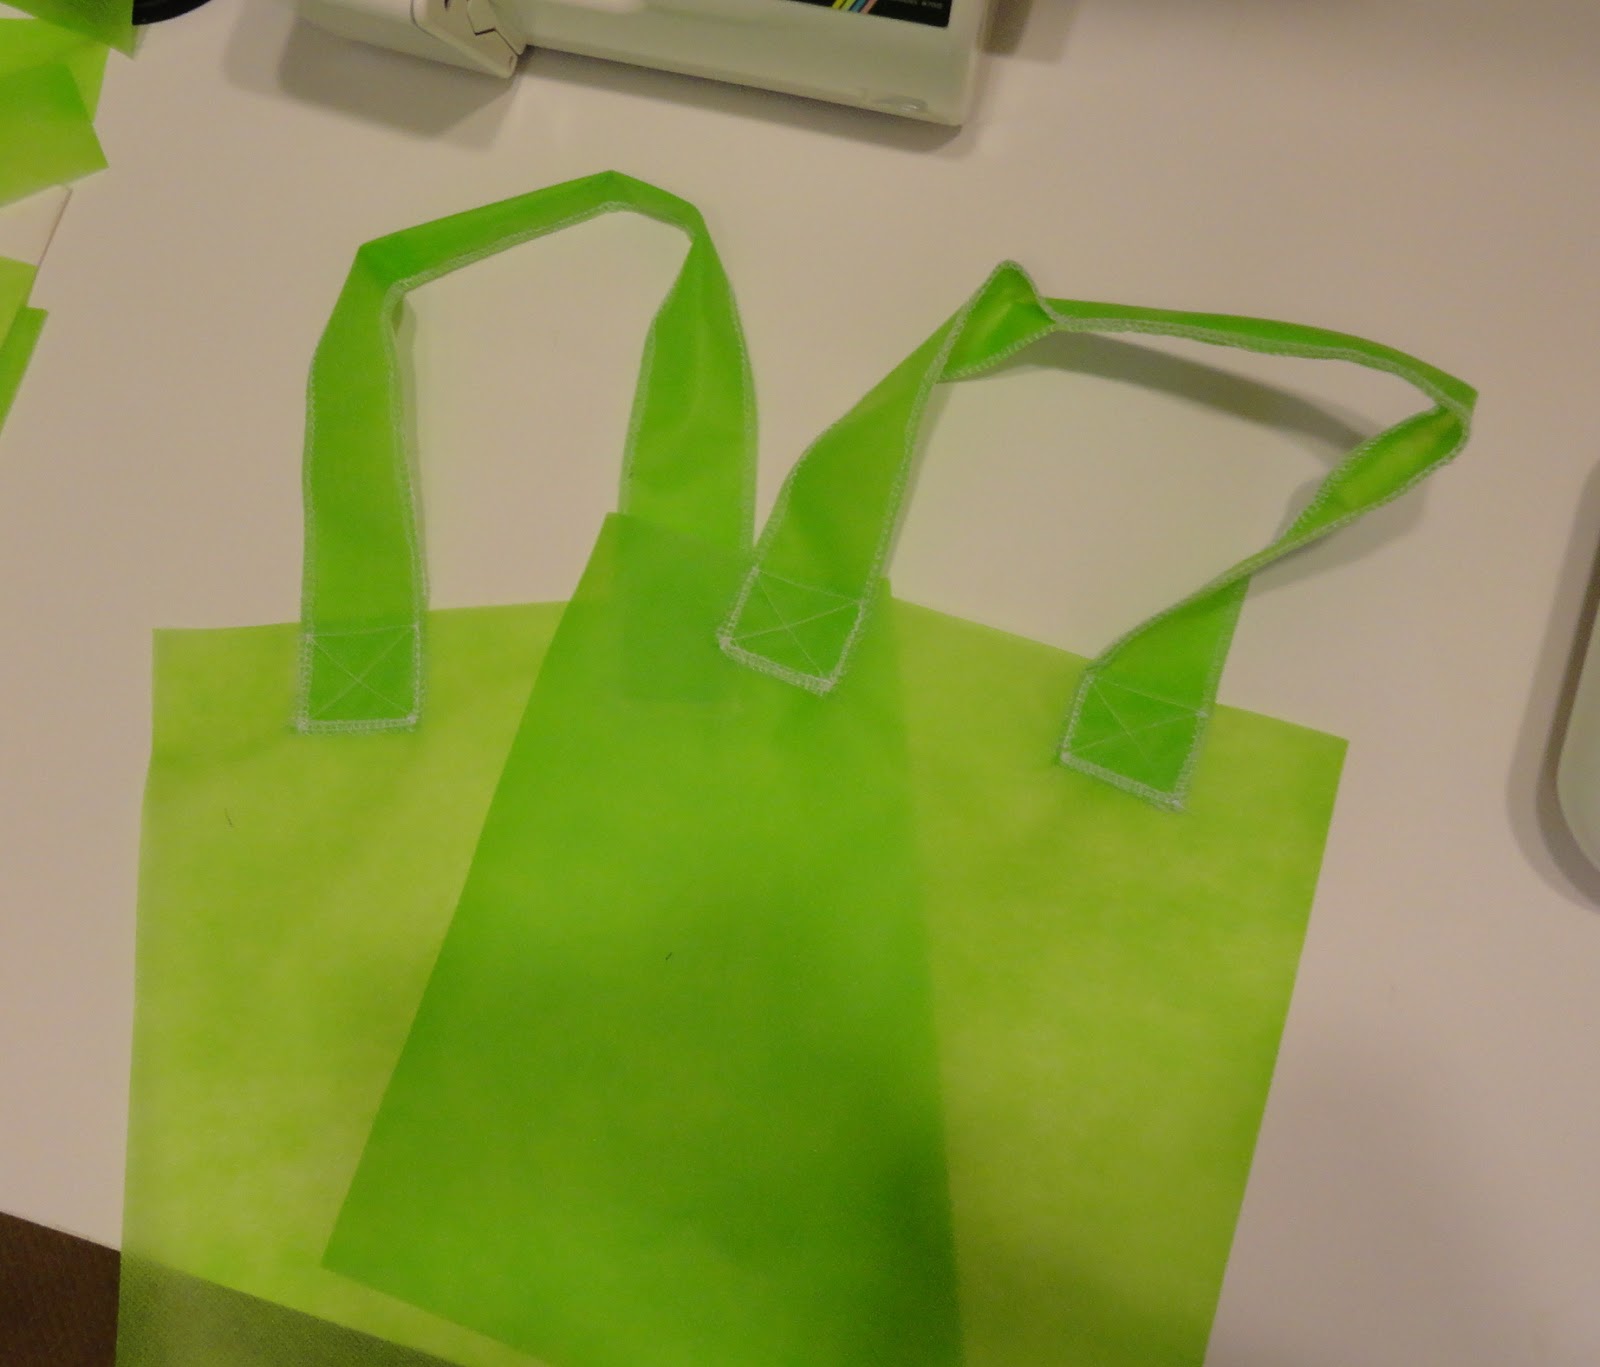
The next part is a little trickier.
You will take one of your side pieces and starting at the top by the handle, start sewing down to the base.
Once you get to the base at the bottom, you will stop your needle, turn your fabric and sew the bottom shorter end of your side piece onto the base of your bag.
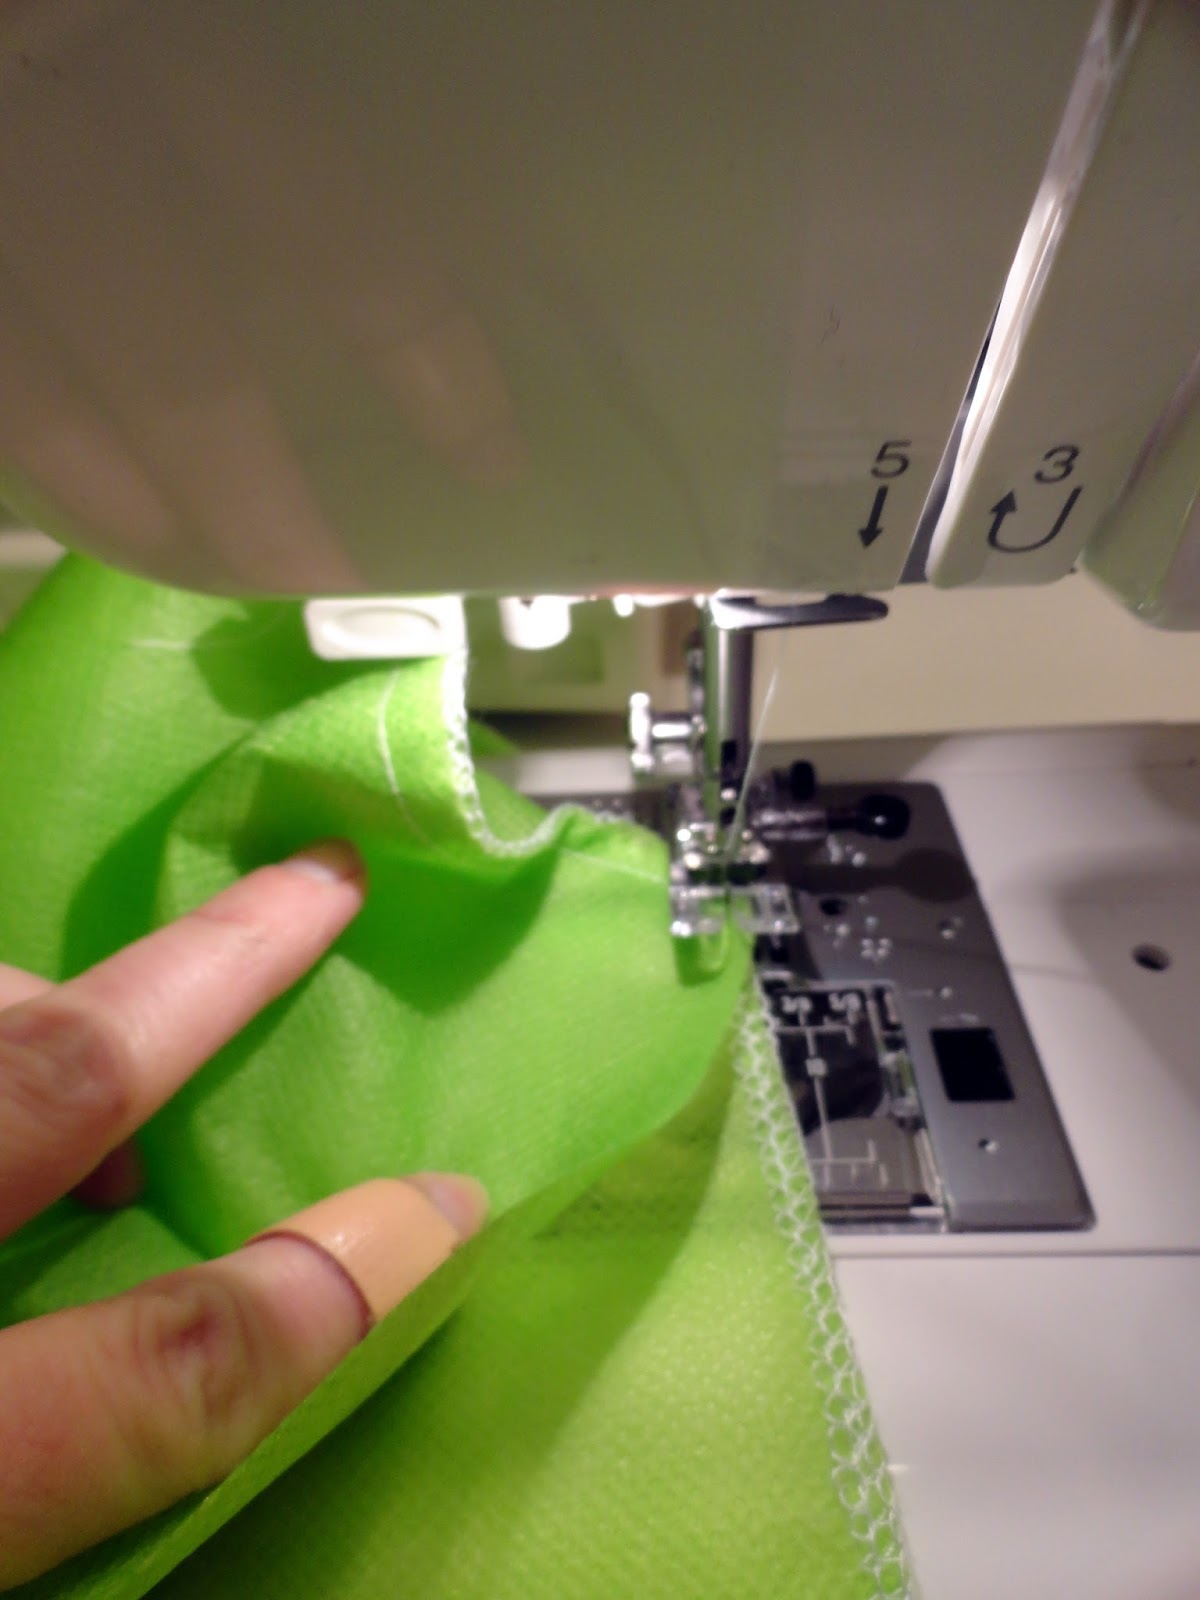
Once you sew the bottom and the side together, stop, turn your needle and your fabric again and sew up the other side from the bottom to the top.
Repeat this with the other side and you have your bag completed!
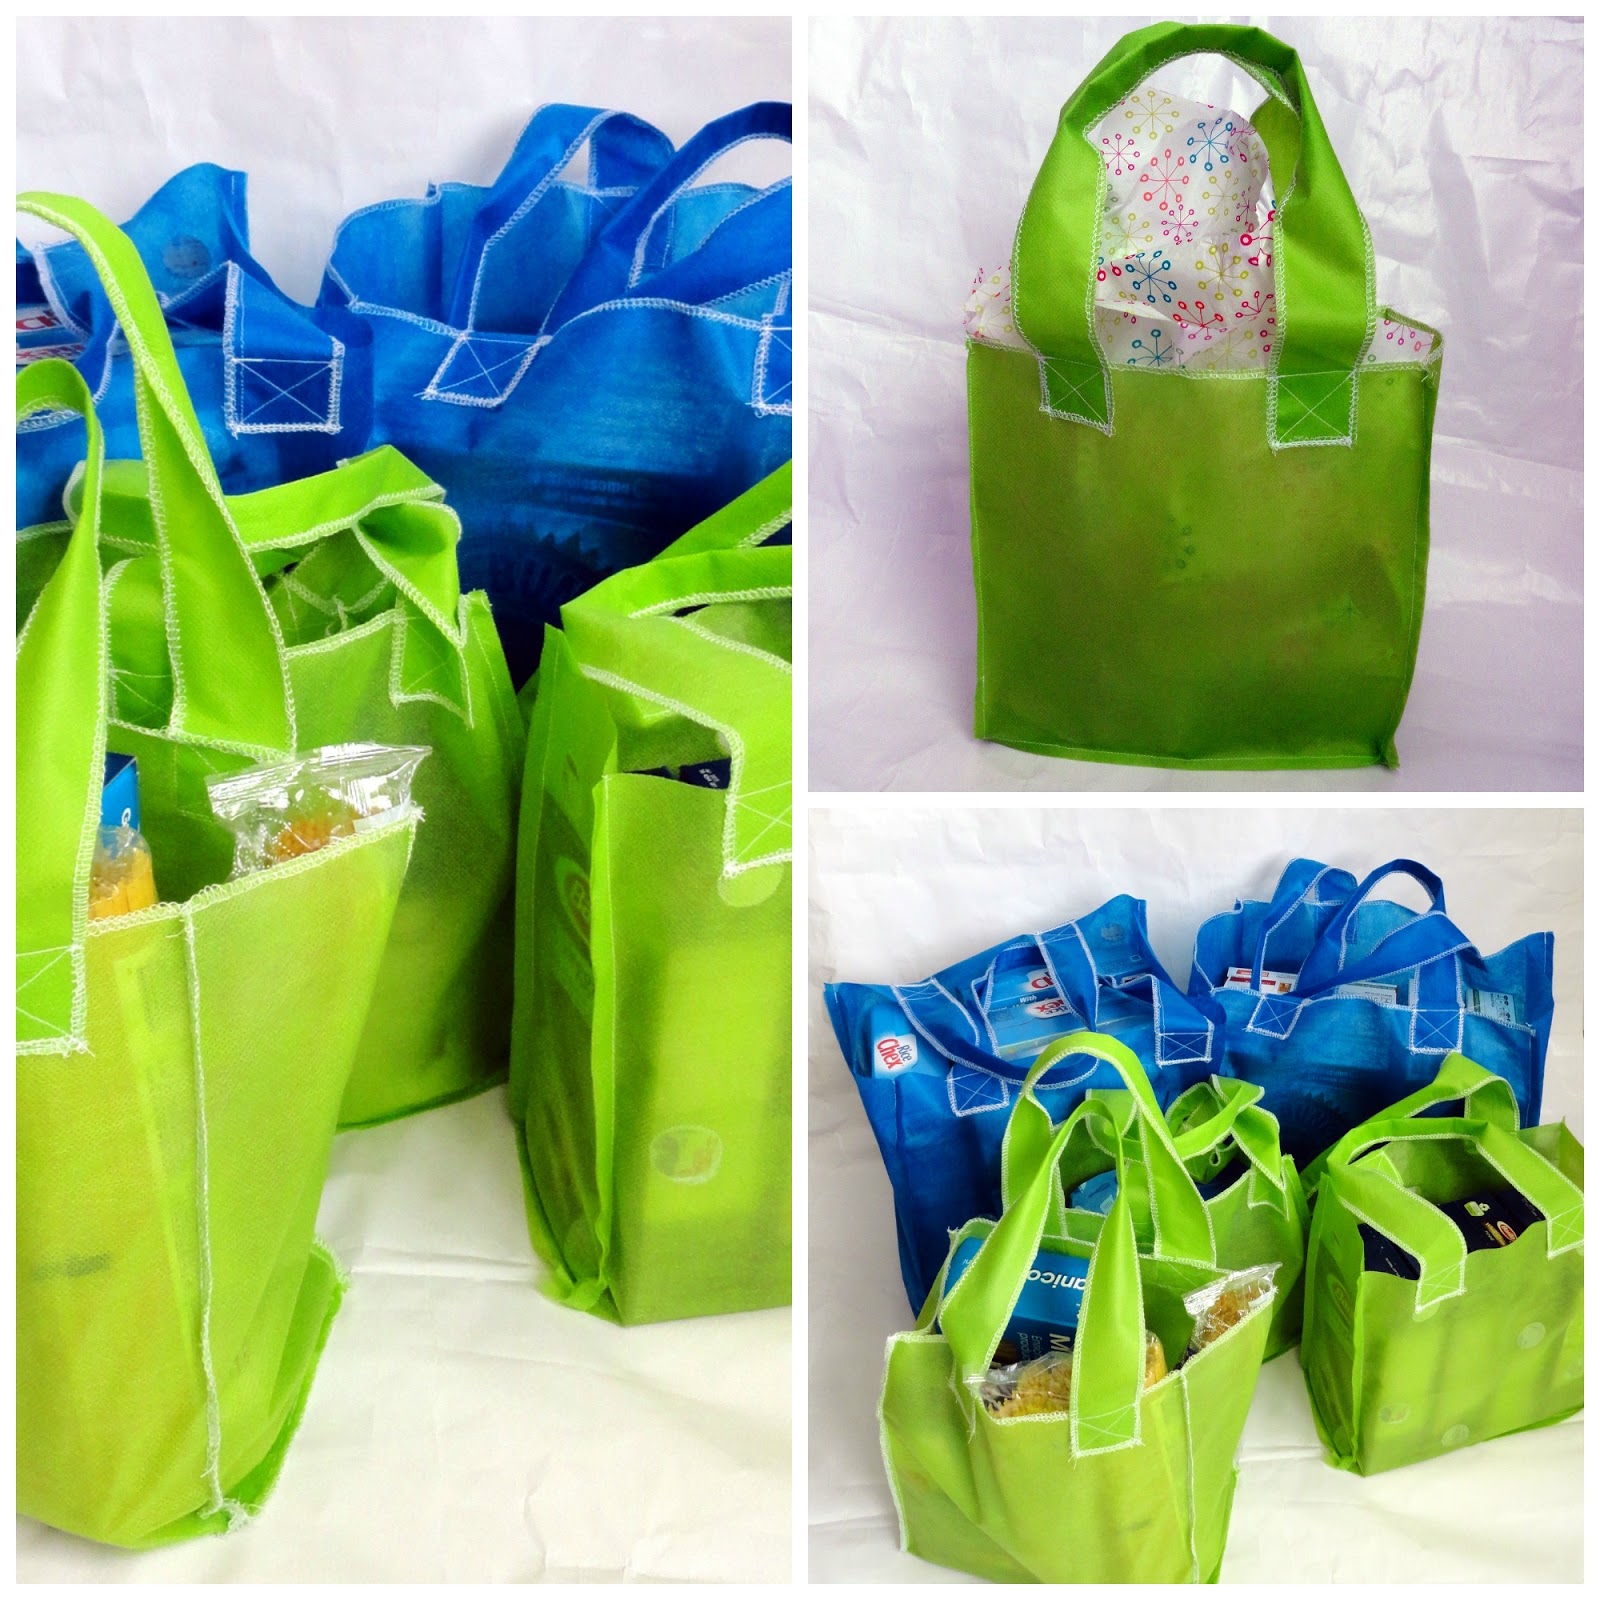
You can hold a lot of groceries in those bags!
Or, you can use your bag as a gift bag.

I've got a lot of new reusable grocery sacks to use next time I head to the store.
That is, if I don't forget to bring them along!
How do you remember your reusable bags when you go to the grocery store?
I need a tip or two.
Subscribe to:
Posts (Atom)