Showing posts with label saving money. Show all posts

Monday, January 4, 2016

20 Things Frugal People Do some tips and tricks that will save you money!

I'm cheap. You can call me frugal, thrifty or a good shopper.  Perhaps even a mindful consumer. If I had to pick a word to describe my spending style, I think I would like to be considered resourceful. 
According to the dictionary, frugal means sparing or economical with regard to money or food. I suppose that's a good word to describe how we chose to live.  And it's one most people can relate to.

I really like to live well on less.  That's sort of my motto.  We started out married with a newborn at the ripe old age of 20 and 21, part of being frugal came out of necessity. Next year, our oldest son is starting college, and well, we are going to be going back to working with a pretty bare bones budget. However, through the years, we have found out just how far we can push our budget without really feeling like we are missing out on anything.  We really do live pretty darn well on less. 

I've written a list of 20 things that frugal people do every day to save them money.

Tuesday, November 10, 2015

How we budget for the holidays


The date never changes. I think I knew that Christmas was on December 25, long before I knew what day my birthday was on. And yet, every year, I hear that the holiday sneaks up on some people and they are left wondering how they are going to make those gift lists that their children create a reality.

We do our very best to not make Christmas about the presents or the gift lists. Our children have everything that they need. We are beyond grateful to have a roof over our heads, a warm bed to sleep in, food that fills the pantry and clean water that comes out of the tap.

As parents, we decided very early on {out of necessity mostly} that we wouldn't indulge our children's every want. We don't buy new toys at the store, heck, we rarely buy any new books {thank you library!}. The kids never beg for candy or gum in the grocery aisle because they know they won't get it.

Because we exercise restraint most of the year, we do like to have our children receive at least one item that we know they really want at Christmas.

I've been asked multiple times throughout the years, how we stick to a budget for the holidays. Well, I'm spilling our secrets!


Several weeks ago, I wrote a post about the benefits of buying used gifts for Christmas. I shared with you that we budget $50 for each of our kids' gifts for Christmas.  This is far below the national average and we are totally o.k. with that.

This budget allows us to be more generous in other areas of our life. We are able to give to those in need, not just to those in want.

So, the million dollar question is, where does our money for Christmas spending come from? Well, my friends, just yesterday, we requested to cash out our Chase rewards card and by early next week a shiny new check will be in our mailbox earmarked for Christmas spending.
When we use our Chase card {it's the only one we use}, we receive points on every purchase and those points then can be redeemed for cash. Well, other stuff too like travel, experiences, merchandise and gift cards, but we almost always choose cash.  Because cash. Duh. 
After I deposit that shiny new check, I will be buying things with the money I deposited  and I will be collecting more points. The glorious cycle continues! 

I'm stretching my dollar and saving money all at the same time! {cue hallelujah chorus}

Your first step in budgeting for the holidays is to know how much you want to spend on each person and do your best to stick to that limit. I have talked to friends who don't do this and start buying from their children's wish list instead. Before they know it, they have hundreds of dollars worth of gifts set aside for their children who already have shelves full of toys and electronics.

If you buy family gifts {for your parents, siblings, aunts/uncles, grandparents}, try to set a limit for that as well. I try to shop all year long in anticipation of Christmas and buy gifts for friends and family members when they are deeply discounted.

The key is knowing your number and doing your best to be creative to stay in that budget.
Once you start buying gifts, keep track of what you bought and your spending. Because I shop all year long, sometimes I forget about the toy I set aside for my 10 year old that I picked up on major clearance in January. I take inventory of those items before I do any major shopping.

Finally, allow yourselves to be generous. I would much rather give to someone who really needed, rather than just to someone who wanted, however, there is joy in giving regardless.

Our family has two children through child sponsorship with World Vision living in Uganda. I've seen the needs in that area and I know those children can benefit from the savings I create from sticking to our budget. They have basic needs that aren't always being met. Because we are able to stretch our dollar, shop smart and use our credit card to get rewards on anything we want, we can be generous to the real needs of those living on the other side of the world!

There is no magic budget solution, but there is a magic card that will allow you to put money back into your pocket when you spend all year round. I would love to hear your tips on how you budget for the holidays.

Wednesday, October 14, 2015

Seriously easy Halloween costumes that won't break the bank


I love Halloween.  It's my second favorite holiday behind Christmas. Free candy tops my list of favorite things with dressing up a close second.

It's easy to drop hundreds of dollars on the perfect costume but I'm here to show you how you can shop smart for costumes and not break the bank!


Wednesday, September 16, 2015

How to save hundreds of dollars at the salon and color your hair at home-a step by step guide

It all started when I was 15. I was out with my best friend shopping at Target with money to burn{those were the glory days!}. Somehow I ended up in the hair dye section and picked up a box. 

I was walking the aisles of my daughter's jr. high a few weeks ago and man, I'm telling you, that time of life is full of experimentation with one's looks.  So it's not surprise, that I started playing around and started changing the color of my hair.

I can remember only two times in my life that I have actually paid someone to dye my hair for me and each of those times I couldn't believe how dang on expensive it was. 

Now instead of experimenting with my look and changing the color of my hair, I am dying my hair to cover the grey. 

Either way, with 22 years of experience and probably thousands of dollars saved, I am here to offer my expertise and give you a step by step guide on how you can dye your hair at home. I promise, it's not that scary!


Friday, August 28, 2015

Garage Sale Friday roundup of my best kept secrets!

The summer is winding down, but our schedules seem to be amping up.  Especially on the weekends. We are doing our best to squeeze every last bit of fun out of our summer which means less time is being spent at garage sales. I've been traveling the last two weekends, which means no garage sale finds Friday from me.  I've bought zippo, nada, nothing the past few weeks but I'm dying to get back out to the sales for sure!

In the meantime, I thought I would revisit a few of my past garage sale tip posts {how to drive traffic to your garage sale, tips for the garage sale first timer, and how to negotiate the best deal} just in case you missed them.   

Monday, August 24, 2015

Three different ways to create the perfect pair of jeans. Tutorial on how to make skinny jeans, dye your jeans and hem jeans with the original hem

Jeans are a staple in my kids wardrobe {as well as mine!} so finding the right pair is important.
Getting the right color of dye for a jean is of utmost importance.  
The skinny jean has to be just skinny enough, but not too skinny {and no saggy knees}.
The jeans have to be long enough to cover the back of the shoe, but not too long that they puddle.
So do you see where we are getting with this?
I have found over the years, several tips and tricks to CREATING the perfect pair of jeans.
Most of the time I'm working with garage sale finds that we have on hand in drawers, or future donated goodwill items that the kids have turned their noses up to. I've got three different methods even the most novice seamstress can tackle!

Friday, June 5, 2015

Garage sale tips for the first timer

I have been going to garage sales for as long as I can remember. I remember picking up toys and newborn clothes for my dolls when I would stop at garage sales with my mom, and now I am picking up clothes and toys for my own kids! Every weekend from May-September {I like to refer to it as garage sale season}, you can find me shopping the sales. One of my favorite things to do is to introduce people to garage sales for the first time.  If you have never been to a garage sale before but are tired of hearing about all the great deals that your garage sale friends find, then stick with me, I will share my best tips for the newbie garage saler!  You will be a pro in no time!

Friday, February 6, 2015

5 things to stop wasting your money on right now

It's easy to get into spending habits and not even think that what you are doing is a waste of money. The new year is a great time to reexamine your spending habits and start making easy changes. I have five things that you can stop wasting money on and start putting some more cash back into your wallet.

Friday, October 31, 2014

Make your own foaming hand soap refill

Every year I get sucked into buying foaming hand soap at Bath and Body Works.
The promotion they run isn't that great, but they do have some pretty amazing scents to choose from and for some reason I can justify spending $4 a bottle on the soap.
I don't know why, because I can make my own foaming hand soap for pennies!


The catch is, you will need a container that has the foaming pump.
I'm using one that I had that just ran out.
You will also need only a small amount of regular soap
{this jar was bought at the Dollar Tree and would make about seven refills for the foaming hand soap bottle you see on the left}
and if you want, you can also use a few drops of essential oils.
I'm using peppermint.


Take the lids off of your soap containers, 
and pour your liquid soap into your foaming soap container.
You won't need much, just around 1/3 of a cup.
Add 5-7 drops of your essential oils


and slowly 
{this is key so that your soap doesn't foam up like crazy as you fill it!}
fill your bottle full with water.
Put the lid on and give your soap jar a shake.


Easy and inexpensive!


For less than a quarter I have made myself a foaming soap refill.

Tuesday, July 8, 2014

Cloth diapering 101 why I used cloth diapers and how I saved hundreds of dollars doing it!

It's been about seven years since any of my kids have been in diapers, 
but I would like to say that I was a bit of an expert on the matter back in the day.

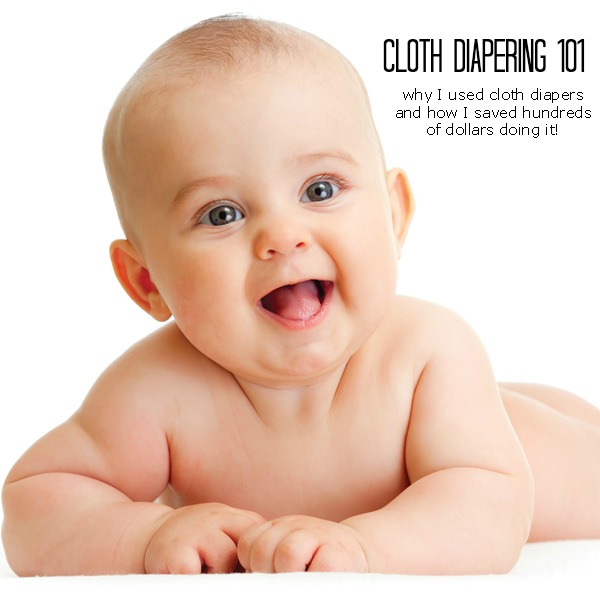
I had such a fantastic experience using cloth diapers with my kids that I would love to share my experience with you in hopes that it is helpful for you in making your decision.

My oldest son is nearly 16, and when he was born, my mom bribed me into trying cloth diapers with him.
She knew it was a less expensive alternative to disposable diapers and in exchange for trying out cloth diapers with our son, she bought us a washing machine and dryer.
Fair trade I thought...that is until I tried them.

I hated cloth diapers!
They leaked, they left red marks on my sons legs and they were so gross to wash out in the toilet.
I lasted only a few weeks and even then it was sporadic usage.

Several years later when I was pregnant with my daughter, I happened upon a message board about cloth diapering.  I spent a ton of time researching and found that the plastic covers and not very absorbent prefolds that I was using on my first child were archaic and that things were changing.

I didn't want to jump right in with cloth diapering since I wasn't quite sure how the adjustment to having two kids was going to be, so I waited until Isabella was about 6 weeks old and we ran out of our newborn diapers.

By that time, I had done a ton of research, I knew what was working for other moms, what my stash should look like, what the investment should be and what diapers and products I should invest in.

I started off by buying a large garbage pail and two pail liners like this one for the nursery.
I needed two pail liners so that I could be washing one and using another.
I also got a wet bag like this to keep in the diaper bag.

I tried a lot of diapers and diapering systems.
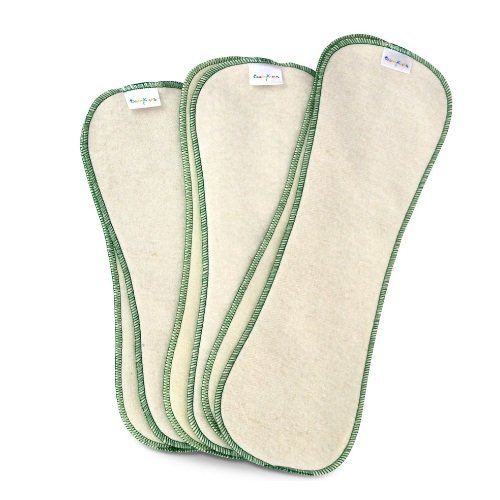
By far my favorites were pocket diapers.
Pocket diapers need "stuffed" and so I bought these babykicks joeybunz hemperoo's.
These fleece topped hemperoo's are by far my favorite part of cloth diapering because not only were they thin, they were super absorbent.  They also held their value well, so that after diapering two kids, I was able to resell them for nearly what I paid for them.  I ended up having around 18-24 of these hemperoos in my "stash".

When I wasn't using a pocket diaper I used a prorap classic cover.
I used to have a phone number where I could buy seconds, for around $4 each.
That number still works {shocking!} but they charge $6.25 +shipping, which is nearly retail.
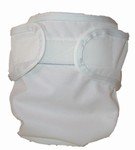
I also lucked out by finding a lot of these prorap covers at garage sales and consignment shops for under $1.
I may have lucked out because this company is WA based.
In case you are interested in giving them a try you can call 1-800-397-8594.
Regardless, I would highly recommend this cover.
When paired with a hemperoo {above} it made for a really slim, trim, absorbent diaper that never leaked and never left red marks on the babies skin.


Back in 2002, when I started using cloth diapers,
I met a mom named Linda who was sewing diapers for her preemie daughter.
She made these amazing all in one pocket diapers that held up so nicely and came in tons of colors and prints.  I would order directly from Linda and receive personal e-mails and hand written notes from her. Linda has since sold the company, but you can still order happy heiny's pocket diapers here.

I would stuff these pocket diapers with, you guessed it, a hemperoo!
These diapers would hold up through the night and when we were out and about.

I tried lots of other diapers, but if I had it to do over again, that is the "stash" that I would start with.

I also used cloth wipes. 
I made my own with flannel on one side and velour on the other,
{you can find my tutorial here}
or you can order them or just use a washcloth.
You are already washing diapers, it's easier to use washable wipes than disposable ones.
You can also find my cloth wipes washing solution in the post above.

Speaking of washing...people seem to have the most questions about washing the diapers.
Remember how I said that when I tried cloth with my oldest son, I was dipping and washing the diapers in the toilet.  EWWW!  So gross! 

After lots of research, I realized that you don't have to do that.
Think about it.
If you use a cloth diapering service, they don't have you wash the poo out,
they tell you to just throw the diapers in the bag and then leave the bag on your porch for pick up.
I figured, why can't I do the same thing?

You totally can!
I would throw the whole soiled diaper into the diaper pail, no washing out necessary.
Sometimes I would sprinkle baking soda on the diaper and then throw it in, but this isn't necessary.

Once my kids started solid food, and the poo got a little firmer, I would roll the poo off into the toilet.
No rinsing, or dunking, just rolling.
The kids would help me do this and I think it came in super helpful when potty training rolled around.
The kids understood that poo went in the potty and that it was no big deal.
Seems like that shouldn't be an issue, but it totally is for some kids, trust me.

As a side note, remember those pocket diapers that I used?
You know how they are stuffed with a hemparoo?
Don't unstuff them when they get soiled.
Yuck!  Just leave them all together.
Trust me, they will come out on the spin cycle and be clean.

Depending on how big your diaper stash is, you may need to wash diaper every few days.
I washed mine every three days in the beginning and every week as the babies got bigger and needed changed less.
The stink never got unbearable, and using baking soda occasionally in the diaper pail helped to neutralize the ammonia smell.
{FYI you can buy bulk baking soda at Costco for next to nothing!}

On wash day, I would take my bag from the diaper pail to the laundry room, dump the whole thing in the washer, add a little vinegar to the rinse cycle
  {if you haven't used baking soda, you can sprinkle some in now}
and do a pre-wash on hot.

Once the pre-wash was done, I would wash them again on hot with my homemade laundry detergent of grated felsnaptha, borax and super washing soda.

Because your diaper covers are made to be waterproof they usually have a waterproof material called PUL in them.  DO NOT DRY THEM IN THE DRYER!
I would usually only dry my hemparoos in the dryer, the rest of the covers and diapers I would line dry.
Sun is the best bleach {and the only bleach} you should use.

Remember how I told you that I saved hundreds of dollars cloth diapering?
Want to know how?
I bought many of my supplies second hand on ebay, craigslist and through diapering forums.
After we used them, the diapers were then sold again through those avenues.

I just checked the local Seattle Craigslist and there are hundreds of listings for cloth diapers.
The initial investment can be a bit pricey {$200-$300}, but in the end through buying used and selling, we ended up breaking even and quite possibly if I did the math, probably even coming out ahead.
{FYI The average cost for disposable diapers is $800 per year}

The only expense we had while using cloth diapers was for the washing and detergent items I used.
In the end, I think it was worth it.

Want to know what the best benefit was to cloth diapering?
Both of my younger two kids that were exclusively cloth diapered ended up being fully potty trained {even at night} by 18 months!  They didn't like to feel wet, and cloth diapers certainly feel wet no matter how absorbent they are.

40 years ago it was nearly unheard of to have a three year old in diapers still.
Now, with disposable diapers, it's commonplace.

Another nice side benefit was that I never had to shop for diapers.
I never ran out of diapers and always had diapers on hand to use.

I know my memory may be a bit rusty and things with cloth diapers have certainly changed
{10 years ago you couldn't buy cloth diapers on Amazon!}
so feel free to ask me any questions you might have.
I'm happy to try to answer them.

I would highly recommend trying cloth.
Not only for the environmental benefits, but because it's a huge money saver!

Wednesday, May 14, 2014

Is it dead yet? A gardening tip that will save you money!

If you are like most homeowners
{and some apartment dwellers}
the first signs of spring have you rushing out to plant flowers around the house.

For the past few years, I have planted annuals in the pots in the front and back of my house.
Sometimes they grow and bloom all summer,
sometimes they die in just a few weeks.

If a plant isn't hardy at my house, 
it's probably not going to live for long!


I manage to feed all of my children on a fairly consistent basis,
watering and fertilizing plants isn't usually high on my radar.

Which is why I only buy plants from stores that have a return policy.
And quite honestly, most do,
though not everyone takes the store up on their return policy.

The annual geraniums that I purchased at Home Depot have a 90 day return policy.
Before I even left the store parking lot, I calculated the date 90 days from the day I purchased them,
minus 5 days
{because life is busy and I have to give myself a grace period!}
I entered that date into my phone with the event title 
"is it dead yet?"

When that date comes, I can check my plants and know if they are in the return window.
If they are, I can take my receipt
{that you stash in your monthly receipt envelope}
and my dead plants and exchange them for something living.

Perennials have a year long return policy at most stores.
This is fantastic to know if you are doing a major landscaping project in your yard.
Some plants don't like the ground they are planted in, 
the soil may not drain well, or the winter was harsh.
Regardless, the store is happy to return your plant, 
usually no questions asked,
if you have your receipt and you are within your return time window.

It's happened to all of us.
Next time set a reminder.
Is it dead yet?

Wednesday, May 7, 2014

How to save money on your prescriptions

We are fortunate that our family is very healthy.
We don't have any prescriptions that we fill on a regular basis
{besides the epipen}.

Because we are a healthy family, we are on a high deductible insurance plan.
What that means is that we are paying out of pocket for most medical expenses, including prescriptions.
This simple tip that I am going to share with you, is how I save our family money on the prescriptions that we need to fill.


It's as simple as calling around.

I am traveling to Africa this summer and need to complete several vaccinations before my trip.
The oral typhoid is one of them.
I spent about 20 minutes calling these 7 pharmacies to get their cash price on the prescription.

As you can see, there is a huge discrepancy from pharmacy to pharmacy for prescription medication.
Quite honestly, until we started our high deductible plan, I had no idea!
The prescribing Doctor would ask where we would like the prescription sent to, and I would choose the pharmacy closest to my house, or the one I needed to run errands to 
{who doesn't need an excuse to go to Target?}

Now, I ask for a hard copy of the prescription and I take the time to call around to my local pharmacies to get the best price.


Just because Costco is cheaper for this particular medication, it doesn't mean that it will be the cheapest for every medication.  Unfortunately, you have to call around every time.  And because medication prices are constantly changing, the cheapest pharmacy one year, may not be the cheapest pharmacy the next year.

Do you have any good money saving tips for getting your prescriptions?

Friday, April 25, 2014

How to negotiate at a garage sale-5 tips that will save you tons of money!

It's nearly garage sale season and one of the questions I always get asked is how do you negotiate.
I shared a few tips and tricks on this post last year, but I think it's time to revisit them so that we all can be prepared as we head out and hit the sales!


1. Know what you are dealing with

It's inevitable that every week I will come across a garage sale that doesn't have their items marked.
It's not my biggest garage sale pet peeve, though it is up there.
If the items at a sale are not marked you just don't know what you are dealing with.
If the items aren't marked, I typically find something that I want and ask the seller what they are asking for the item.
If we are really far off base, I usually just walk away.
You know, those garage sales where the prices are so high that the people would just rather keep their stuff.
If a seller wants $350 for a dresser, I know that I will probably not be able to get that dresser negotiated down to a price I am willing to pay, unless I am willing to pay close to the asking price.
But if they say that the clothes for example are a dollar a piece, then I know we are in the same ball park.

2. Bundle and save

I usually buy a lot of clothes and it's pretty typical that a garage sale doesn't have each item individually priced.  Again, lets say each clothing item is $1 a piece.  It's not unheard of at a person's sale that if I like one piece I usually like several items.  So say I find 14 articles of clothing.  I will usually go to the seller and say I have 14 items, would you take $10?
9 times out of 10 they will say yes.

3. Add up your items with the seller

The majority of the time when I go with an armload of items to the seller {usually if they are unmarked}, the seller will make a crazy out of no where price for the lot.  I like to ask periodically as I shop what the items price is so that I can have an idea and I think it forces the seller to think about the value of the item.  For example, books are a quarter, clothes are a dollar, etc...If I don't add the items up and ask how much the seller will take for the items that I have, usually the price they come up with is higher than the actual price they have quoted me.
 I have taken to adding up the items with the seller first and then asking for a lot price after we know the total.  10 items in your arms looks like the value should be much higher than the low garage sale price you are paying.  Especially if the seller isn't familiar with garage sale prices!  If my 10 items add up to $8, then I will ask if the seller will take $5.  This tactic works much better then just asking for nearly half of my stuff for free!

4. Be willing to walk away 

 This is huge!  If you want to negotiate for the sake of negotiating, then that is fine.  In fact, it's one of my favorite things to do!  If you have a bottom line, and the seller won't budge, then be willing to walk away.  It's quite common that I will put items back at a sale or reduce the items that I am buying if I am not getting as big of a discount or paying the price that I want to pay.
Don't be rude about it! Just put the item back and walk away.  Most of the time, the seller will change their mind as I walk down their driveway, other times they won't, and that is totally fine!

5. Start your negotiating low so you have wiggle room

Bargaining at a garage sale is fun for me.  I like to pay the lowest price possible and get the most high quality items possible.  Negotiating is part of having a garage sale and it's a two way street.  Assume that if you are going to offer a lower price, that the seller will come back with another {higher} offer that they are willing to take.  It's just part of the game.  If you start low, and you get your first asking price, then you had a major score.  Pat yourself on the back.  If you don't negotiate, you will never know if you could have gotten the items cheaper, but if you make an attempt to negotiate a lower price, you can leave with the satisfaction that you tried.  And you still might possibly come out with a better price!
Don't be unreasonable.  If the prices are fair and you are willing to pay them, don't haggle just to haggle.  That is, unless you are buying a huge lot of items from the seller, then I think that it's reasonable to offer a lot price {after you calculate your items of course!}.

For example, I went to a garage sale of a home school parent last summer.  This parent had some amazing books in their library at very reasonable prices.  Each book was $1 despite the sometimes high retail price.  I picked up 45 books and offered to pay her $40.  If I had only found 4 books I liked, I would not have asked her to take a lower price since I felt like the $1 asking price for pristine hard back books was worth the total.   If I had offered her $20 for the 45 books, that would have been unreasonable.
Tip number 5 and tip number 1 go hand in hand.  If the item you are interested in costs $15 but you are only willing to pay $1, don't be offended if your offer isn't taken.  Be polite, thank them, and walk away.
Hopefully these 5 tips help you negotiate your way to some great deals this garage sale season.
Do you have any tips you would like to add that I might have missed?

Friday, March 21, 2014

How you can save money at the dentist and give your kids some independence and control

 I try not to, but sometimes in parenting I am a bit of a control freak.

I know that there are things that my kids are capable of,
{making their beds, helping out with the household chores, brushing their own teeth}
but because I know I can do it better and usually faster, 
I just like to just do it myself.

When my oldest son was 8, we finally handed over the reigns and let him be in charge of brushing his own teeth.  Yep, he was 8.  Control much?!

After 6 months of him brushing his own teeth, we had a dentist appointment and guess what?
The outcome was exactly how I thought that it would be.
He sucked at brushing and ended up with 4 cavities!
I knew I couldn't be that mom that went to college with her son showing up every night and in the morning to brush his teeth, so I had to come up with a plan.

Spending hundreds of dollars on filling cavities every six months just wasn't cutting it for me
{multiply that by three kids and it would really be nasty}
so we decided to invest in a Philips Sonicare toothbrush.
For less than the cost to fill a single cavity, we could invest in a Sonicare toothbrush and create a lifetime of healthy oral care habits.

I'm sure you have seen Philips Sonicare toothbrushes at your dentist office.
I had for years.
In fact, 91% of dental professional parents prefer Philips Sonicare for kids for their own children.

We have been using Sonicare toothbrushes for all three kids for the past four years and can I tell you something?
They have been cavity free ever since our switch!

As a parent, we all know how important it is to create independence in our children.
We know that our kids are capable and able to do so much more than we sometimes let them.
Check out this infographic on how we as parents can help navigate the independence balancing act.


I honestly can't tell you how much peace of mind I get from handing over my controlling ways and letting my kids take on the independence of brushing with their sonicare toothbrush.

The new Philips Sonicare for kids is a rechargeable electric toothbrush for kids 4+ from a name we all trust.
It not only encourages healthy brushing habits 
{even when kids are doing it on their own}
but it's fun to use with customizable stickers and educational features like a kidpacer 
{to encourage kids to brush the "zones"} 
and kidtimer 
{a built in two minute timer that trains kids to brush for the dentist recommended time}.


My youngest son was excited to receive a Philips Sonicare for kids toothbrush in the mail.
He loved picking out the sticker to make his toothbrush different from his sister and brother's toothbrush.


He immediately ran upstairs and got to brushing!
The KidPacer has fun sounds every 30 seconds that encourage kids to switch from the upper, lower, front and back of their teeth.


This enables kids to get each of their teeth during the two minute dentist recommended brushing time.
Once the two minutes are up, the toothbrush turns itself off.

If using an electric toothbrush is new for your kids, there is a slow start to work up to the two minutes.
Simply switch the button on the bottom of the handle.
The first time my kids used their Sonicare toothbrushes they giggled because it does tickle their teeth until they are used to it.


All done!


Three kids, three Sonicare toothbrushes.

Here are some things about Sonicare toothbrushes that I have learned from years of use.
You can travel with your Sonicare toothbrush since it will take a charge for up to a week of use.
You will use less toothpaste and there will be less spitting.
{if you clean the kids bathroom this little tidbit is a welcome change!}
If your kids use a Sonicare, your dentist will notice.
{Sonicare removes up to 75% more plaque than a manual toothbrush}
Sonicare toothbrushes are a lifesaver if your child has braces.
You can find Sonicare kids toothbrushes at Amazon, Target, WalMart, Meijer, Bed Bath & Beyond and Walgreens.  They retail for around $49.99 and are worth every penny!
We are a Sonicare family.
You should be too!
Give up some of your control, let the kids become independent and gain some important oral health care habits.  And maybe, as an added bonus, you will be spending less time {and money} at the dentist like we did!

disclosure: I received a Sonicare kids toothbrush in exchange for writing this post.  All opinions are 100% my own.  I wouldn't write about something I didn't love.

Monday, February 24, 2014

Saving money on contact lenses-shop around and save hundreds of dollars! Not a sponsored post!

This is not a sponsored post.


I wanted to start out by saying that this is not a sponsored post.
I just want to help you save money and I want to share my experience.

I've been a contact lens wearer for over 20 years.
I love wearing contacts and couldn't imagine a return to wearing glasses exclusively.

My 15 year old son has crappy eyes and now wears contacts too.
Our insurance covers corrective eye wear {glasses or contacts} 
up to $200 for each member that needs them, every two years.

I'm not complaining, but once you start pricing out corrective lenses {contacts or glasses} you will know that that $200 doesn't go very far.
Which is why I have shopped around.

My son had an eye exam last week and while I love his optometrist, 
they are located inside a sales trap.
You know, a glasses shop filled with overpriced eye glasses and sun glasses just waiting for you with new prescription in hand to not feel like you have any other option than to buy from them.

The optometrist handed the optician the new prescription for my son, and walked to the front receptionist to ask what our benefits on insurance were.  I heard the receptionist tell her that we had a $200 benefit and the optician turned to me and said that I was in luck!  A years supply for my son's lenses would only be $199!  

Now I'm not saying that the optician somehow manipulated the contact lens price to nearly the exact same amount of our benefits.  That seems like that would be illegal or something.

I'm just saying that while these very sweet and kind opticians want to do nothing but help you find the right lens {this goes for glasses too}, I'm telling you that
it's totally o.k. to shop around.

While my son's prescription changed in strength, he can still wear the same brand of contacts that he had been wearing.  If I didn't know better, I would have been so thankful to the optician for telling me that my son's year supply of contacts would cost me exactly what my benefits would cover
  {mind you the benefits renew every two years, so if I used them all up this year, they won't cover anything next year}.

But hark, I had done my homework!
Last year I was able to do a quick and easy Google shopping search for the brand of contacts that my son was wearing and was comfortable in.
I do the same thing for my lenses.
I found a year supply of his contact lenses for $93 
{$98 with shipping}.

Knowing this information allowed me to say thanks but no thanks
 to the helpful optician and with a few keystrokes, 
I was able to order new contacts for my son at more than half price!

I'm not going to tell you to shop one on-line contact lens store over another. 
Quite honestly, I don't remain loyal myself.
I go to where the best price is.
Sometimes it's the same place year after year 
{keep your eyes peeled for discount loyalty codes, you could save more when it's time to reorder}
oftentimes, it's a different place every year.

Here is how you do it.
Go to your Google search and type in the brand of lenses that you wear.
Click on the tab that says shopping to compare prices


You can then click on each item to find out more about the price.
For example, this lens has free shipping and no tax and when comparing, a relatively cheap price in comparison.
This one is a dollar cheaper but look closely...
Shipping is $11.50!
Once you compare prices and find the best price on a few items 
{keeping in mind shipping and tax}
you can then click through to the website.

Often times sites will offer discounts if you buy multiple boxes.
I was purchasing a years supply, so I needed 4 boxes.
On one site, the more boxes you buy, the more discount you receive.

There are also rebates for certain lenses.
Last year, I purchased a year supply of my lenses and got a $50 rebate.
Keep those discounts and rebates in mind when you are calculating your totals.

Once you find the company you want to order from,
input your information.
It's easiest if you have a box of your old lenses handy.
You will need things like your BC and DIA as well as the power.
The BC and DIA rarely change but your power is likely to change and will be noted on your new RX.

I submitted my order and printed my invoice.

Easy as that!

If you have benefits that you would like to use, follow these directions:

Go to your insurance website and print off the medical reimbursement form.
It took me less than 3 minutes to find it and fill it out.
You will send a copy of your invoice and your reimbursement form to the insurance company and within a few weeks, you will receive a check in the amount of the total that you paid.
It really is that easy to save hundreds on your contact lenses every year!

A few things to remember:
Eye health is important. You only get two eyeballs.  Take care of them!
Get an updated prescription with your eye exam.
And the biggest tip to remember:
 don't be afraid to shop around.

Did this help you?

Friday, March 15, 2013

Junkin' in Seattle


Last week, my friend Mandi and I decided to hit the Goodwill Outlet in Seattle for the first time.
I have heard of the Goodwill Outlet but sort of boycotted it because to me, it sounds like a bit of an oxymoron.


The Goodwill outlet is the final stop for all of the items donated at the local Goodwill stores before heading to the dump.  Most of the items are sold by the pound and are deeply discounted from the normal {expensive} Goodwill prices.  You can see my post here about how I think Goodwill is too expensive.

You enter into a warehouse building like this and find hoards of people.


Rows of blue bins are rolled in filled to the brim with clothing, toys, and household items.
People quickly gather around the newest rolling carts and dig.
There is a little bit of organization to the madness.
Everyone waits behind a blue line until all of the new carts are in place.
Then once they wheel in the final cart, everyone starts digging.
I may have gotten yelled at more than once for not being aware of how this system works.
Now you know.

Bring a pair of gloves or better yet, your haz mat suit.
You will leave feeling like bugs are crawling all over you.

The Goodwill outlet has it's own security...and it needs it.
A fight nearly broke out within the first five minutes of us being there because someone was upset that someone else threw the clothes they were sorting too aggressively across the blue bins.
Yep, that really happened.
And we were told by other Goodwill outlet customers who are frequent shoppers that that happens a lot.
It's like prison.
Keep your head down and mind your own business.


I wasn't on a search for clothes on this trip but I was curious to see why all the people flock to the clothing bins.  I really didn't come away with any answers.  I'm sure there are finds to be had, but every single pair of pants that I found had holes in the crotch.
I'm not joking.  
Every.single.pair.


I did also spend some time searching for shoes.
There were a few pairs that had potential, but only if you had one foot.
Pairs were hard to come by.
Finding a pair of shoes was like searching for a needle in a hay stack.
So, I gave up.

If you are a one legged individual who doesn't care if you have a crotch in your pants, then the Goodwill outlet is your place to shop!

This is my basket filled with my goodies.
The clothes that I did find were found on the top of the piles.
Rejects that people no longer wanted in their own carts.
I picked up a coat for my son and a zip up jacket for my dad.

I also found some fantastic fabric samples, a large rug, a duvet cover, and an old suitcase.
I'm sure there were other fun finds in there.
Grand total for all of this...$19.


I found that the prices for items seemed to be set by each cashier.
Especially those items not sold by the pound.
Mandi got this basket of goodies for about the same price as all of my stuff.
Pretty sure she got a better deal.


I would definitely head back to the Goodwill Outlet for another shopping experience.
I learned a thing or two and feel like a real expert.
I probably wouldn't go by myself though.
And I would never go without gloves.


The next stop Mandi and I made was just down the road at a shop called Second Use.
Second Use is a salvage store that is slightly cheaper than Earthwise, but not cheap like a garage sale.
There were some finds to be had {especially in the free pile}.
Mandi picked up this half door {soon to be table} and two window frames for $5 each.


There were a lot of things that were eye candy.
This green scale is fantabulous isn't it?


You know how I love old windows.
My new window passion is leaded glass.
Hard to find, but amazing when you do.


If you need a door, Second Use is the place.
There were rows and rows of old doors.
Barn doors, front doors, screen doors, you name it.
I'm a sucker for old machines.


Isn't this buffet beautiful?
It looks like it was an old built in in a turn of the century house.
Image the parties it has seen!


Industrial is awesome.


This was probably my favorite piece of the whole day.
It is so much better in person.
Wouldn't it be an awesome upper cabinet if you were re doing a kitchen?


Mandi was loving this as a store front check out area.
Did you know my favorite store, Persnickety's Awesomeness Emporium is moving to downtown Sumner?
It's a big deal.


Aren't these handles super rad?


Need a knob or a hinge?

Perhaps an old school house pendant?


Not sure what you would do with an old radiator.
So many people have been hiding them for years.
It's time to embrace them as a decorative element.
Love the design on this one.


We had so much fun junkin' in Seattle.  
Do you have a favorite place to score old junk or an experience with the Goodwill Outlet?
I would love to hear from you!
I'm sure there are stories to be told!